Chevrolet Sonic Repair Manual: Piston, Connecting Rod, and Bearing Installation
Special Tools
EN-470-B Angular Torque Wrench
For equivalent regional tools, refer to Special Tools.
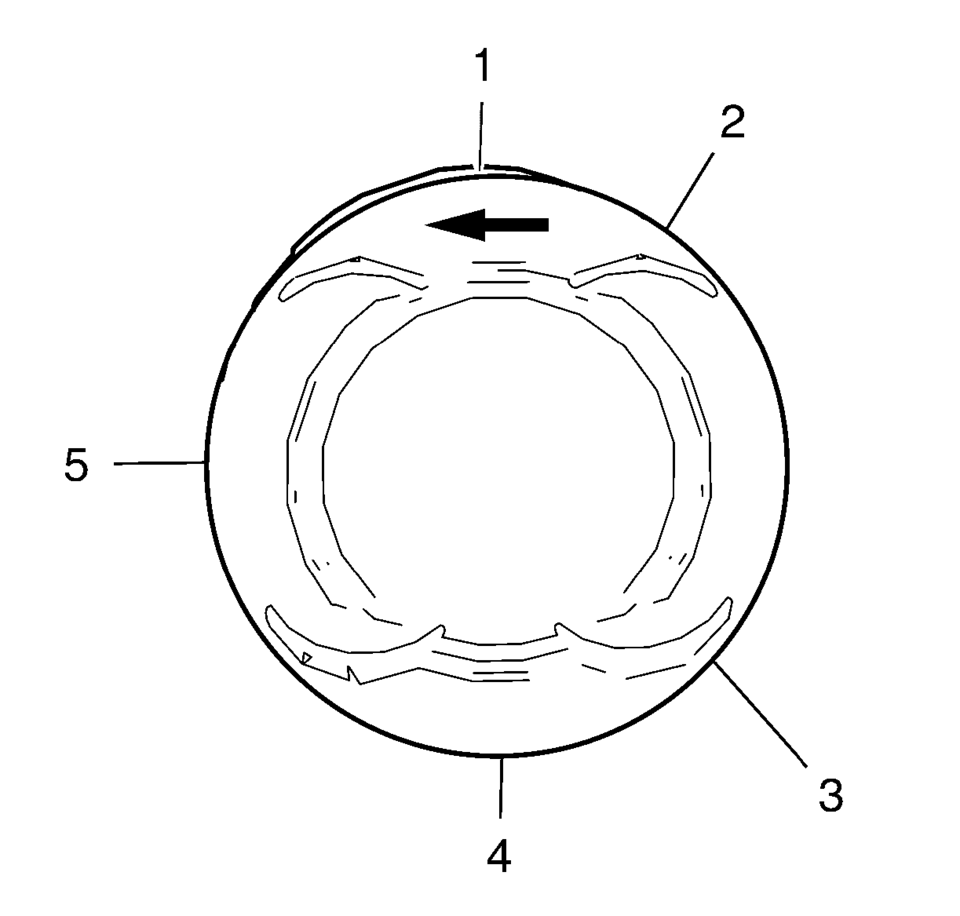
- Adjust the piston ring joints as follows:
- Upper compression ring (1).
- Lower compression ring (4).
- Oil rings (2) or (3).
- Oil ring spacer (5).
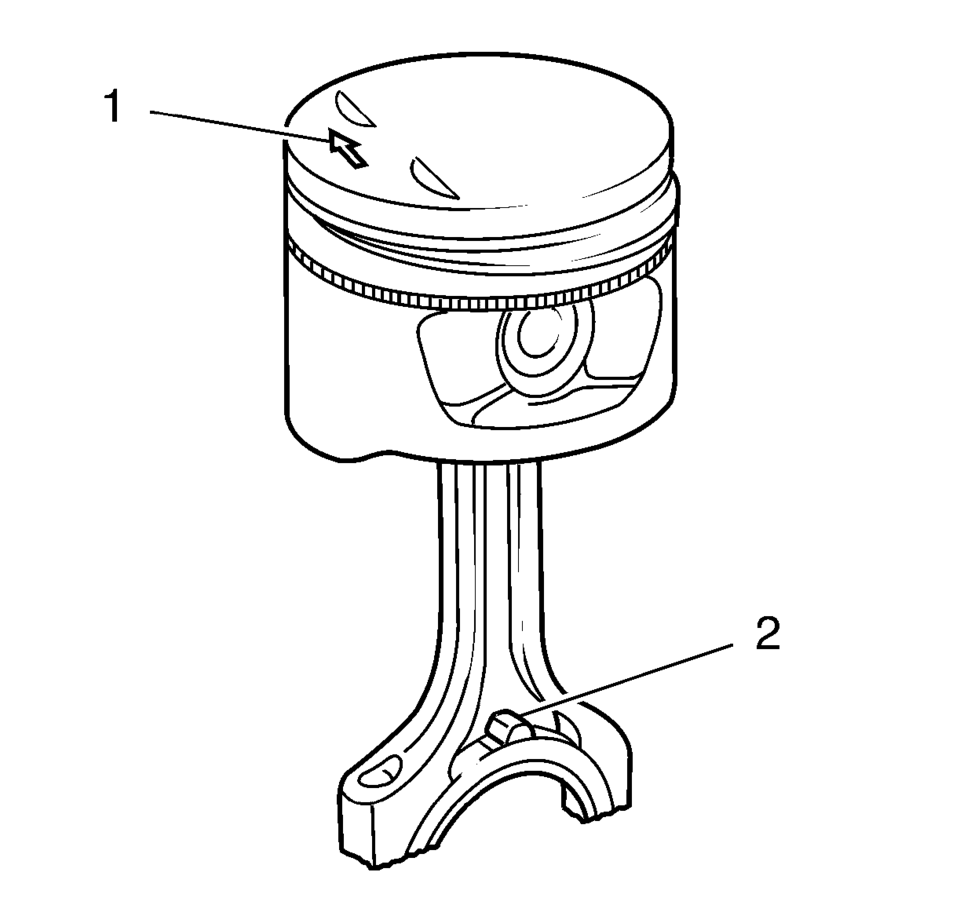
- The arrow (1) on the piston head must point to the timing side.
- The markings on the connecting rods (2) must point to the transmission side.
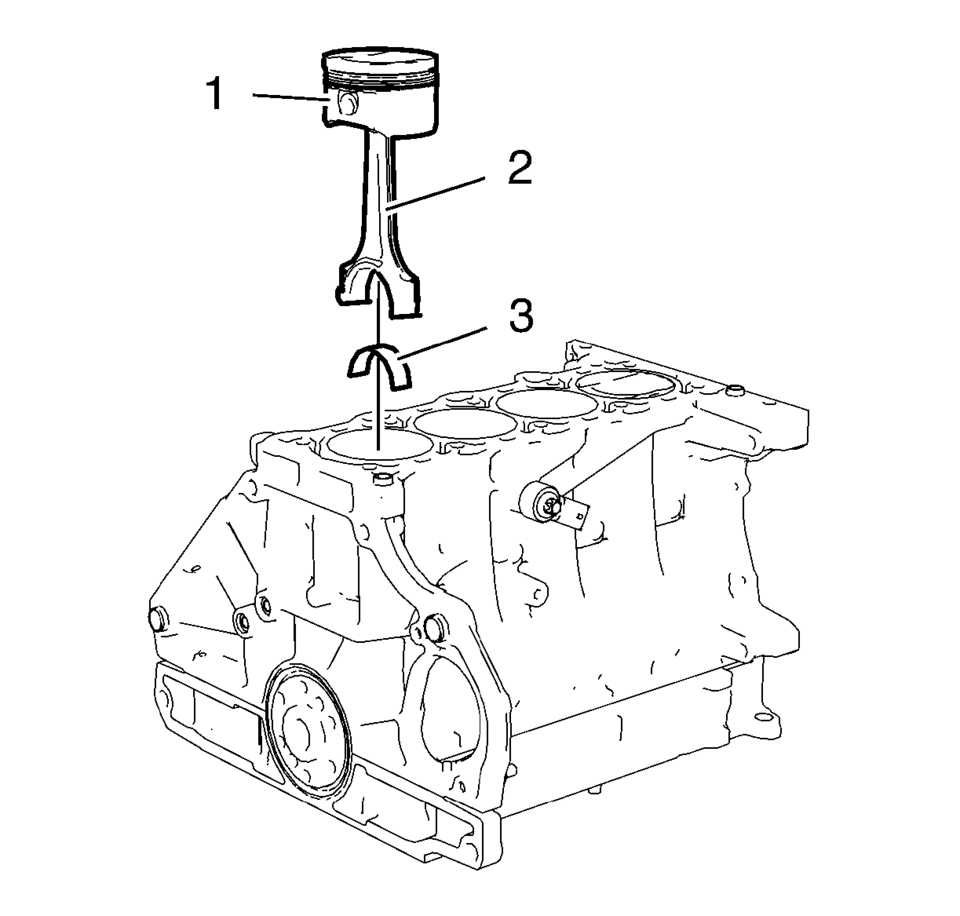
- Install a piston ring compressor to compress the piston rings.
- Install the pistons (1) in along with connecting rods (2) and upper connecting rod bearings (3) to the engine block and to the crankshaft.
- Install the 2 connecting rod bearings and the 2 connecting rod bearing caps (2) of cylinder 1 and 4.
- Install the 4 NEW connecting rod bearing cap bolts (1) and tighten in the following sequence:
- Tighten the connecting rod bearing cap bolts to 25 Y (18 lb ft)
.
- Tighten the connecting rod bearing cap bolts an additional 45 degrees. Use EN-470 B wrench.
- Rotate the crankshaft 180 degrees.
- Install the 2 connecting rod bearings and the 2 connecting rod bearing caps (2) of cylinder 3 and 2.
- Install the 4 NEW connecting rod bearing cap bolts (1) and tighten in the following sequence:
- Tighten the connecting rod bearing cap bolts to 25 Y (18 lb ft)
.
- Tighten the connecting rod bearing cap bolts an additional 45 degrees. Use EN-470–B wrench.
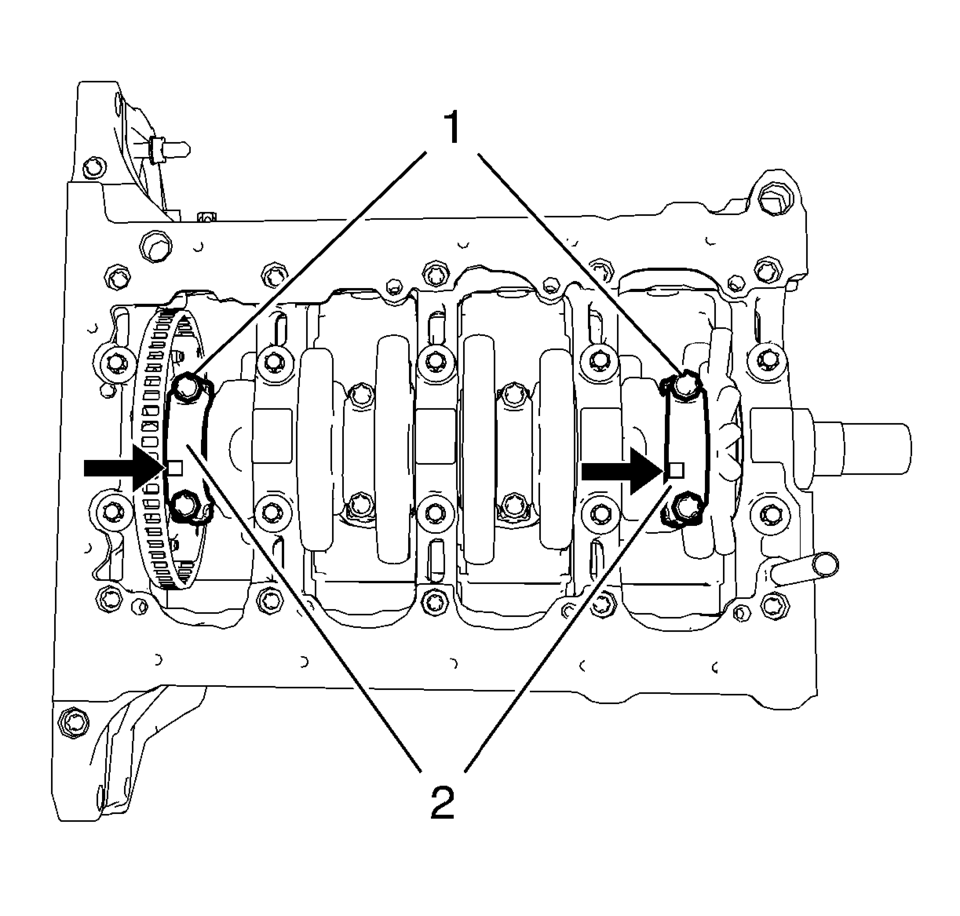
Note:
The flarings (arrows) on the connecting rod bearing caps must point to the transmission side. The connecting rod bearing caps must be installed in their original position.
Caution:
Refer to Fastener Caution.
Caution:
Refer to Torque-to-Yield Fastener Caution.
Note:
Do not reuse the old bolts.

Note:
The flarings (arrows) on the connecting rod bearing caps must point to the transmission side. The connecting rod bearing caps must be installed in their original position.
Note:
Do not reuse the old bolts.
 Piston, Connecting Rod, and Bearing Cleaning and Inspection
Special Tools
EN-470-B Angular Torque Wrench
For equivalent regional tools, refer to Special Tools.
Visual Inspection And Cleaning Procedure
Connecting Rod
Warning: Wear safety gla ...
 Piston, Connecting Rod, and Bearing Removal
Install the crankshaft balancer bolt.
Set the pistons 1 and 4 to TDC in direction of engine rotation.
Note: Note cylinder sequence.
Mark the connecting rod with the ...
Other materials:
Doing Your Own Service Work
Warning
It can be dangerous to work on your vehicle if you do not have the proper
knowledge, service manual, tools, or parts. Always follow owner manual procedures
and consult the service manual for your vehicle before doing any service work.
If doing some of your own service work, use the pro ...
Front Lower Grille Replacement
Front Lower Grille Replacement
Callout
Component Name
Preliminary Procedures
Remove the front bumper fascia assembly. Refer to Front Bumper Fascia
Replacement.
Remove the front bumper fascia energy absorber. Refer to Fron ...
Instrument Panel Compartment Replacement
Instrument Panel Compartment Replacement
Callout
Component Name
Preliminary Procedure
Remove the right instrument panel upper trim panel. Refer to Instrument
Panel Upper Trim Panel Replacement - Right Side.
...

0.0047