Chevrolet Sonic Repair Manual: Oil Pan Installation
Special Tools
EN-49980 Guidance Pins
For equivalent regional tools, refer to Special Tools.
- Clean the sealing surfaces from old sealing material, dirt, oil and grease.
- Apply sealing compound to the oil pan. Refer to Adhesives, Fluids, Lubricants, and Sealers.
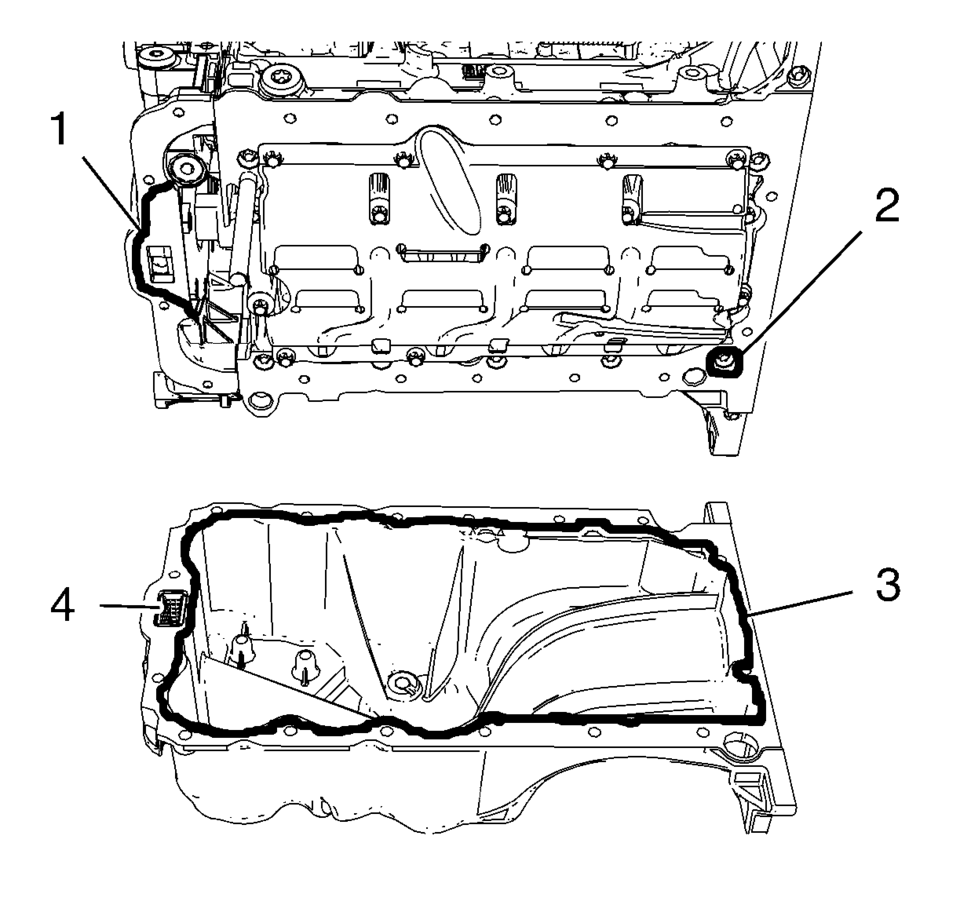
- Apply sealing compound to the groove of the engine front cover (1). Refer to Adhesives, Fluids, Lubricants, and Sealers.
- Apply sealing compound around the screw bore (2) of the crankshaft bearing cap tie plate.
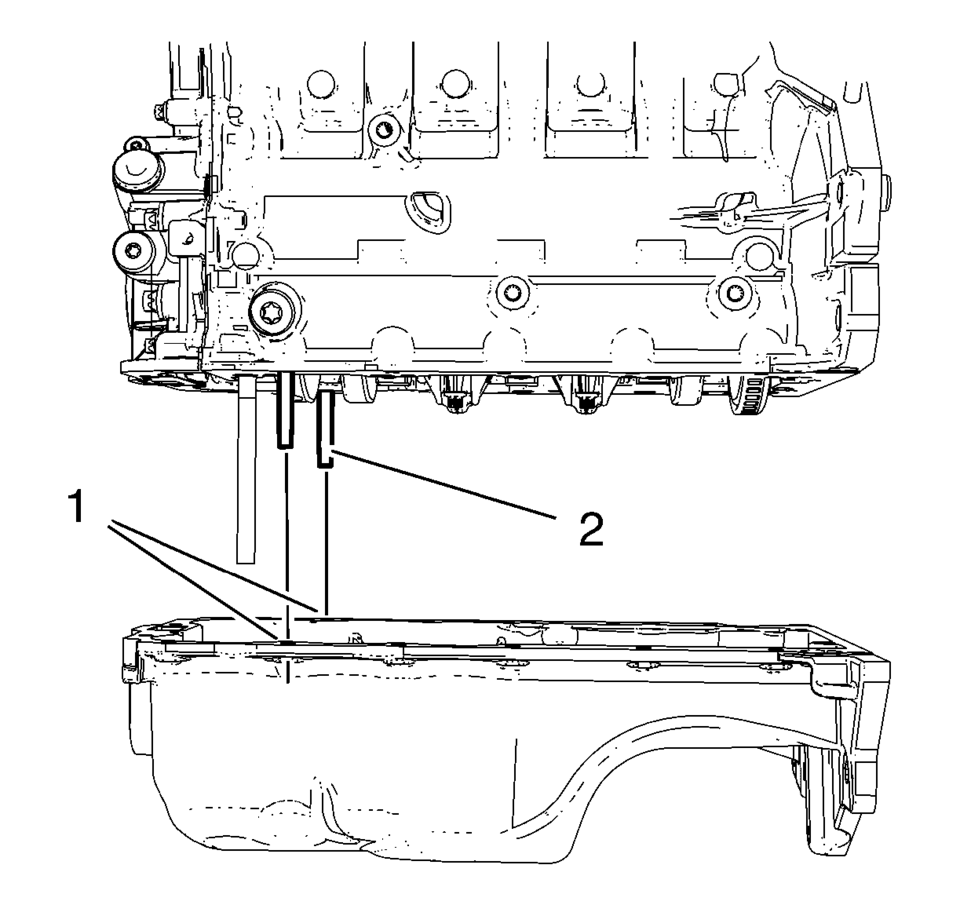
- Install the 2 EN-49980 pins (1) and (2) to the shown oil pan screw bores.
- Carefully install the oil pan. Guide the oil pan with EN-49980 pins (2) and the equivalent screw bores (1).
- Hold the oil pan with 4 oil pan bolts.
- Remove EN-49980 pins.
- Install the remaining 12 oil pan bolts and hand tighten.
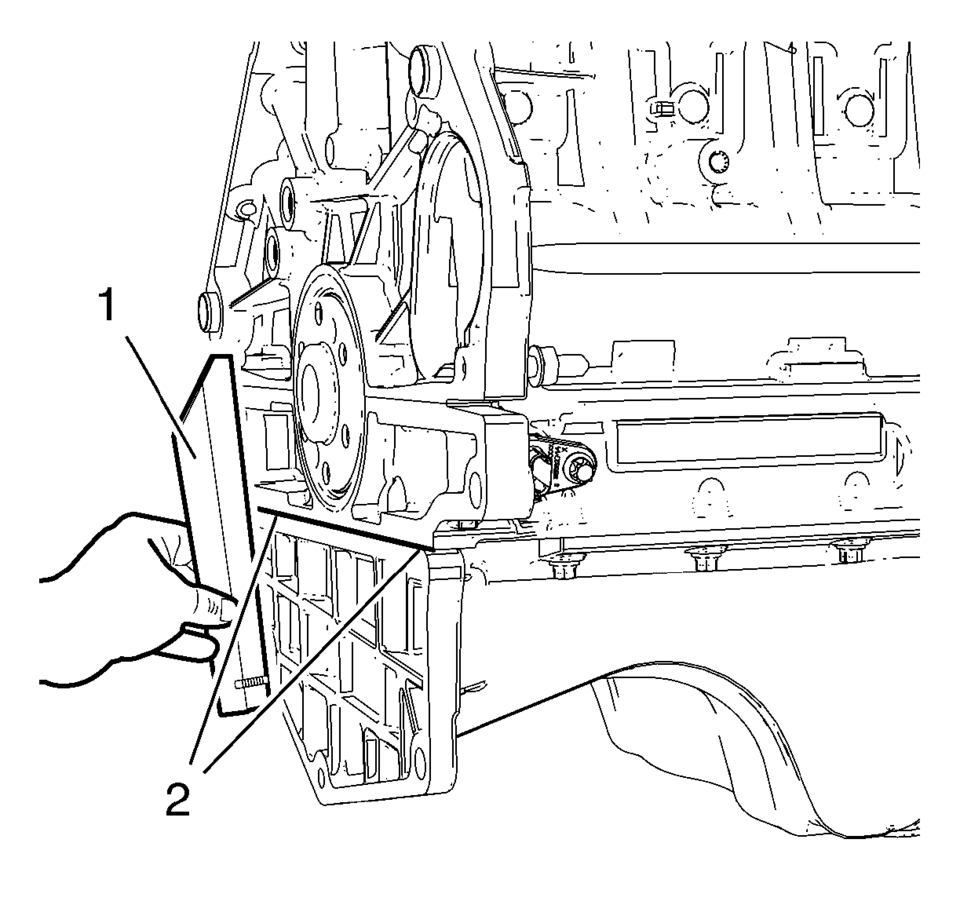
- Lay a straight edge (1) against the oil pan and engine block. Using a rubber mallet, adjust the transition in area (2) until there is no clearance between oil pan and the straight edge.
- Tighten the 16 oil pan bolts to 10 Y (89 lb in)
.
Note:
The sealing bead should be applied close to the inner edge of the oil pan. Take care that the oil suction gallery (4) will not get contaminated with sealing compound or dirt. The thickness of the sealing bead (3) should be 2 mm (0.0787 in).

Note:
The complete installation procedure of the oil pan should not take longer than 10 minutes.
Caution:
Use care when installing the oil pan to prevent disruption of the sealing bead. The sealing bead should remain consistent until the oil pan is mated with the engine. An inconsistent sealing bead can cause an insufficient seal and result in engine damage.
Caution:
Refer to Fastener Caution.
 Oil Pan Cleaning and Inspection
Warning: Wear safety glasses when using compressed air in order
to prevent eye injury.
Caution: To ensure proper engine lubrication, clean clogged or
contaminated oil ga ...
 Oil Pan Removal
Remove the 16 oil pan bolts (1).
Caution: Pry the oil pan carefully in order to prevent damage
to the transaxle case or the oil pan sealing surfaces.
Place a ...
Other materials:
Overview (Radio with Touchscreen)
z VOL
y (Volume)
Press to decrease or increase the volume.
O (Power)
Press and hold to turn the power on or off.
D (Home Page)
Press to go to the Home Page. See Home Page.
...
Adhesive Installation of Rear Windows
Warning: Refer to Glass and Sheet Metal Handling Warning.
Use a urethane adhesive systems which meet GM Specification GM?€‰3651G.
Remove all mounds or loose pieces of urethane adhesive from the pinchweld
area.
If the original window is being reused, remove all but approxi ...
Speed Adjust by Route (a feature of ProPILOT Assist 1.1 and 2.1)
Speed Adjust by Route is an intelligent feature available in the Nissan Armada
as part of the advanced ProPILOT Assist 1.1 and 2.1 systems. Designed for vehicles
equipped with an integrated map locator system, this function enhances driving comfort
by automatically adapting vehicle speed to ma ...

0.0078