Chevrolet Sonic Repair Manual: Overview (AM-FM Radio)
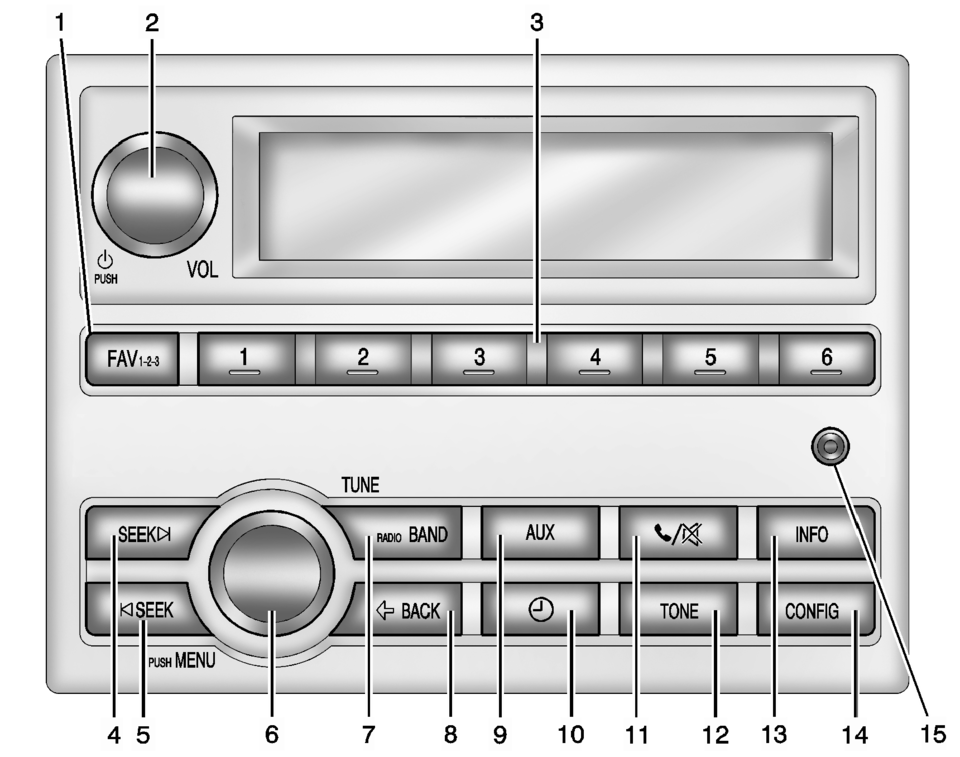
- FAV 1-2-3 (Favorites)
- Radio: Opens the favorites list.
- Turns the system on or off and adjusts the volume.
- Radio: Saves and selects favorite stations.
- Radio: Seeks the next station.
- CD: Selects the next track or fast forwards within a track.
- Radio: Seeks the previous station.
- CD: Selects the previous track or rewinds within a track.
- Radio: Manually selects radio stations.
- CD: Selects tracks.
- Changes the band while listening to the radio.
- Selects the radio when listening to a different audio source.
- Menu: Moves one level back.
- Character Input: Deletes the last character.
- Selects external audio source.
- Opens the Clock menu.
- Mutes the audio system.
- Opens the Tone menu.
- Radio: Shows available information about the current station.
- CD: Shows available information about the current track.
- Opens the Configuration menu.
- 3.5 mm (1/8 in) connection for external devices.
 Operation
Radio Controls without Touchscreen
The infotainment system is operated by using the pushbuttons, multifunction
knobs, menus shown on the display, and steering wheel controls, if equipped ...
 Overview (Radio with CD/USB)
91011121314151617
O /VOL (Power/Volume)
Turns the system on or off and adjusts the volume.
Z (Eject)
Removes a disc from the CD slot.
Buttons 1−6
Radio: Saves a ...
Other materials:
Fuel Tank Heat Shield Replacement
Removal Procedure
Support the fuel tank with a suitable jack.
Remove the fuel tank strap fasteners (1) and lower the fuel tank straps (2).
Remove the fuel tank heat shield fasteners (1) and remove the fuel tank
heat shield (2).
...
Hood
1. To open the hood of the Nissan Armada, pull the hood release handle 1 located
beneath the driver’s side instrument panel. This action will cause the hood to pop
up slightly.
2. Move to the front of the Nissan Armada and locate the secondary safety lever
2. Slide it sideways with your ...
Emission control system warranty
Your Nissan Armada is protected by comprehensive emission-related warranties
designed to ensure compliance with environmental regulations and maintain optimal
engine performance.
For USA:
Emission Defects Warranty – Covers defects in materials or workmanship that
may affect emissions s ...

0.0066