Chevrolet Sonic Repair Manual: Parking Brake Cable Replacement (Disc Brake)
- Removal Procedure
-
- Remove the front floor console. Refer to Front Floor Console Replacement.
- Ensure that the parking brake lever is in the fully released position.
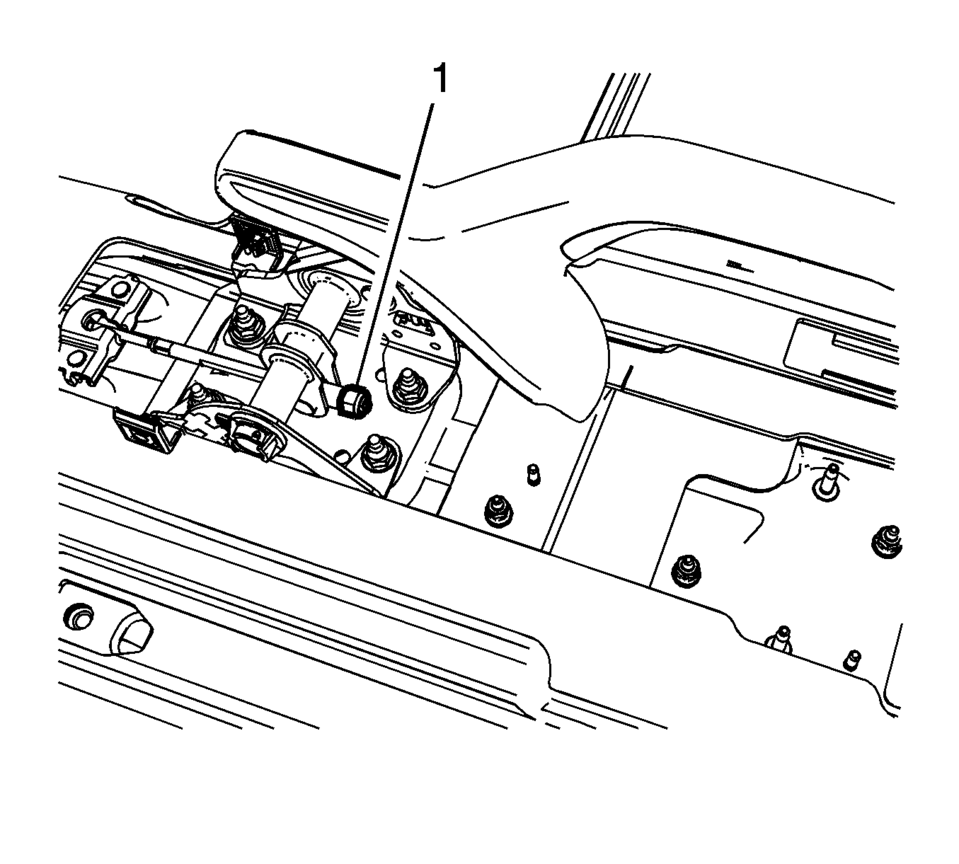
- Using ONLY HAND TOOLS, remove the adjusting nut (1) from the end of the front park brake cable threaded rod.
- Remove the rear seat cushion. Refer to Rear Seat Cushion Removal and Installation.
- Position the rear floor carpet forward to access the parking brake cable pass through grommets.
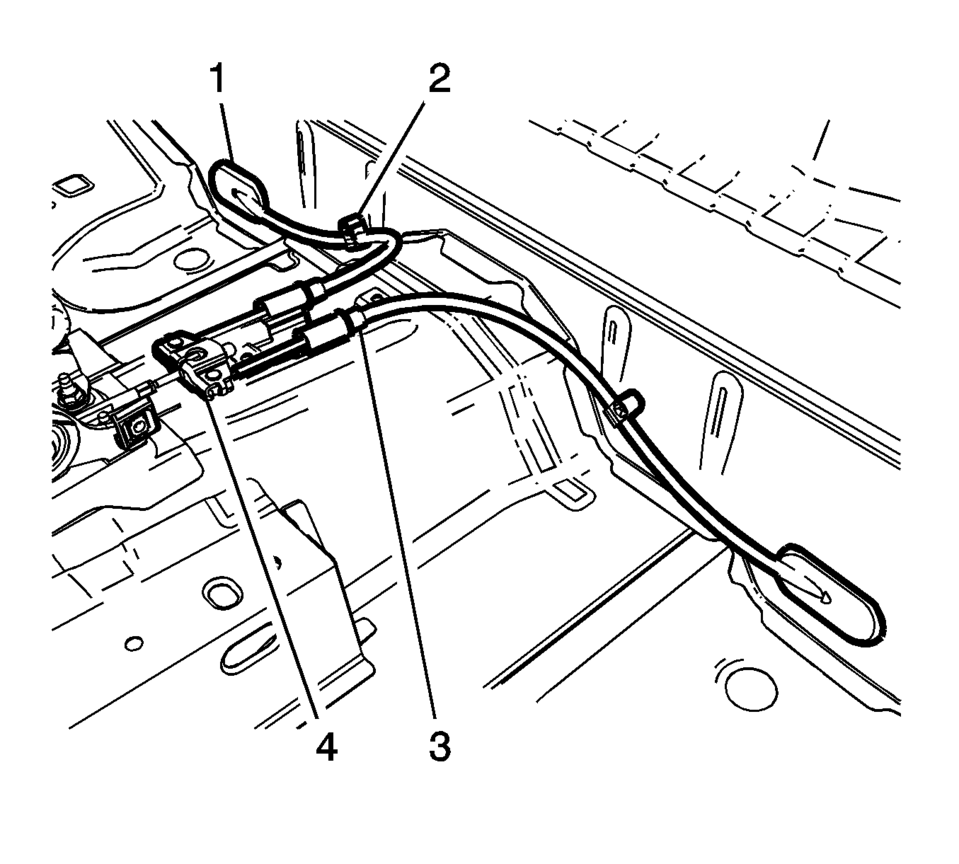
- Release the parking brake cable pass through grommets (1).
- Release the parking brake cable routing clips (2).
- Release the parking brake cable collars (3) from the floor tunnel bracket.
- Disconnect the park brake lever cable from the equalizer (4).
- Raise and support the vehicle. Refer to Lifting and Jacking the Vehicle.
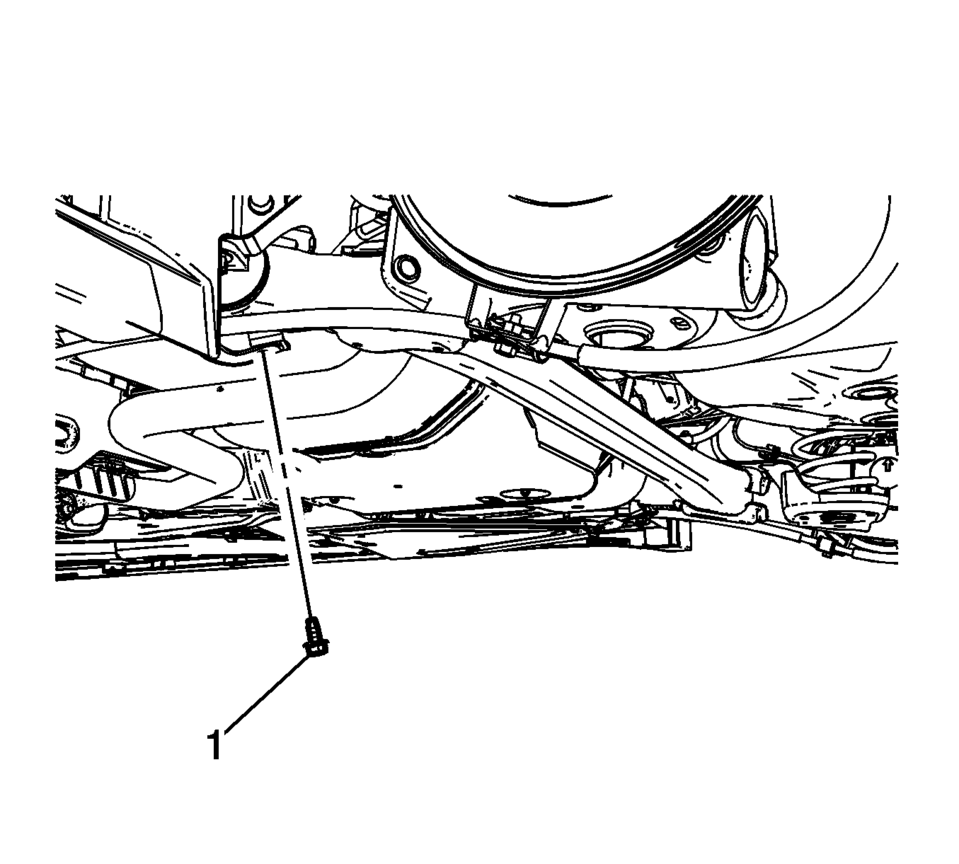
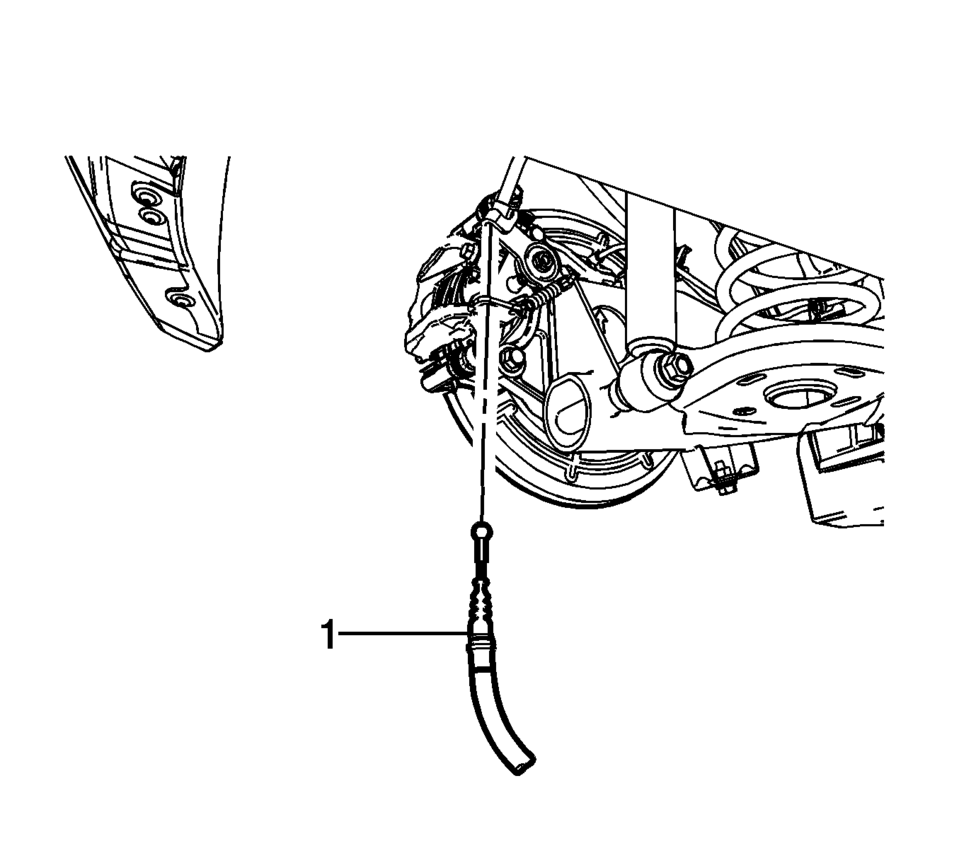
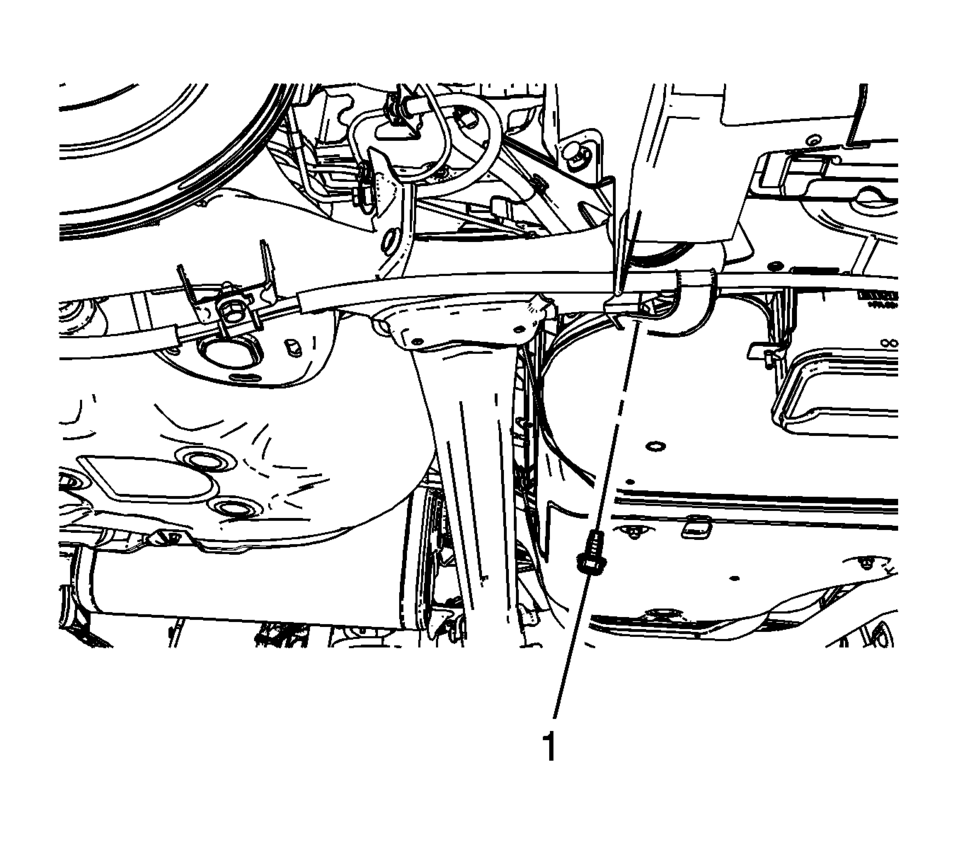
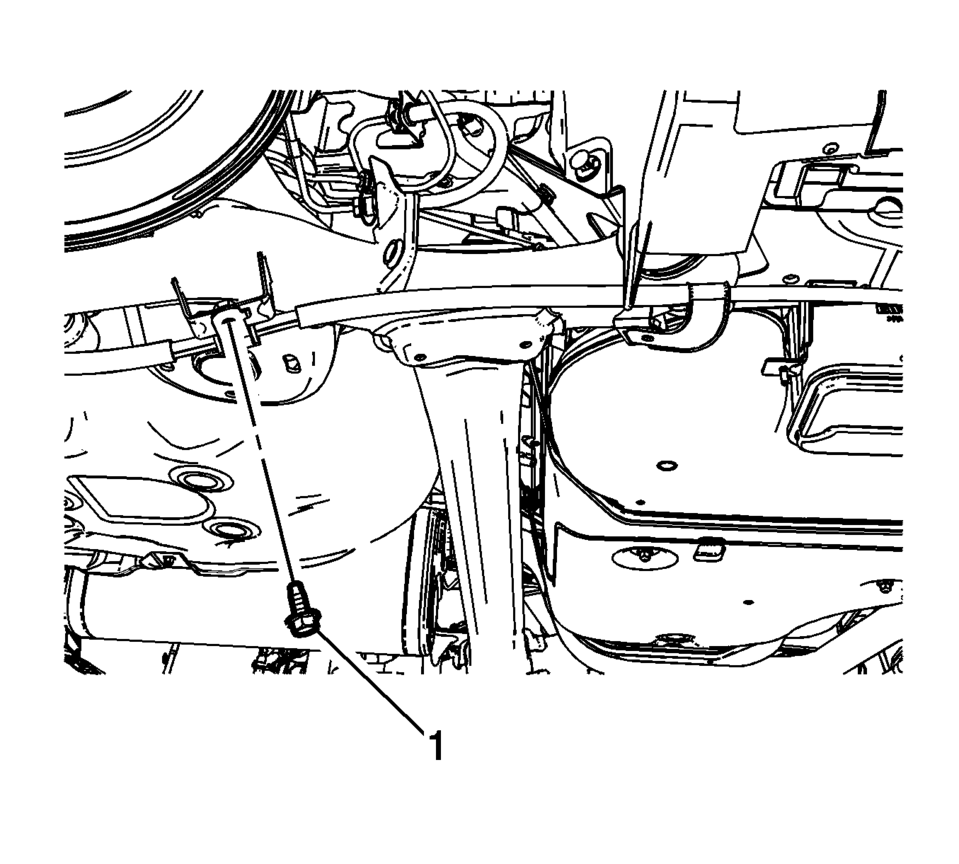
- Remove the left front parking brake cable bracket bolt (1).
- Remove the left rear parking brake cable bracket bolt (1).
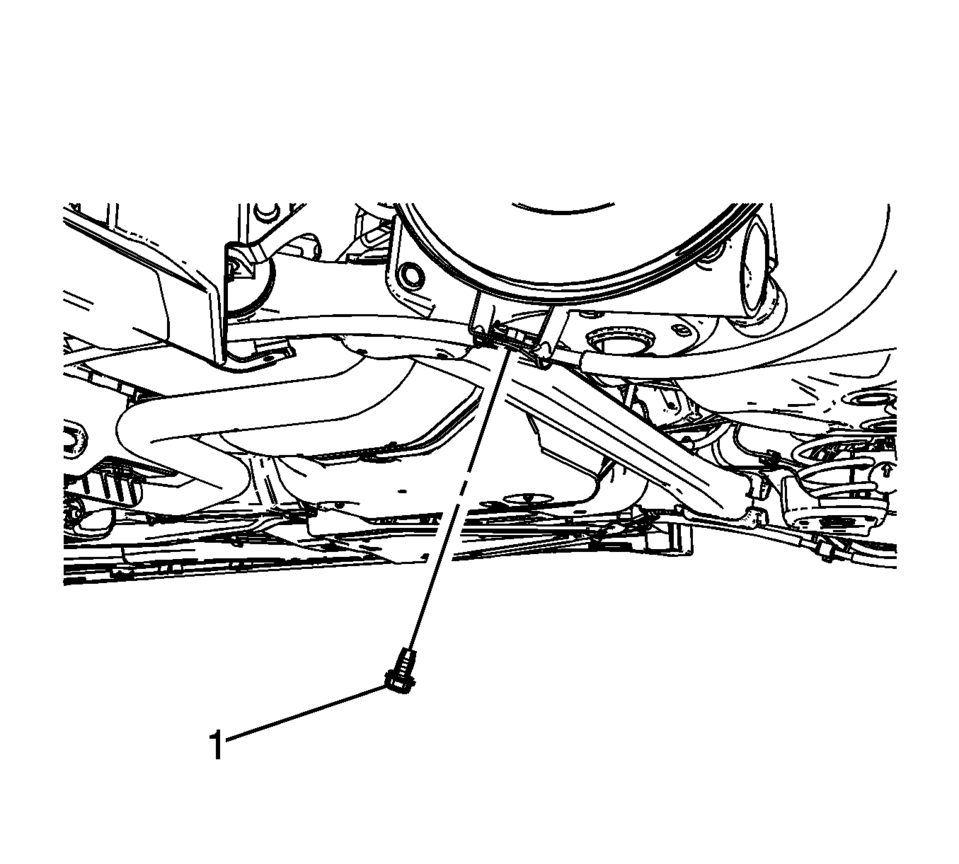
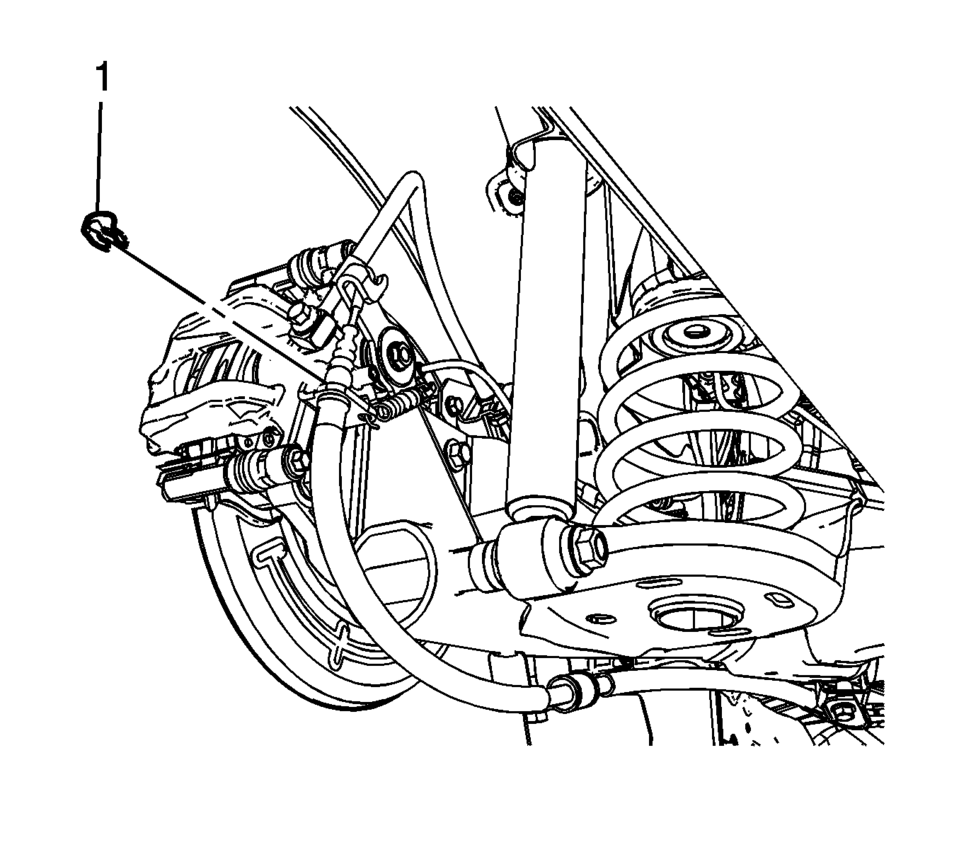
- Remove the left parking brake cable retaining clip (1) from the parking brake cable bracket.
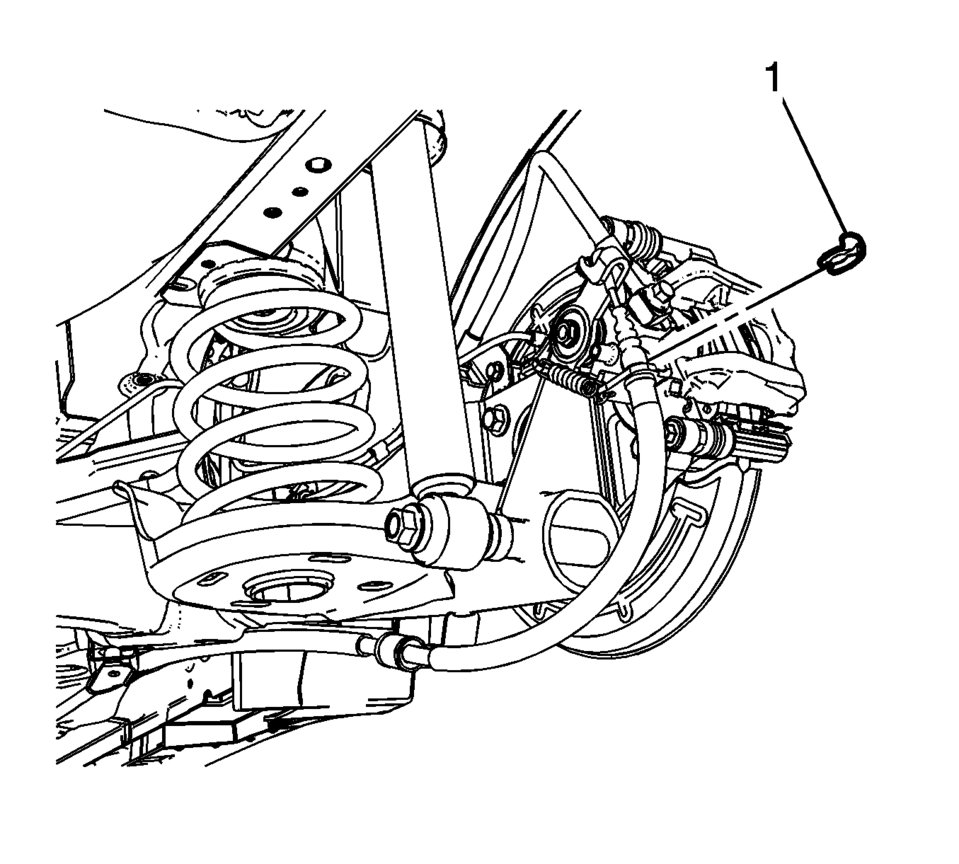
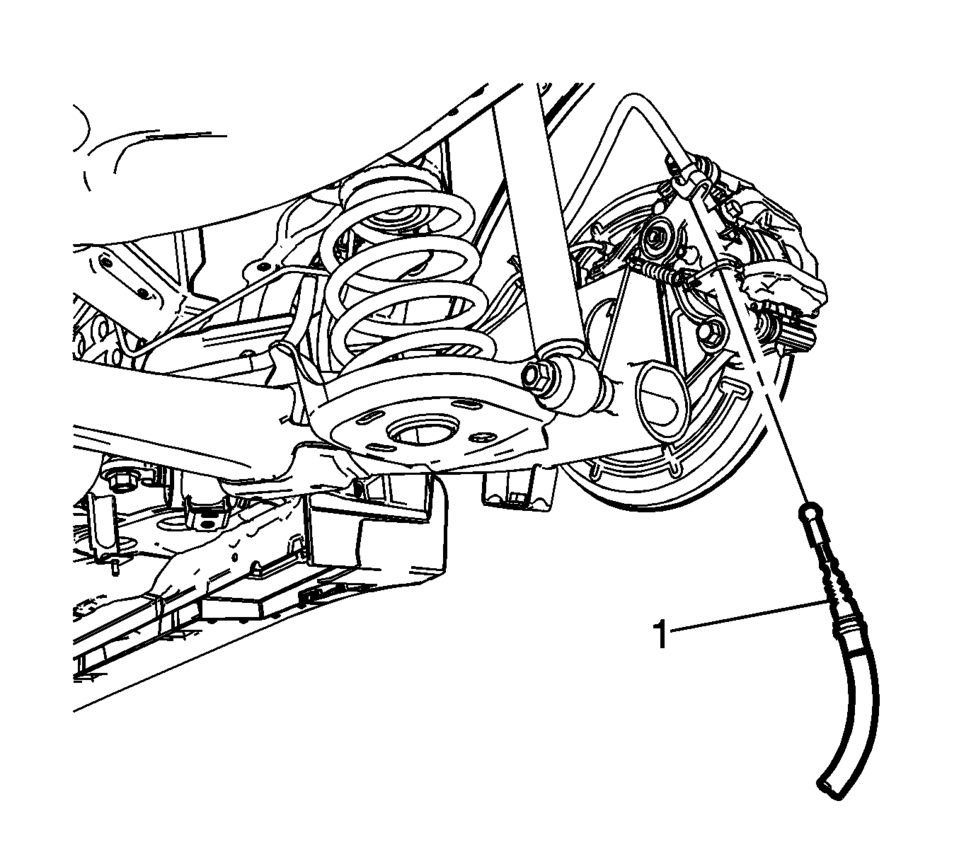
- Disconnect the left parking brake cable (1) from the actuator lever and remove the left parking brake cable from the cable bracket.
- Remove the fuel tank aero shield nuts (1) and the shield.
- Remove the right front parking brake cable bracket bolt (1).
- Remove the right rear parking brake cable bracket bolt (1).
- Remove the right parking brake cable retaining clip (1) from the parking brake cable bracket.
- Disconnect the right parking brake cable (1) from the actuator lever and remove the right parking brake cable from the cable bracket.
- Feed the parking brake cable through the vehicle body.
- Lower the vehicle and remove the parking brake cable and equalizer assembly from inside the vehicle.

- Installation Procedure
-
- Install the parking brake cable pass through grommets (1).
- Install the parking brake cable routing clips (2).
- Install the parking brake cable collars (3) to the floor tunnel bracket.
- Connect the park brake lever cable to the park brake cable equalizer (4).
- Reposition the rear floor carpet.
- Install the rear seat cushion. Refer to Rear Seat Cushion Removal and Installation.
- Raise and support the vehicle. Refer to Lifting and Jacking the Vehicle.
- Install the right parking brake cable to the cable bracket and connect the right parking brake cable (1) to the actuator lever.
- Install the right parking brake cable retaining clip (1) to the parking brake cable bracket.
- Install the right rear parking brake cable bracket bolt (1) and tighten
to 22 Y (16 lb ft)
.
- Install the right front parking brake cable bracket bolt (1) and tighten
to 22 Y (16 lb ft)
.
- Install the fuel tank aero shield and the nuts (1).
- Install the left parking brake cable to the cable bracket and connect the left parking brake cable (1) to the actuator lever.
- Install the left parking brake cable retaining clip (1) to the parking brake cable bracket.
- Install the left rear parking brake cable bracket bolt (1) and tighten
to 22 Y (16 lb ft)
.
- Install the left front parking brake cable bracket bolt (1) and tighten
to 22 Y (16 lb ft)
.
- Lower the vehicle.
- Using ONLY HAND TOOLS, loosely install the adjusting nut (1) to the front park brake cable threaded rod.
- Adjust the parking brake. Refer to Parking Brake Adjustment.
- Install the front floor console. Refer to Front Floor Console Replacement.
Caution:
Refer to Fastener Caution.
 Parking Brake Lever Replacement
Removal Procedure
Remove the front floor console. Refer to Front Floor Console Replacement.
Ensure that the park brake lever is in the fully released position.
Disconnect th ...
 Parking Brake Cable Replacement (Drum Brake)
Removal Procedure
Remove the front floor console. Refer to Front Floor Console Replacement.
Ensure that the parking brake lever is in the fully released position.
Us ...
Other materials:
Traction Control/ Electronic Stability Control
The Traction Control System (TCS) limits wheel spin. The system is on when the
vehicle is started.
The StabiliTrak system assists with directional control of the vehicle in difficult
driving conditions. The system is on when the vehicle is started.
To turn off traction control, press and re ...
Steering Wheel Controls
Some audio steering wheel controls could differ depending on the vehicle's options.
Some audio controls can be adjusted at the steering wheel.
/
(Push to Talk): For vehicles with Bluetooth
or OnStar, press to interact with those systems. See Bluetooth (Voice Recognition) or Bluet ...
New Vehicle Break-In
Caution
The vehicle does not need an elaborate break-in. But it will perform better
in the long run if you follow these guidelines:
. Do not drive at any one constant speed, fast or slow, for the first
805 km (500 mi). Do not make full-throttle starts. Avoid downshifting to brake
or slo ...

0.0052