Chevrolet Sonic Repair Manual: Rear Brake Caliper Bracket Replacement
- Removal Procedure
-
Warning:
Refer to Brake Dust Warning.
- Raise and support the vehicle. Refer to Lifting and Jacking the Vehicle.
- Remove the tire and wheel assembly. Refer to Tire and Wheel Removal and Installation.
- DO NOT use any air tools to remove or install the guide pin bolts. Use hand tools ONLY.
- Install an open end wrench to hold the caliper guide pin in line with the brake caliper while removing or installing the caliper guide pin bolt. DO NOT allow the open end wrench to come in contact with the brake caliper. Allowing the open end wrench to come in contact with the brake caliper will cause a pulsation when the brakes are applied.
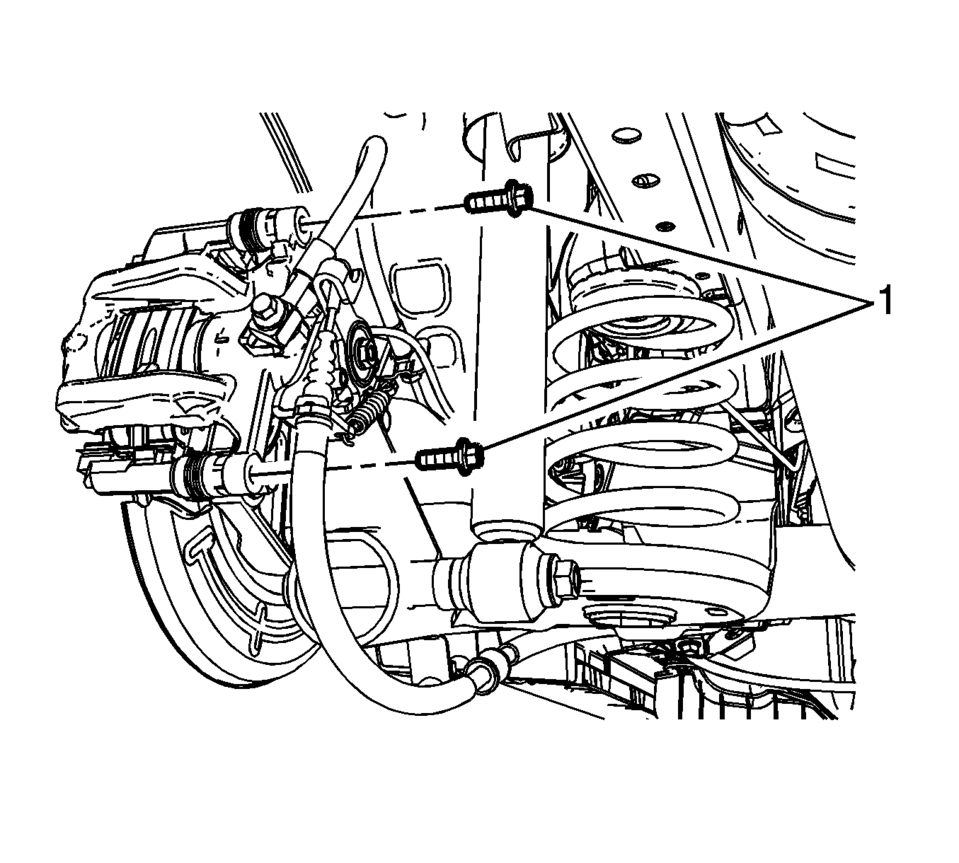
- Using a backup wrench to hold the brake caliper guide pins stationary, remove the brake caliper guide pin bolts (1).
- Remove the brake caliper and support with heavy mechanics wire.
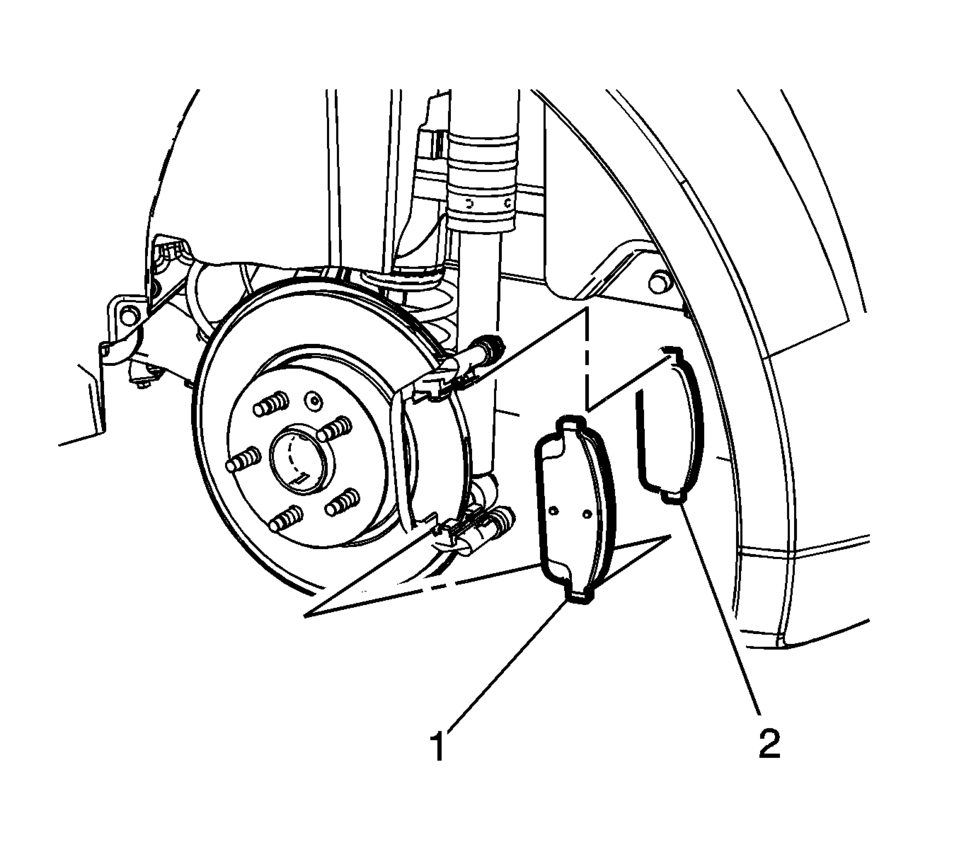
- Remove the outer disc brake pad (1).
- Remove the inner disc brake pad (2).
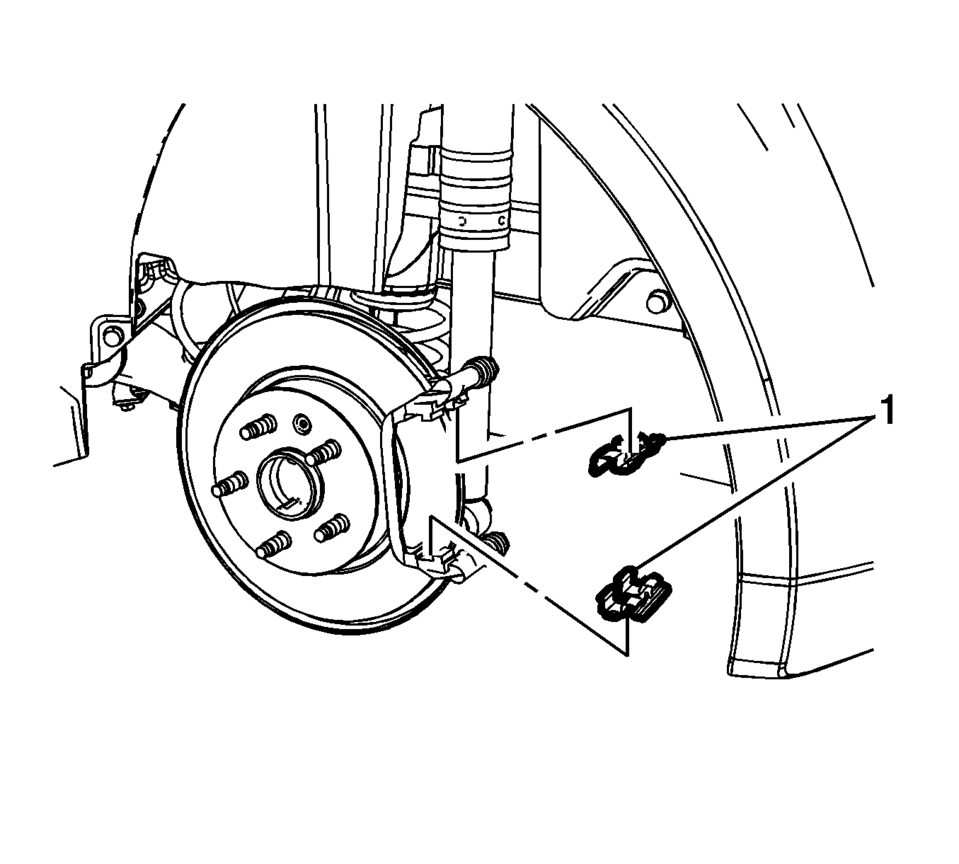
- Remove the disc brake pad springs (1).
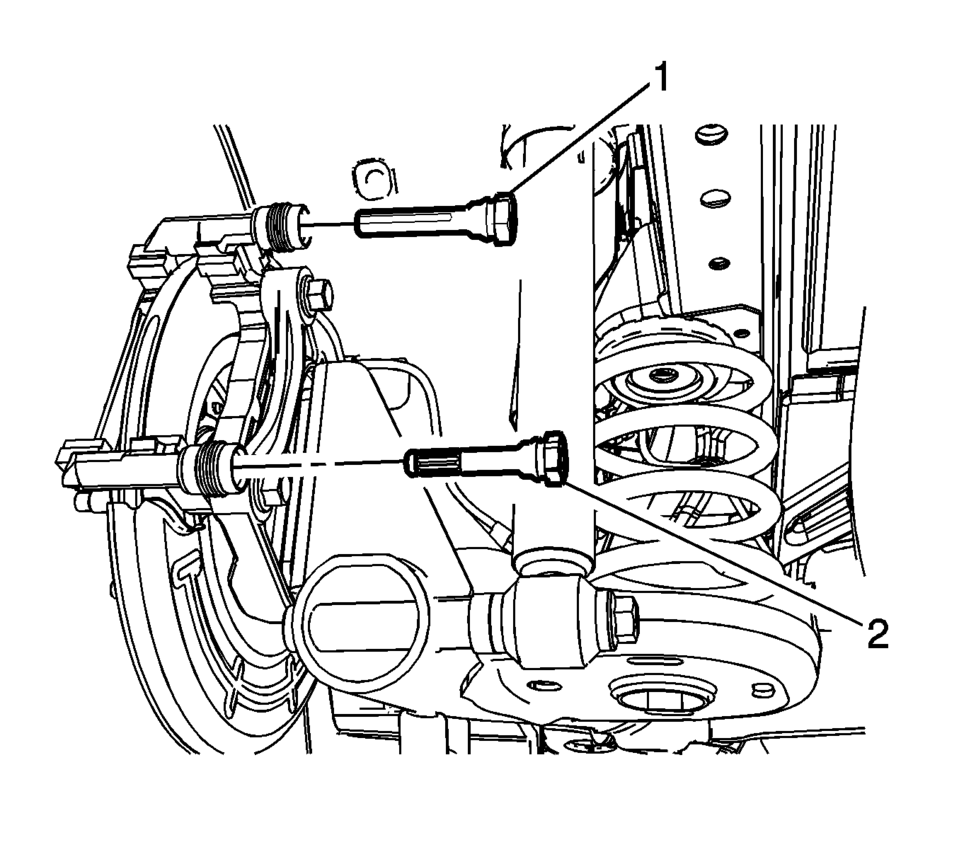
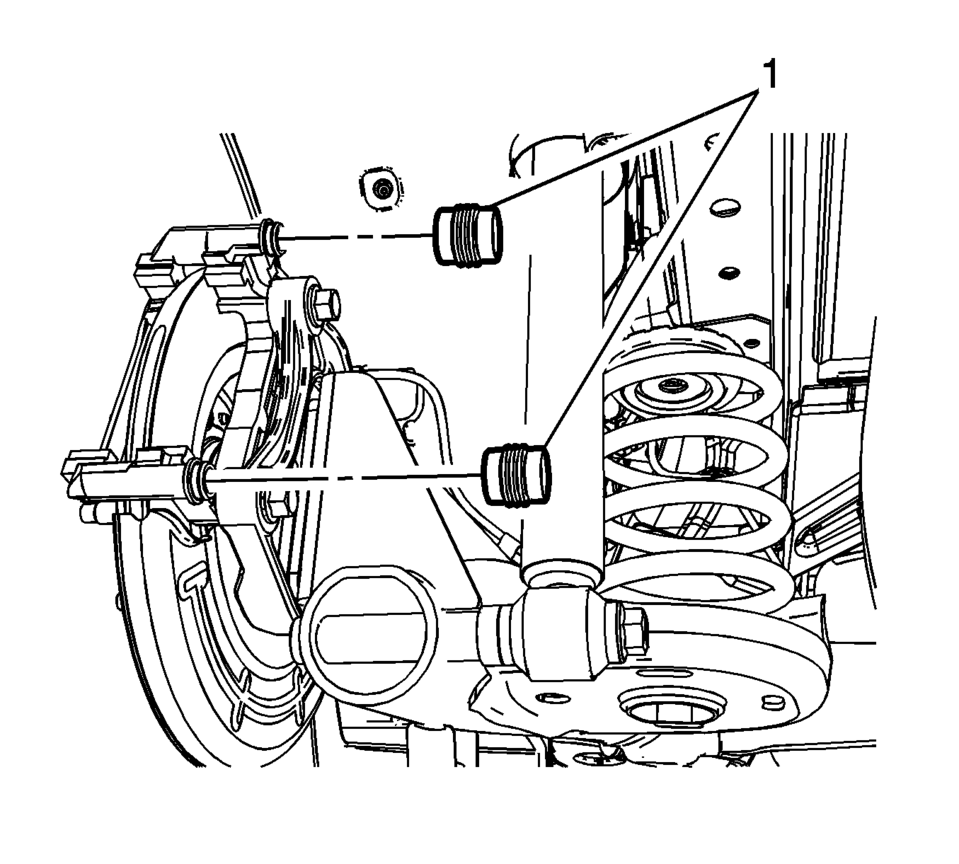
- Remove the upper brake caliper guide pin (1).
- Remove the lower brake caliper guide pin (2).
- Remove the brake caliper guide pin seals (1).
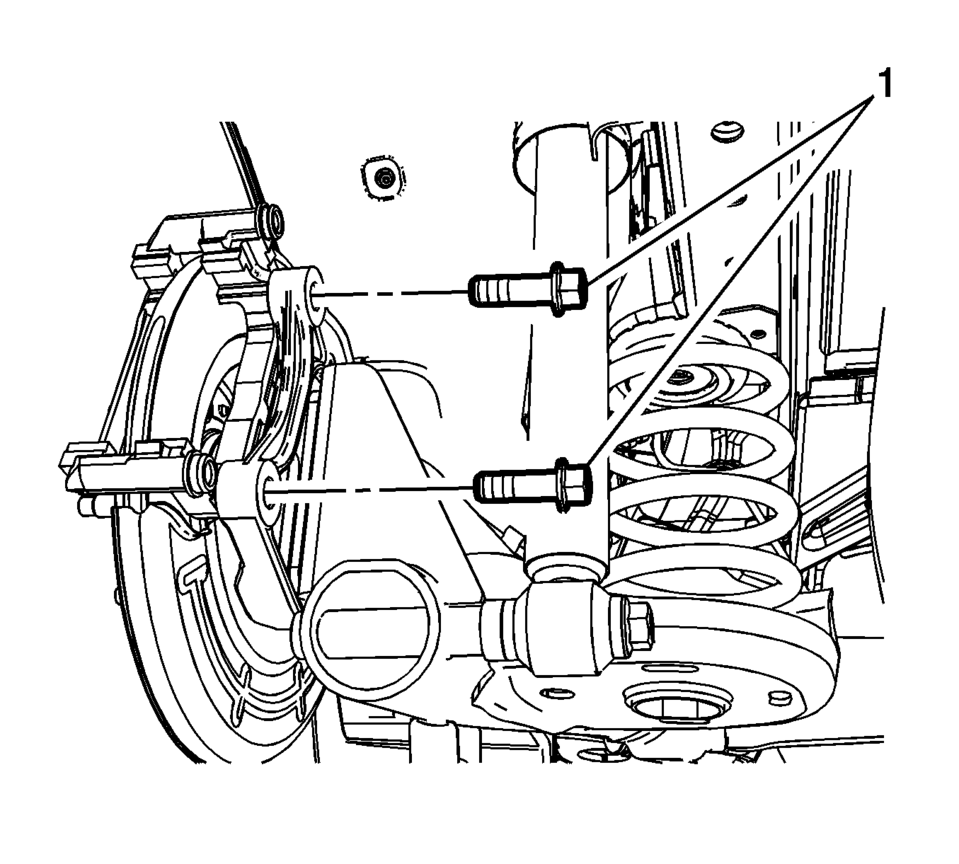
- Remove and discard the brake caliper bracket bolts (1).
- Remove the rear brake caliper bracket.
Note:
Caution:
Support the brake caliper with heavy mechanic wire, or equivalent, whenever it is separated from its mount and the hydraulic flexible brake hose is still connected. Failure to support the caliper in this manner will cause the flexible brake hose to bear the weight of the caliper, which may cause damage to the brake hose and in turn may cause a brake fluid leak.
Note:
The lower brake caliper guide pin is equipped with a bushing and must be installed in the same location.
Note:
Do not reuse the brake caliper bracket bolts.
- Installation Procedure
-
- Install the rear brake caliper bracket.
- Install new brake caliper bracket bolts (1) and tighten to 100 Y
(74 lb ft)
.
- Install the brake caliper guide pin seals (1).
- Install the upper brake caliper guide pin (1).
- Install the lower brake caliper guide pin (2).
- Install the disc brake pad springs (1).
- Install the outer disc brake pad (1).
- Install the inner disc brake pad (2).
- Position the brake caliper over the disc brake pads and to the brake caliper bracket.
- Using a backup wrench to hold the brake caliper guide pins stationary,
install the brake caliper guide pin bolts (1) and tighten to 28 Y (21 lb ft)
.
- Install the tire and wheel assembly. Refer to Tire and Wheel Removal and Installation.
Caution:
Refer to Fastener Caution.
Note:
Ensure the brake caliper guide pin seals are fully seated in the groove of the brake caliper bracket.
Note:
The lower brake caliper guide pin is equipped with a bushing and must be installed in the same location.
 Front Seat Belt Anchor Plate Tensioner Replacement
Front Seat Belt Anchor Plate Tensioner Replacement
Callout
Component Name
Warning: Refer to SIR Warning.
Warning: ...
 Rear Brake Caliper Replacement
Removal Procedure
Warning: Refer to Brake Dust Warning.
Warning: Refer to Brake Fluid Irritant Warning.
Raise and support the vehicle. Refer to Lifting and Jacking the ...
Other materials:
Airbag Front Passenger Presence Sensor Replacement
Airbag Front Passenger Presence Sensor Replacement
Callout
Component Name
Warning: Replace the passenger presence system as a complete
assembly to prevent possible injury to the occupant. All the components
in the se ...
Brake Shoe Replacement (J93, J94)
Removal Procedure
Warning: Refer to Brake Dust Warning.
Note: Always replace brake shoes in axle sets.
Raise and support the vehicle. Refer to Lifting and Jacking the Vehicle.
Remove the tire and wheel assembly. Refer to Tire and Wheel Removal
and In ...
Engine Flywheel Removal
Special Tools
EN-652 Flywheel Holder
For equivalent regional tools, refer to Special Tools.
Install EN-652 holder (1) to hold the engine flywheel (2).
Remove and DISCARD the 6 engine flywheel bolts (2).
Remove the engine flywheel (1).
...

0.0062