Chevrolet Sonic Repair Manual: Rear Brake Hose Replacement (Axle to Caliper)
- Removal Procedure
-
Warning:
Refer to Brake Dust Warning.
Warning:
Refer to Brake Fluid Irritant Warning.
- Raise and support the vehicle. Refer to Lifting and Jacking the Vehicle.
- Remove the tire and wheel assembly. Refer to Tire and Wheel Removal and Installation.
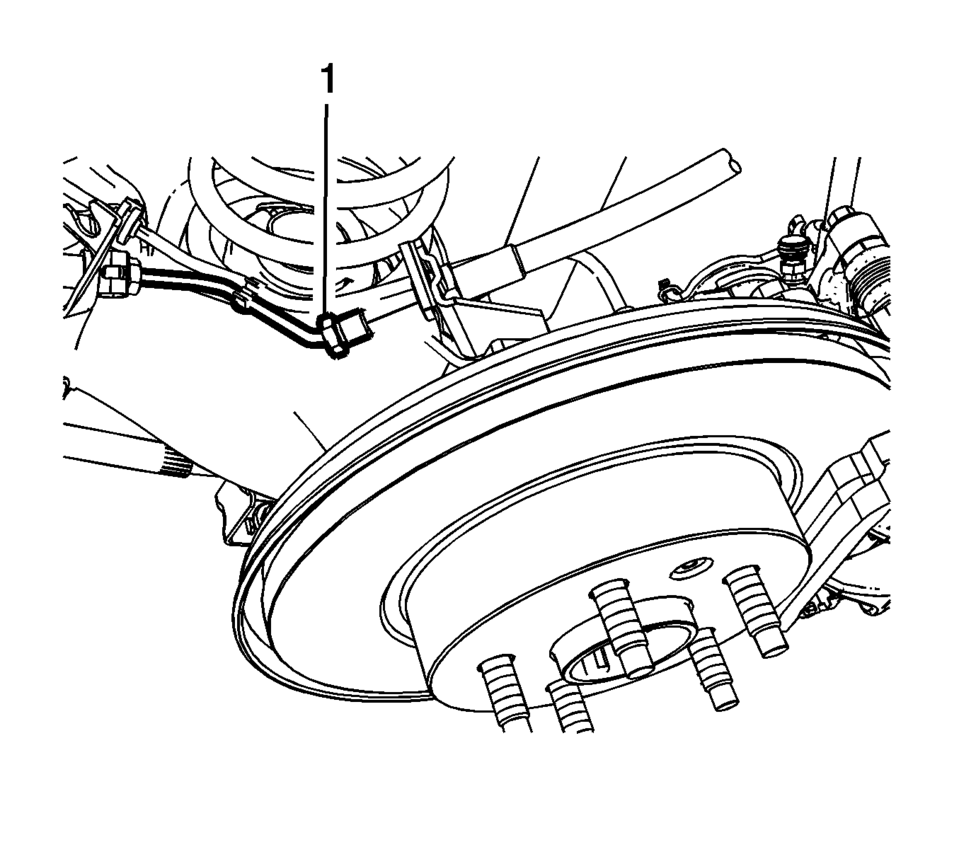
- Remove the brake pipe fitting (1) from the rear brake hose.
- Cap the brake pipe fitting to prevent brake fluid loss and contamination.
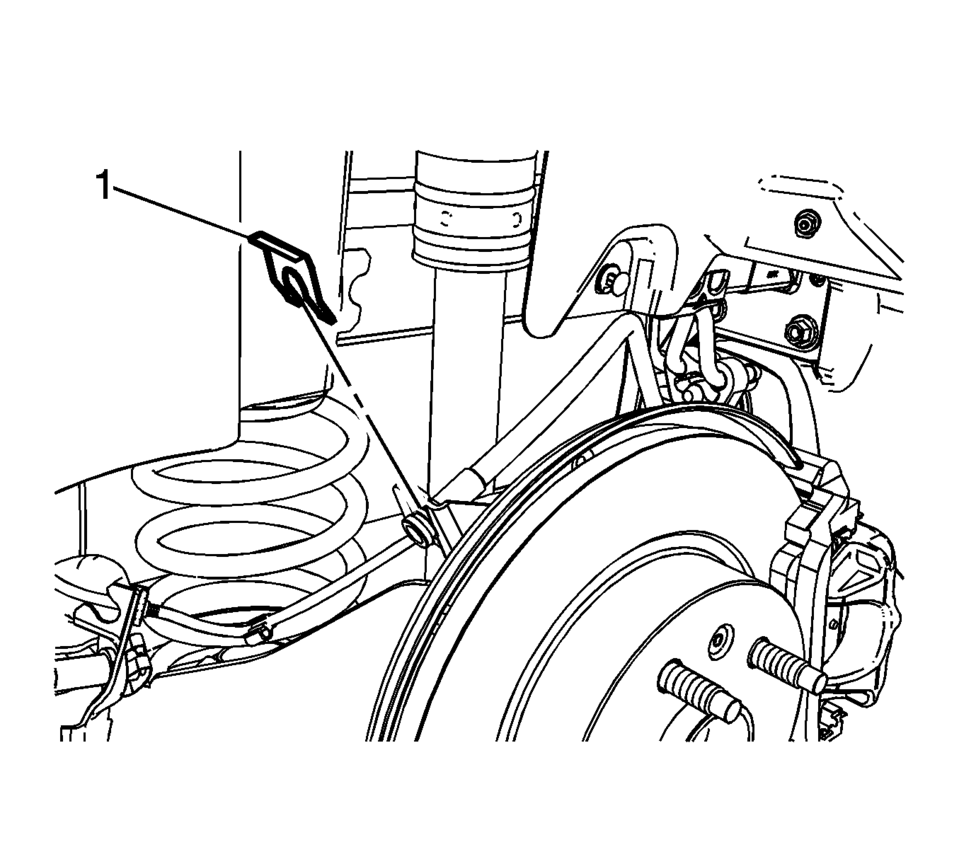
- Remove the brake hose retainer (1).
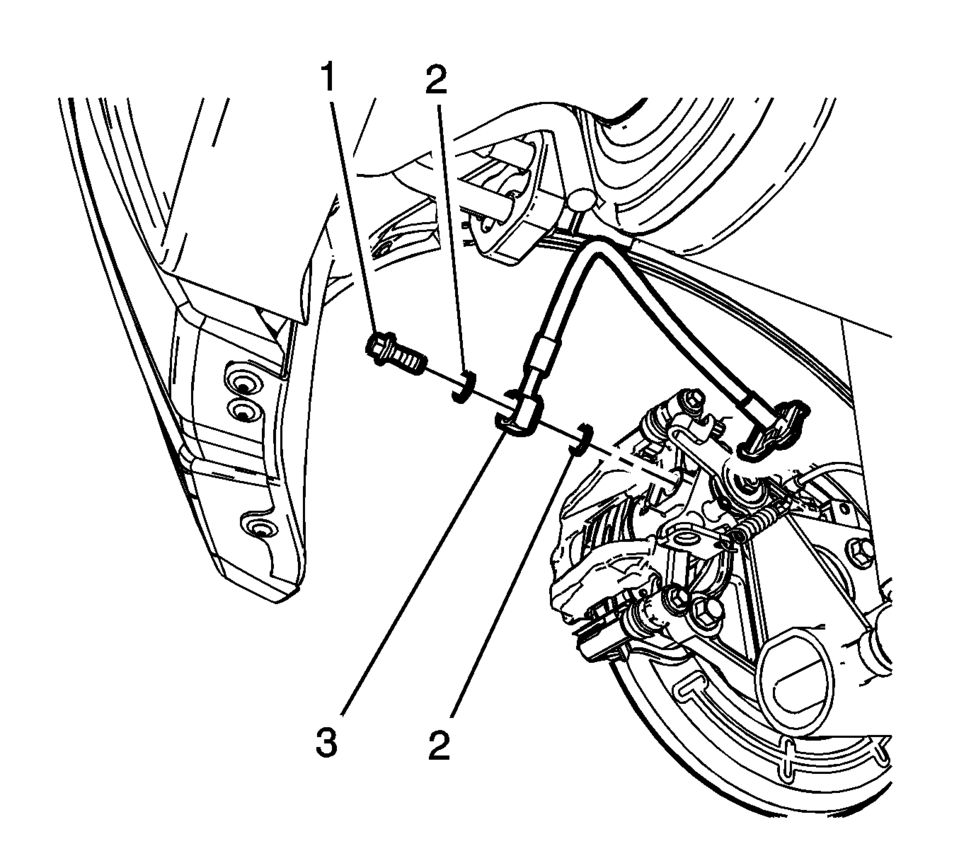
- Remove the brake hose fitting bolt (1).
- Remove and discard the brake hose fitting gaskets (2) from the brake hose fitting (3).
- Remove the brake hose.
Note:
Do not reuse the brake hose fitting gaskets.
- Installation Procedure
-
- Assemble the brake hose fitting bolt (1) and the new brake hose fitting gaskets (2) to the brake hose fitting (3).
- Install the brake hose assembly to the brake caliper and tighten the
fitting bolt to 40 Y (30 lb ft)
.
- Install the brake hose to the wheelhouse bracket and install the retainer (1).
- Install the brake pipe fitting (1) to the rear brake hose and tighten
the fitting to 18 Y (13 lb ft)
.
- Bleed the hydraulic brake system. Refer to Hydraulic Brake System Bleeding.
- Install the tire and wheel assembly. Refer to Tire and Wheel Removal and Installation.
Caution:
Refer to Fastener Caution.
 Hub/Axle Flange and Wheel Stud Runout Inspection
Special Tools
GE-8001 Dial Indicator Set , or equivalent
Raise and support the vehicle. Refer to Lifting and Jacking the Vehicle.
Mark the location of the wheels to the wheel studs and mar ...
 Rear Brake Hose Replacement (Body to Axle - Disc Brake)
Removal Procedure
Warning: Refer to Brake Dust Warning.
Warning: Refer to Brake Fluid Irritant Warning.
Raise and support the vehicle. Refer to Lifting and Jacking the ...
Other materials:
Arming the AlarmSystem
1. Close all doors, the trunk/liftgate, and the hood.
2. Lock the vehicle in one of two ways:
Use the RKE transmitter.
With a door open, press on the
interior of the door.
3. After 30 seconds the alarm system will arm, and the indicator light will begin
to slowly flash indicating the ...
Tire Pressure Light
For vehicles with the Tire Pressure Monitor System (TPMS), this light comes on
briefly when the engine is started. It provides information about tire pressures
and the TPMS.
When the Light Is On Steady
This indicates that one or more of the tires are significantly underinflated.
Stop as soo ...
Outside Rearview Mirror Replacement (Manual)
Outside Rearview Mirror Replacement
Callout
Component Name
Preliminary Procedures
Remove the front side door upper front trim panel. Refer to Front
Side Door Upper Front Trim Panel Replacement.
Remove the outside rearview ...

0.0062