Chevrolet Sonic Repair Manual: Rear Side Door Window Outer Sealing Strip Replacement (Hatchback)
|
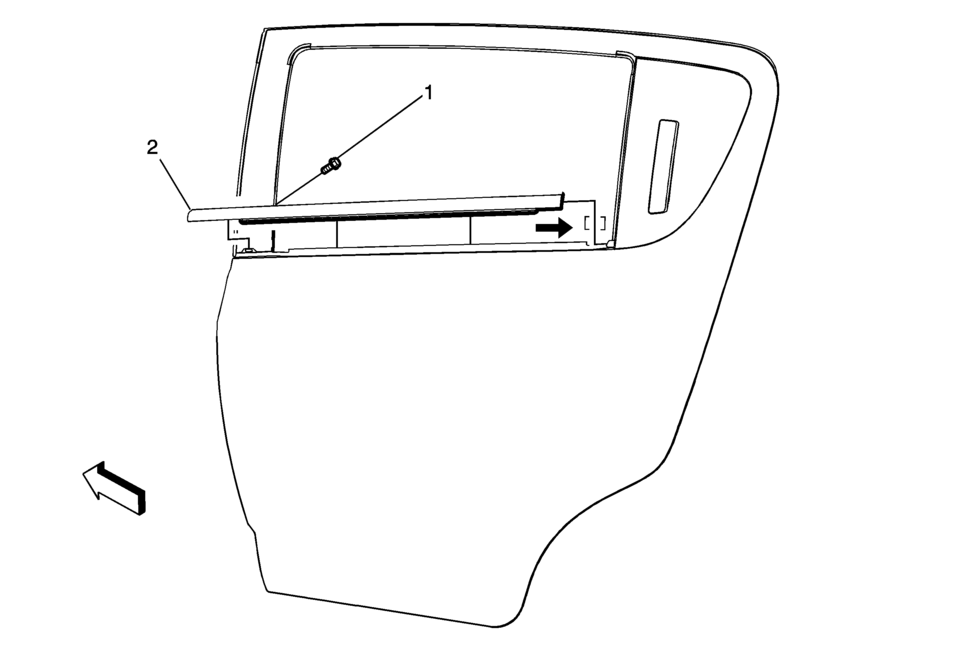
Callout |
Component Name |
|---|---|
|
1 |
Rear Side Door Window Outer Sealing Strip Screw Caution: Refer to Fastener Caution.
2?‚ā¨‚ÄįY (18?‚ā¨‚Äįlb?‚ā¨‚Äįin) Note: Open the rear door to the full open position to expose the rear side door window outer sealing strip screw that is located on the front inner edge of the door. |
|
2 |
Rear Side Door Window Outer Sealing Strip Procedure
|
 Rear Side Door Weatherstrip Replacement - Door Side
Rear Side Door Weatherstrip Replacement - Door Side
Callout
Component Name
1
Rear Side Door Weatherstrip
Procedure
...
 Rear Side Door Window Outer Sealing Strip Replacement (Sedan)
Rear Side Door Window Outer Sealing Strip Replacement
Callout
Component Name
1
Rear Side Door Window Outer Sealing Strip ...
Other materials:
Luggage Shade Replacement (Hatchback)
Luggage Shade Replacement
Callout
Component Name
1
Luggage Shade Assembly
Procedure
Detach luggage shade from upper support.
...
Replacing LATCH System Parts After a Crash
Warning: A crash can damage the LATCH system in the vehicle. A damaged
LATCH system may not properly secure the child restraint, resulting in serious
injury or even death in a crash. To help make sure the LATCH system is working
properly after a crash, see your dealer to have the system ...
Transmission Fluid Pump Disassemble (6T40/45/50)
Table 1:
Fluid Filter Assembly and Torque Converter Fluid
Seal Disassemble
Table 2:
Fluid Pump Disassemble
Fluid Filter Assembly and Torque
Converter Fluid Seal Disassemble
Fluid Filter Assembly and Torque Converter Fluid Seal Disassemble
...

0.0063