
Chevrolet Sonic Repair Manual: Rear Side Door Window Regulator Replacement (Hatchback)
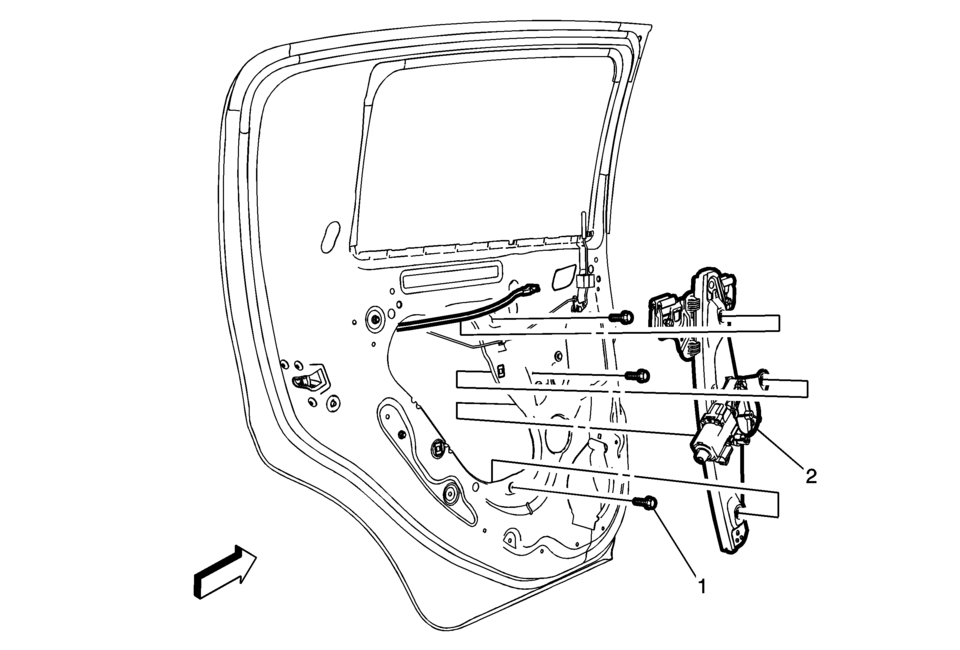
|
Callout |
Component Name |
|---|---|
|
Warning: Refer to Glass and Sheet Metal Handling Warning. Preliminary Procedure
Remove the front side door window from the guide. Do not remove the window from the vehicle, raise the window to the fully up position, tape in place. Refer to Rear Side Door Window Replacement. |
|
|
1 |
Rear Side Door Window Regulator Screw (Qty:?€‰3) Caution: Refer to Fastener Caution.
11?€‰Y?€‰(97?€‰lb?€‰in) |
|
2 |
Rear Side Door Window Regulator Procedure
|
 Rear Side Door Window Regulator Motor Replacement
Rear Side Door Window Regulator Motor Replacement
Callout
Component Name
Warning: Refer to Glass and Sheet Metal Handling Warn ...
 Rear Side Door Window Regulator Replacement (Sedan)
Rear Side Door Window Regulator Replacement
Callout
Component Name
Warning: Refer to Glass and Sheet Metal Handling Warning.
...
Other materials:
Hood Side Seal Replacement
Hood Side Seal Replacement
Callout
Component Name
1
Hood Side Seal Push-In Retainer (Qty:?€‰6)
2
Hood Side Seal
...
Water Outlet Installation
Clean the sealing surfaces.
Install the water outlet (2) and a NEW water outlet seal ring (1).
Caution: Refer to Fastener Caution.
Install the 3 water outlet bolts (3) and tighten to 8 Y (71 lb in).
...
Engine Oil Cooler Replacement
Removal Procedure
Disconnect battery negative cable. Refer to Battery Negative Cable Disconnection
and Connection.
Drain engine coolant. Refer to Cooling System Draining and Filling
Remove the turbocharger oil feed pipe. Refer to Turbocharger Oil Feed
Pipe Replacement ...

0.0049