Chevrolet Sonic Repair Manual: Rear Side Door Window Replacement (Sedan)
|
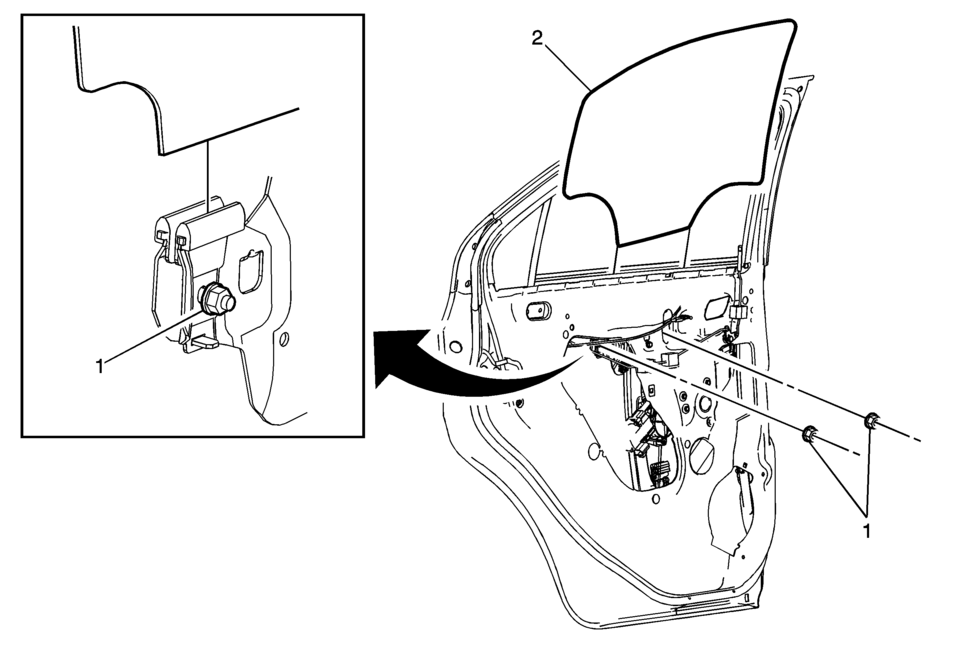
Callout |
Component Name |
|---|---|
|
Warning: Refer to Glass and Sheet Metal Handling Warning.
|
|
|
1 |
Rear Side Door Window Guide Nut (Qty:?€‰2) Caution: Refer to Fastener Caution.
11?€‰Y?€‰(97?€‰lb?€‰in) |
|
2 |
Rear Side Door Window Procedure
|
 Rear Side Door Window Replacement (Hatchback)
Rear Side Door Window Replacement
Callout
Component Name
Warning: Refer to Glass and Sheet Metal Handling Warning.
...
 Rear Side Door Window Weatherstrip Replacement (Hatchback)
Rear Side Door Window Weatherstrip Replacement
Callout
Component Name
Preliminary Procedure
Remove the rear side door window . ...
Other materials:
Radio Front Side Door Speaker Replacement
Radio Front Side Door Speaker Replacement
Callout
Component Name
Preliminary Procedure
Remove the front side door trim. Refer to Front
Side Door Trim Replacement.
1
Radio Front Side Door Speaker ...
Tire Dismounting and Mounting
Caution: Use a tire changing machine in order to dismount tires. Do
not use hand tools or tire irons alone in order to remove the tire from the
wheel. Damage to the tire beads or the wheel rim could result.
Caution: Do not scratch or damage the clear coating on aluminum wheels
wit ...
Drive Range, Fifth Gear (Gen 1)
As vehicle speed increases, the transmission control module (TCM) processes input
signals from the automatic transmission input and output speed sensors, the throttle
position sensor and other vehicle sensors to determine the precise moment to command
ON the normally-high 35R pressure control ...

0.0074