Chevrolet Sonic Repair Manual: Camshaft Position Actuator Solenoid Valve Replacement
- Removal Procedure
-
- Remove the air cleaner assembly. Refer to Air Cleaner Assembly Replacement.
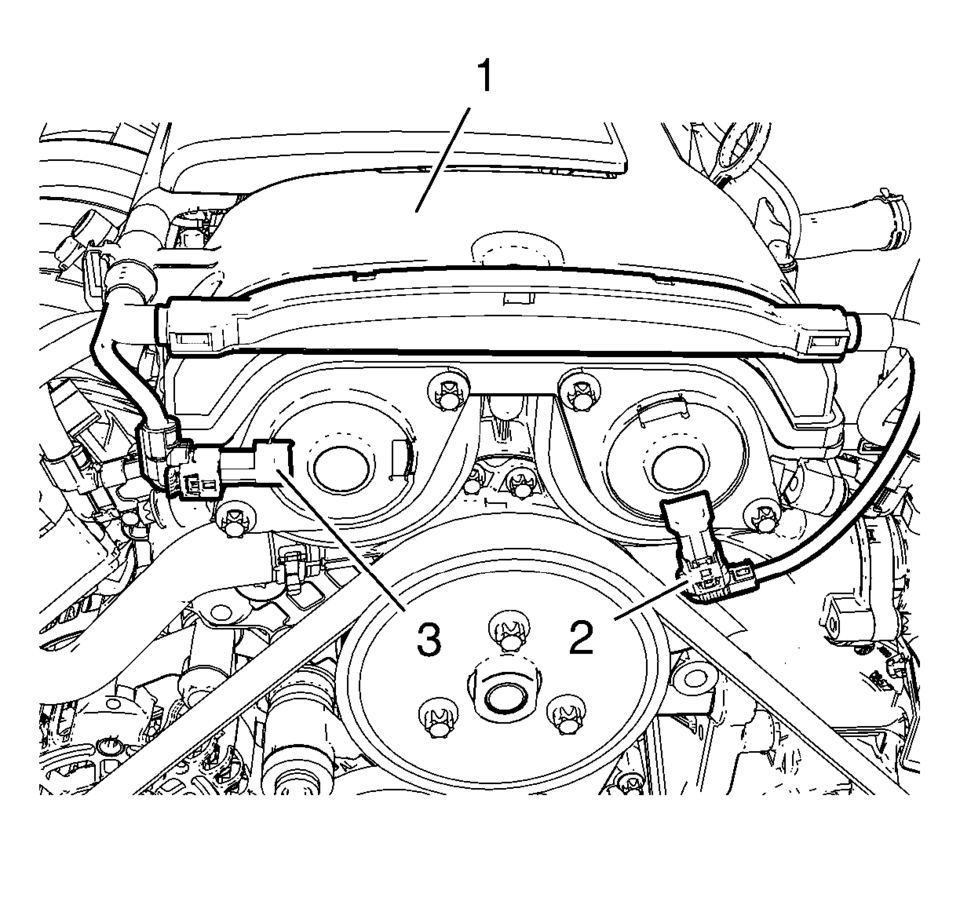
- Disconnect the intake camshaft position actuator solenoid valve wiring harness plug (3).
- Disconnect the exhaust camshaft position actuator solenoid valve wiring harness plug (2).
- Unclip ECM wiring harness (1) from camshaft cover.
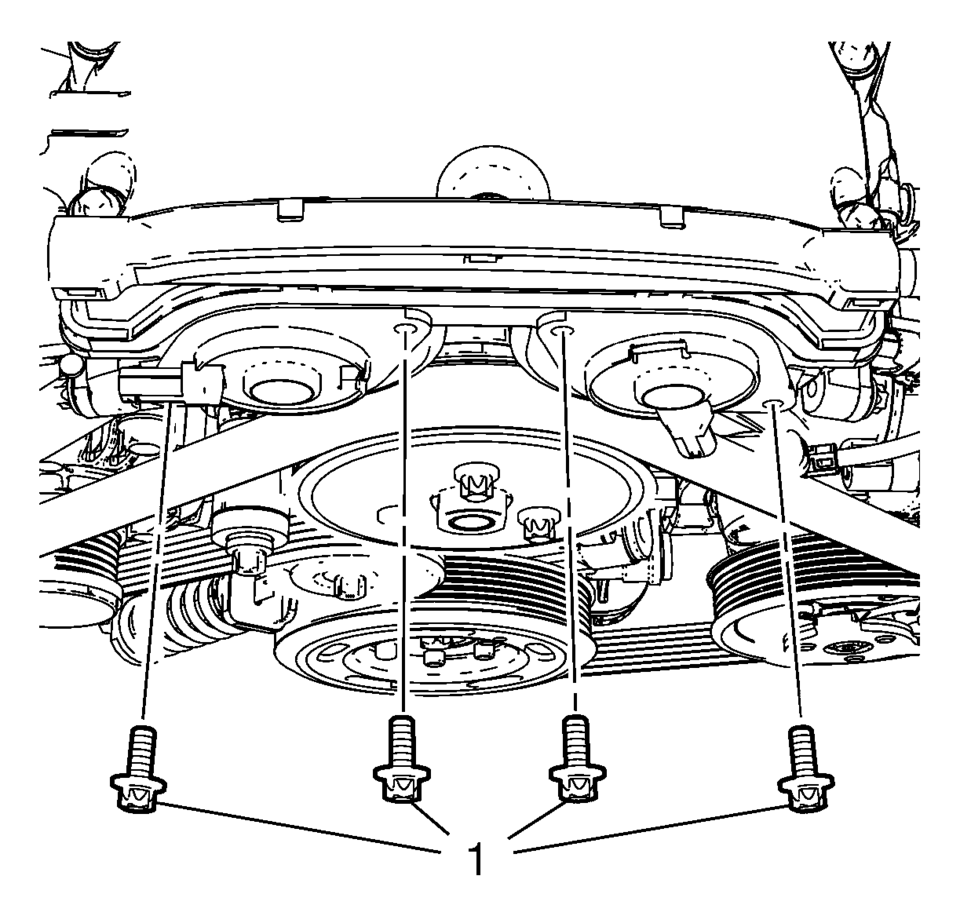
- Remove the 4 camshaft position actuator solenoid valve bolts (1).
- Carefully rotate the intake camshaft position actuator solenoid valve (1) counter clockwise as shown.
- Carefully rotate the exhaust camshaft position actuator solenoid valve (2) clockwise as shown.
- Carefully remove the 2 camshaft position actuator solenoid valves (2) and the seal rings (1).


Caution:
The camshaft position actuator solenoid valves must be kept parallel to the engine front cover during removal and installation. The camshaft position actuator solenoid valves can be damaged if they become wedged or stuck during this process.
- Installation Procedure
-
- Carefully install the 2 camshaft position actuator solenoid valves (2) and the 2 seal rings (1) by gently pressing into position.
- Install the 4 camshaft position actuator solenoid valve bolts (1) and
tighten to 8 Y (71 lb in)
.
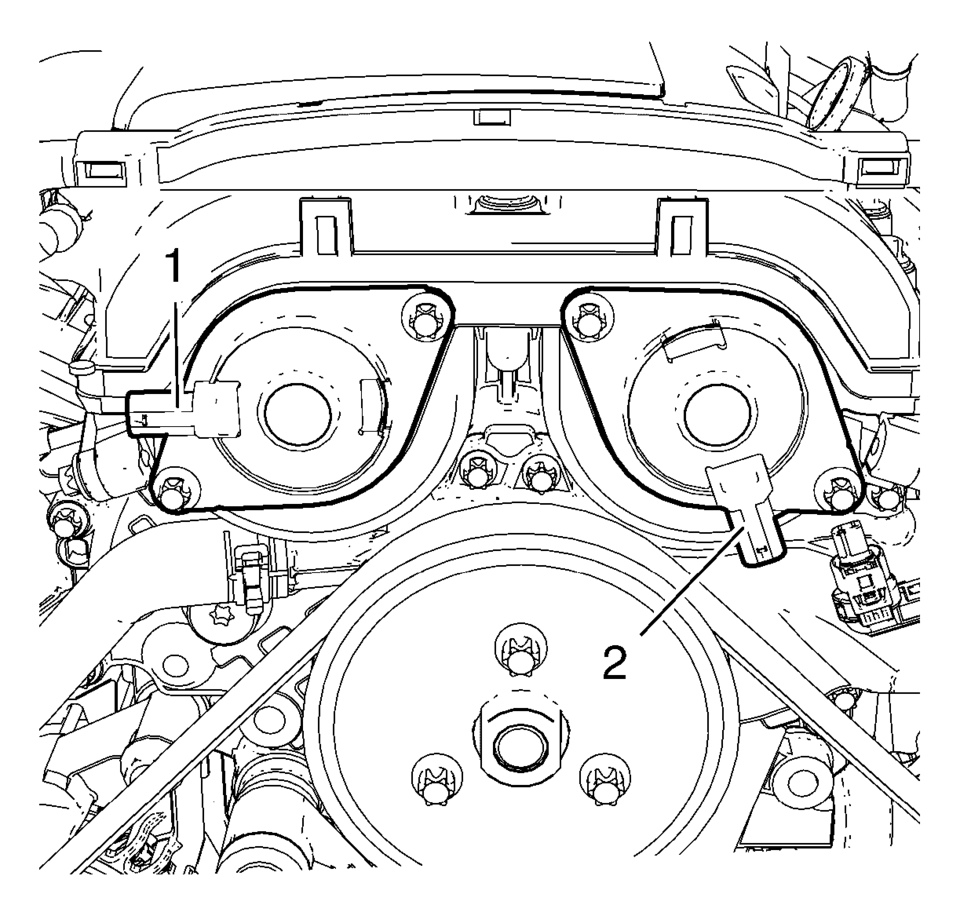
- The 2 camshaft position actuator solenoid valves should be installed in the position as shown (1) and (2).
- Clip ECM wiring harness (1) to camshaft cover.
- Connect the exhaust camshaft position actuator solenoid valve wiring harness plug (2).
- Connect the intake camshaft position actuator solenoid valve wiring harness plug (3).
- Install the air cleaner assembly. Refer to Air Cleaner Assembly Replacement.
Caution:
The camshaft position actuator solenoid valves must be kept parallel to the engine front cover during removal and installation. The camshaft position actuator solenoid valves can be damaged if they become wedged or stuck during this process.
Note:
Lubricate the seal rings with oil in order to make the installation easier.
Caution:
Refer to Fastener Caution.
 Camshaft Actuator System Description
Camshaft Actuator System Overview
(1)
Camshaft Actuator Vane
(2)
Timing Chain Sprocket
(3)
Engine Oil Pressure-For retarding ...
 Charge Air Bypass Regulator Solenoid Valve Replacement
Charge Air Bypass Regulator Solenoid Valve Replacement
Callout
Component Name
1
Charge Air Bypass Regulator Solenoid Val ...
Other materials:
Tire and Wheel Removal and Installation
Special Tools
CH-41013 Rotor Resurfacing Kit
CH-42450-A Wheel Hub Resurfacing Kit
For equivalent regional tools, refer to Special Tools.
Removal Procedure
Raise and support the vehicle. Refer to Lifting and Jacking the Vehicle.
Remove the wheel cover, if equipped.
...
Battery Negative Cable Disconnection and Connection
Battery Negative Cable Disconnection and Connection
Callout
Component Name
Preliminary Procedures
Turn on the radio and record all of the radio pre-set stations.
Ensure that all lamps and accessories are turned off.
Tu ...
Engine Oil Cooler Coolant Inlet Hose Replacement (LUV)
Engine Oil Cooler Coolant Inlet Hose Replacement
Callout
Component Name
Preliminary Procedure
Open the hood.
Drain the cooling system. Refer to Cooling System Draining and Filling.
1
Oil Coo ...

0.0088