Chevrolet Sonic Repair Manual: Rear Side Door Window Replacement (Hatchback)
|
Callout |
Component Name |
|---|---|
|
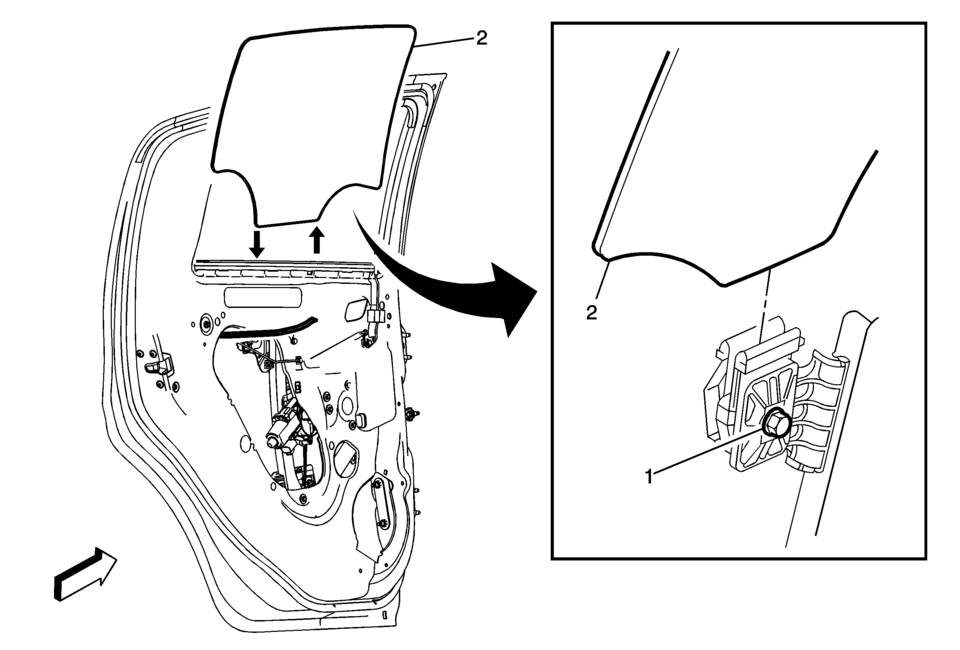
Warning: Refer to Glass and Sheet Metal Handling Warning.
|
|
|
1 |
Rear Side Door Window Guide Nut (Qty:?€‰2) Caution: Refer to Fastener Caution.
11?€‰Y?€‰(97?€‰lb?€‰in) |
|
2 |
Rear Side Door Window Procedure
|
 Rear Side Door Window Rear Guide Replacement
Rear Side Door Window Rear Guide Replacement
Callout
Component Name
Preliminary Procedure
Remove the rear side door trim panel. ...
 Rear Side Door Window Replacement (Sedan)
Rear Side Door Window Replacement
Callout
Component Name
Warning: Refer to Glass and Sheet Metal Handling Warning.
...
Other materials:
Starter Switch Check
Warning
When you are doing this inspection, the vehicle could move suddenly. If the
vehicle moves, you or others could be injured.
1. Before starting this check, be sure there is enough room around the vehicle.
2. Apply both the parking brake and the regular brake.
Do not use the accelerator p ...
Thrust Washer and Bearing Cleaning and Inspection
Warning: Wear safety glasses to avoid injury when using compressed
air or any cleaning solvent. Bodily injury may occur if fumes are inhaled
or if skin is exposed to chemicals.
Caution: Do not allow the bearings to spin. Turn them slowly by
hand. Spinning the beari ...
System operation
The Nissan Armada TSR system is capable of recognizing and displaying key traffic
signs, including the following:
Latest detected speed limit
No passing zone indication
CAUTION
The TSR system in the Nissan Armada is designed to assist, not replace,
attentive driving. Always ...

0.0075