Chevrolet Sonic Repair Manual: Seat Belt Latch Stop Installation
|
Callout |
Component Name |
|---|---|
Preliminary Procedure
|
|
|
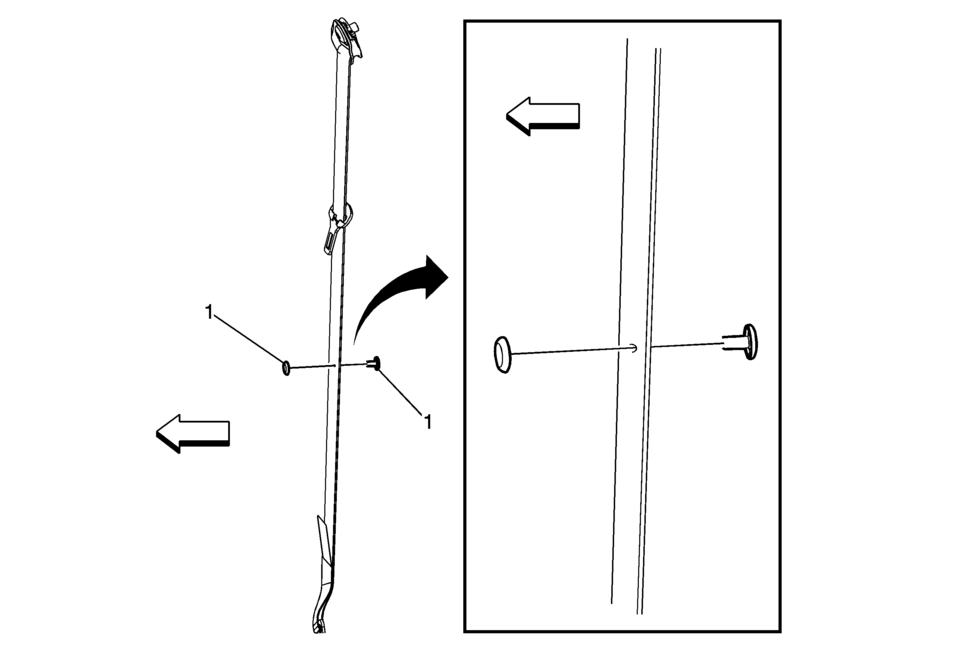
1 |
Seat Belt Stop Button Procedure
Tip: Ensure the male half of the stop button is facing forward in the vehicle in order to ensure the stop button will not snag customers clothing. |
 SIR Seatbelt Pretensioner Handling Warning
Warning: When carrying an undeployed inflatable restraint seat belt
retractor pretensioner:
Do not carry the seat belt pretensioner by the seat belt webbing or
pigtail connector, if e ...
 Seat Belt Service Precautions
Note: If the vehicle has been in a collision, refer to Repairs
and Inspections Required After a Collision for additional information.
Do not bleach or dye the seat belt webbing. Us ...
Other materials:
When to Change Engine Oil
This vehicle has a computer system that indicates when to change the engine oil
and filter. This is based on a combination of factors which include engine revolutions,
engine temperature, and miles driven. Based on driving conditions, the mileage at
which an oil change is indicated can vary co ...
Cigarette Lighter Receptacle Replacement
Special Tools
EL-42059 Cigar Lighter Socket Remover .
For equivalent regional tools. Refer to Special Tools
Removal Procedure
Remove the auxiliary power outlet fuse from the fuse block.
Remove the receptacle:
Look into the receptacle(2). There are two 3?€‰m ...
2-6 Clutch Piston Removal
2-6 Clutch Piston Removal
Callout
Component Name
1
2? Clutch Spring Retainer
Special Tool
DT-28585 Snap Ring Remover or equivalent
For equivalent regional tools, refer to Special
Tools.
2 ...

0.005