Chevrolet Sonic Repair Manual: Selector and Shift Lever Cable Bracket Replacement
- Removal Procedure
-
- Remove the battery tray. Refer to Battery Tray Replacement.
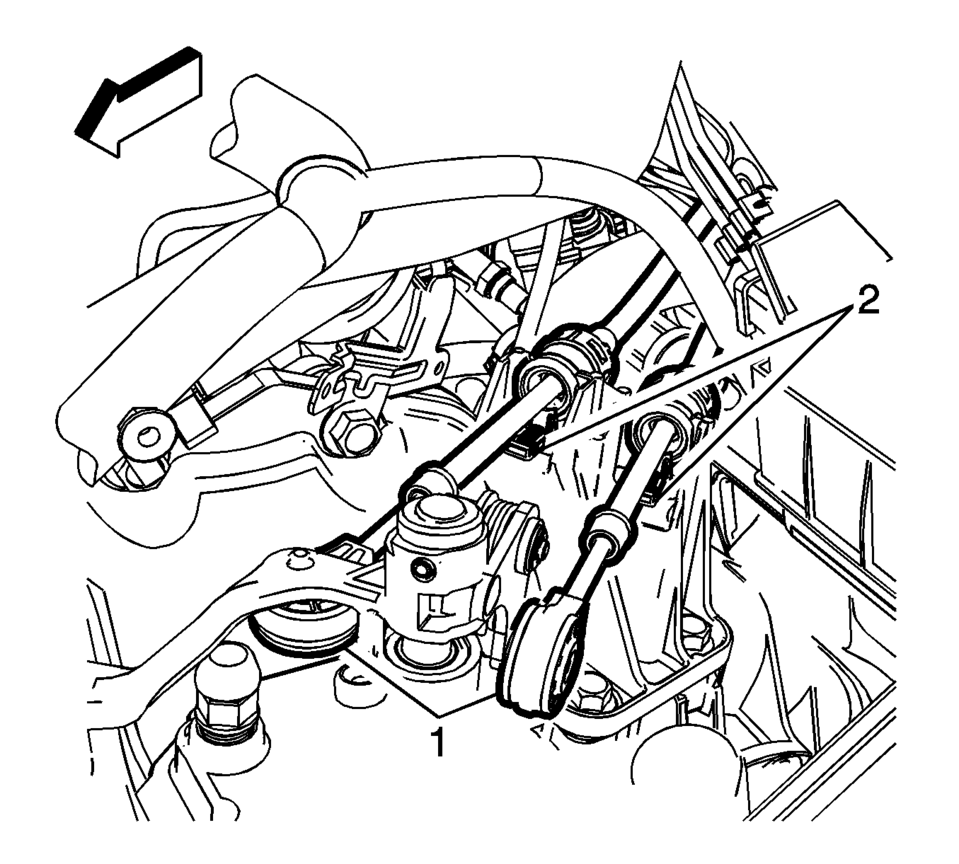
- Disconnect the shift lever and selector lever cable end (1) from the transmission shift lever and selector lever.
- Pull the cable retainers (2) to release the shift lever and selector lever cable from the shift lever and selector lever cable bracket.
- Disconnect the shift lever and selector lever cable from the shift lever and selector lever cable bracket.
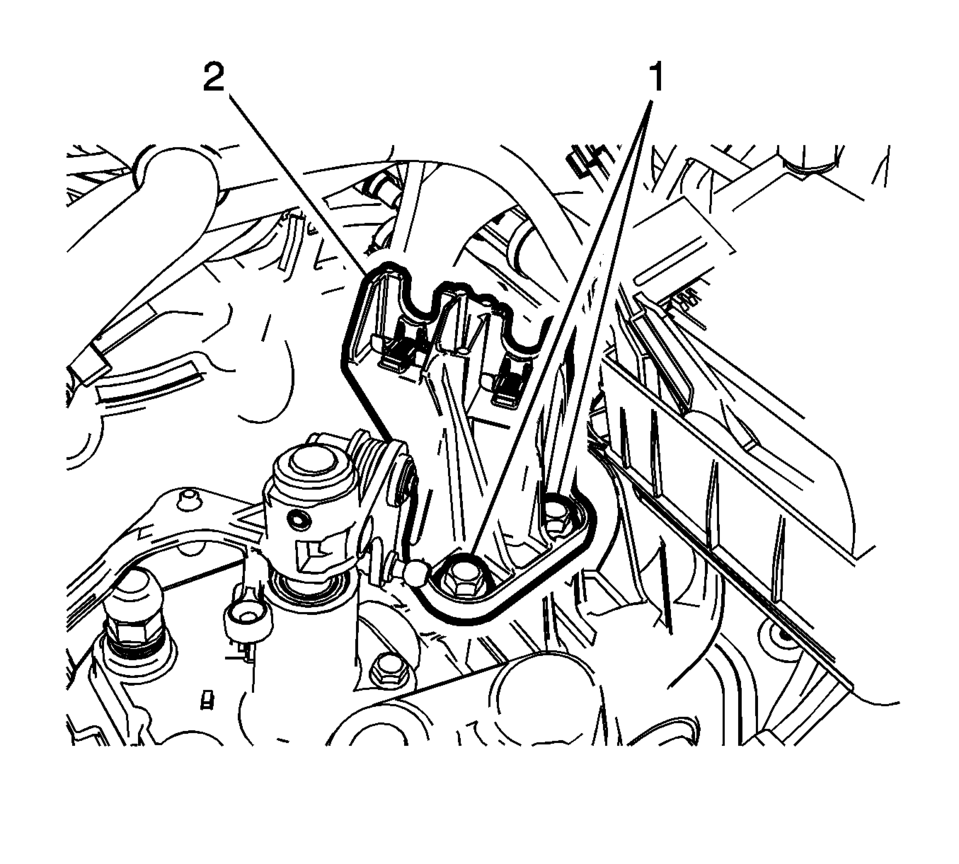
- Remove the 2 shift lever and selector lever cable bracket fasteners (1).
- Remove the shift lever and selector lever cable bracket (2) from the transmission.
- Installation Procedure
-
- Position the shift lever and selector lever cable bracket (2) on the transmission.
- Install the 2 shift lever and selector lever cable
bracket fasteners (1) and tighten to 58 Y
(43 lb ft)
.
- Connect the shift lever and selector lever cable ends (1) to the transmission shift lever and selector lever.
- Pull the cable retainers (2), then position the shift lever and selector lever cable in the shift lever and selector lever cable bracket.
- Release the cable retainers (2) to connect the shift lever and selector lever cable to the shift lever and selector lever cable bracket.
- Adjust the shift lever and selector lever cables. Refer to Manual Transmission Shift Lever and Selector Lever Cable Adjustment.
- Install the battery tray. Refer to Battery Tray Replacement.
- Verify correct operation of the transmission control assembly.
Caution:
Refer to Fastener Caution.
 Manual Transmission Shift Lever and Selector Lever Cable Replacement
Removal Procedure
Remove the battery tray. Refer to
Battery Tray Replacement.
\i
Disconnect the shift lever and selector cable ends (1)
from the transmission s ...

Other materials:
Paint Gauges
Paint thickness gauges measure the total thickness of the vehicle finish. It
is important to accurately measure the thickness of the finish on each vehicle as
the thickness of the finish will vary on each vehicle. Use a paint gauge before
the sanding process in order to accurately measure how ...
Roof Rail Rear Assist Handle Replacement
Roof Rail Rear Assist Handle Replacement
Callout
Component Name
1
Roof Rail Rear Assist Handle Fastener (Qty:?€‰2)
Caution: Refer to Fastener Caution.
Procedure
Fold the assist handle downward an ...
Emergency Call (SOS) button
Emergency support
Basic information
In the Nissan Armada, NissanConnect Services provide a comprehensive range of
emergency assistance features designed to support both the driver and passengers
in critical situations.
For instance, in the event of illness, injury, or any emergency scenario, ...

0.0052