Chevrolet Sonic Repair Manual: Transmission Fluid Drain and Fill
- Draining Procedure
-
Note:
- The fluid check bolt at the front of the transmission may not be opened.
- The transmission fluid drained out during the pre-delivery inspection
may be re-used. New transmission fluid must be used during servicing
work.
The transmission fluid must be brought up to operating temperature before draining.
- Raise and support the vehicle. Refer to Lifting and Jacking the Vehicle.
- Remove the drivetrain and front suspension frame skid plate, if equipped. Refer to Drivetrain and Front Suspension Frame Skid Plate Replacement.
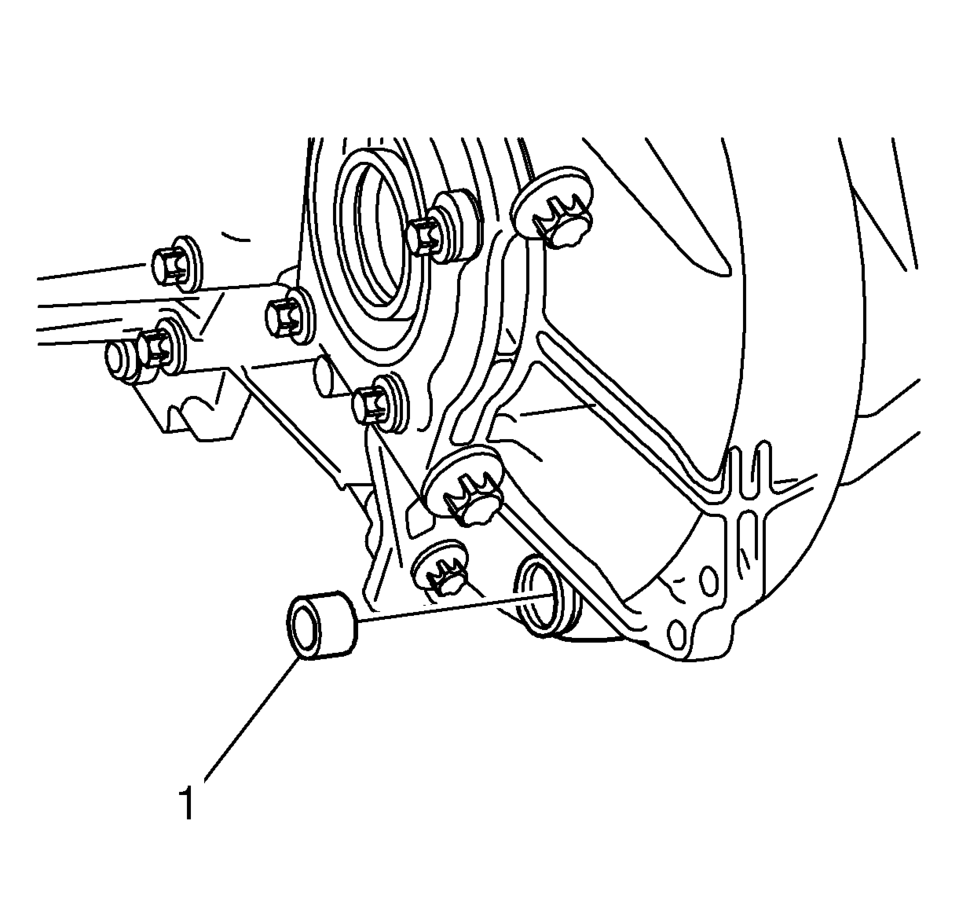
- Clean away all dirt and debris from the transmission fluid drain fastener area.
- Position an appropriate container under the transmission.
- Remove the transmission fluid drain fastener (1).
- Allow the transmission fluid to drain into the container.
- Install a new transmission fluid drain fastener and
tighten to 20 Y (15 lb ft)
.
- Remove the container used to catch the used transmission fluid from under the vehicle.
- Install the drivetrain and front suspension frame skid plate, if equipped. Refer to Drivetrain and Front Suspension Frame Skid Plate Replacement.
Caution:
Refer to Fastener Caution.
- Filling Procedure
-
- Lower the vehicle.
- Remove the engine control module with the bracket from the battery tray. Refer to Engine Control Module Replacement for the 1.2L or 1.4L engine, or Engine Control Module Replacement for the 1.6L or 1.8L engine.
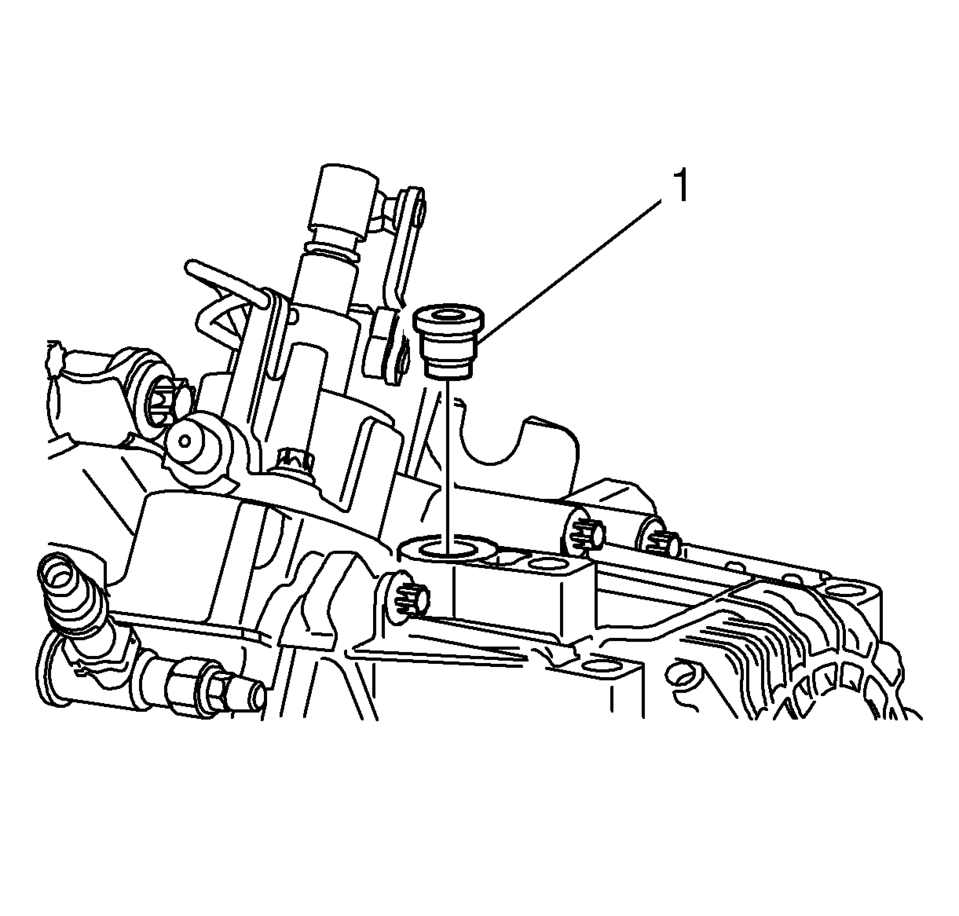
- Clean away all dirt and debris from the transmission fluid fill fastener area.
- Remove the transmission fluid fill fastener (1).
- Fill the transmission with the appropriate amount of fluid. Refer to Fluid and Lubricant Recommendations and Manual Transmission Specifications.
- Install a new transmission fluid fill fastener and
tighten to 30 Y (22 lb ft)
.
- Install the engine control module with the bracket to the battery tray. Refer to Engine Control Module Replacement for the 1.2L or 1.4L engine, or Engine Control Module Replacement for the 1.6L or 1.8L engine.
 Transmission Control Replacement
Transmission Control Replacement
Callout
Component Name
Preliminary Procedures
Remove the front floor console. Refer to
Front F ...
 Transmission Fluid Level and Condition Check
Removal Procedure
Raise and support the vehicle. Refer to
Lifting and Jacking the Vehicle
Remove the front suspension skid plate, if equipped.
Refer to Drivetrain and Front Sus ...
Other materials:
Using the Tire Sealant and Compressor Kit to Temporarily Seal and Inflate a
Punctured Tire
When using the tire sealant and compressor kit during cold temperatures, warm
the kit in a heated environment for five minutes. This will help to inflate the
tire faster.
If a tire goes flat, avoid further tire and wheel damage by driving slowly to
a level place. Turn on the hazard warning fl ...
Sunroof Air Deflector Replacement
Sunroof Air Deflector Replacement
Callout
Component Name
Preliminary Procedure
Remove the sunroof module. Refer to Sunroof Module Assembly Replacement.
1
Sunroof Air Deflector
Tip: Cycle ...
Seat Adjustment
Manual Seats
Warning: You can lose control of the vehicle if you try to adjust
a driver seat while the vehicle is moving. Adjust the driver seat only when
the vehicle is not moving.
To adjust a manual seat:
Pull the handle at the front of the seat.
Slide the ...

0.0051