Chevrolet Sonic Repair Manual: Transmission Mount Bracket Replacement - Rear
- Removal Procedure
-
- Raise and support the vehicle. Refer to Lifting and Jacking the Vehicle.
- Remove the front suspension skid plate, if equipped. Refer to Drivetrain and Front Suspension Frame Skid Plate Replacement.
- Using a suitable jack stand, support the rear of the powertrain.
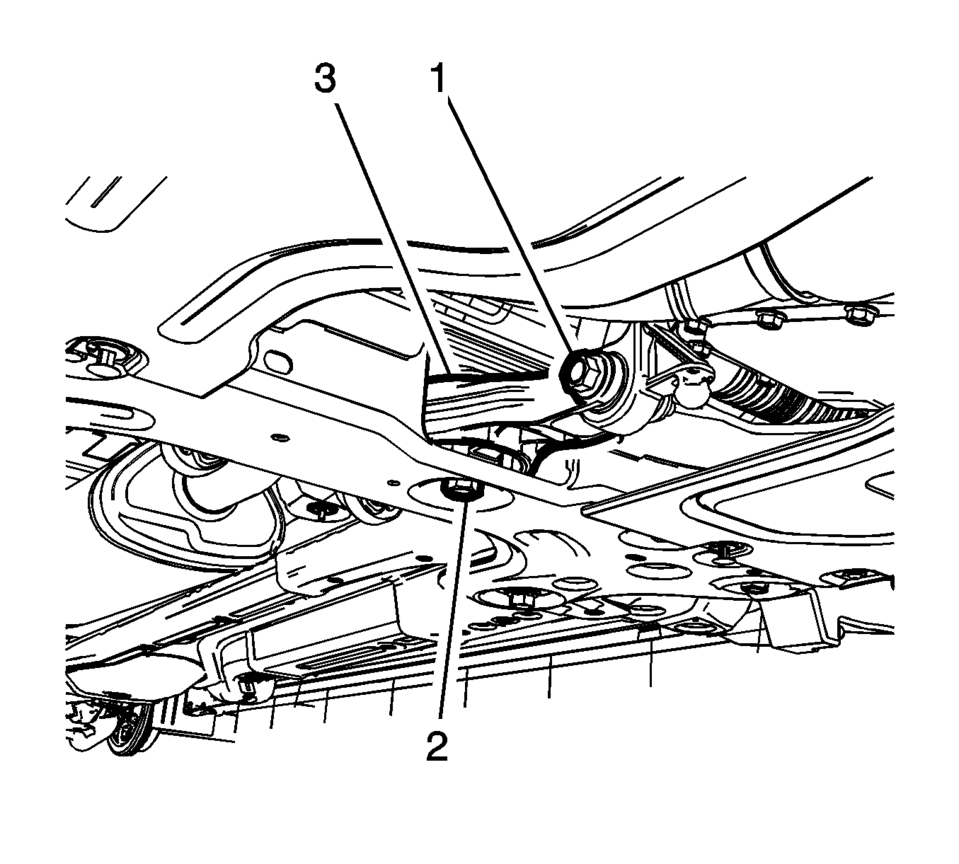
- Remove and DISCARD the transmission rear mount to bracket through bolt (1).
- Remove and DISCARD the transmission rear mount bracket bolts (1).
- Remove the transmission rear mount bracket (2).
- Installation Procedure
-
- Install the transmission rear mount bracket (2).
- Install the NEW transmission rear mount bracket bolts (1)
and tighten to 100 Y (74 lb ft) plus 30?5 degrees
.
- Install the NEW transmission rear mount to bracket
through bolt (1) and tighten to 80 Y (59 lb ft)
plus 45?0 degrees
.
- Remove the jack stand.
- Install the front suspension skid plate, if equipped. Refer to Drivetrain and Front Suspension Frame Skid Plate Replacement.
- Lower the vehicle.
Caution:
Refer to Fastener Caution.
 Transmission Mount Bracket Replacement - Left Side
Removal Procedure
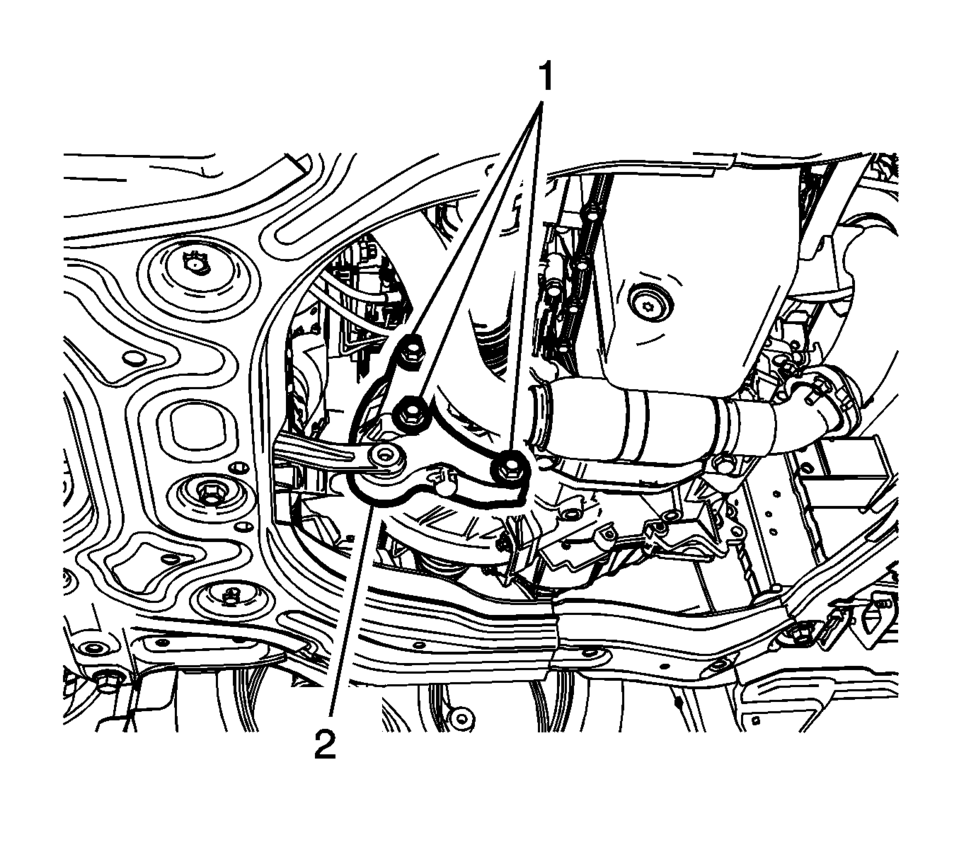
Remove the left transmission mount. Refer to
Transmission Mount Replacement - Left Side.
Remove the three left transmission mount bracket to
tr ...
 Transmission Mount Replacement - Left Side
Removal Procedure
Remove the battery tray. Refer to
Battery Tray Replacement.
Install the engine support fixture. Refer to
Engine Support Fixture.
Remove and DIS ...
Other materials:
Rear Door Lock Cylinder Replacement
Rear Door Lock Cylinder Replacement
Callout
Component Name
1
Rear Side Door Lock Cylinder Opening Cover Screw Access Plug
Tip: Use a flat-bladed tool to remove the cover.
2
Rear ...
Rear Side Door Window Regulator Motor Replacement
Rear Side Door Window Regulator Motor Replacement
Callout
Component Name
Warning: Refer to Glass and Sheet Metal Handling Warning.
Preliminary Procedure
Remove the rear side door window regulator. Refer to Rear ...
Relay Replacement (Attached to Wire Harness)
Removal Procedure
Locate the relay. Refer to the Master Electrical Component List to locate
the relay in the vehicle.
Remove any fasteners which hold the relay in place.
Remove any connector position assurance (CPA) devices or secondary locks.
Note: Use care w ...

0.0074