Chevrolet Sonic Repair Manual: Transmission Mount Bracket Replacement - Left Side
- Removal Procedure
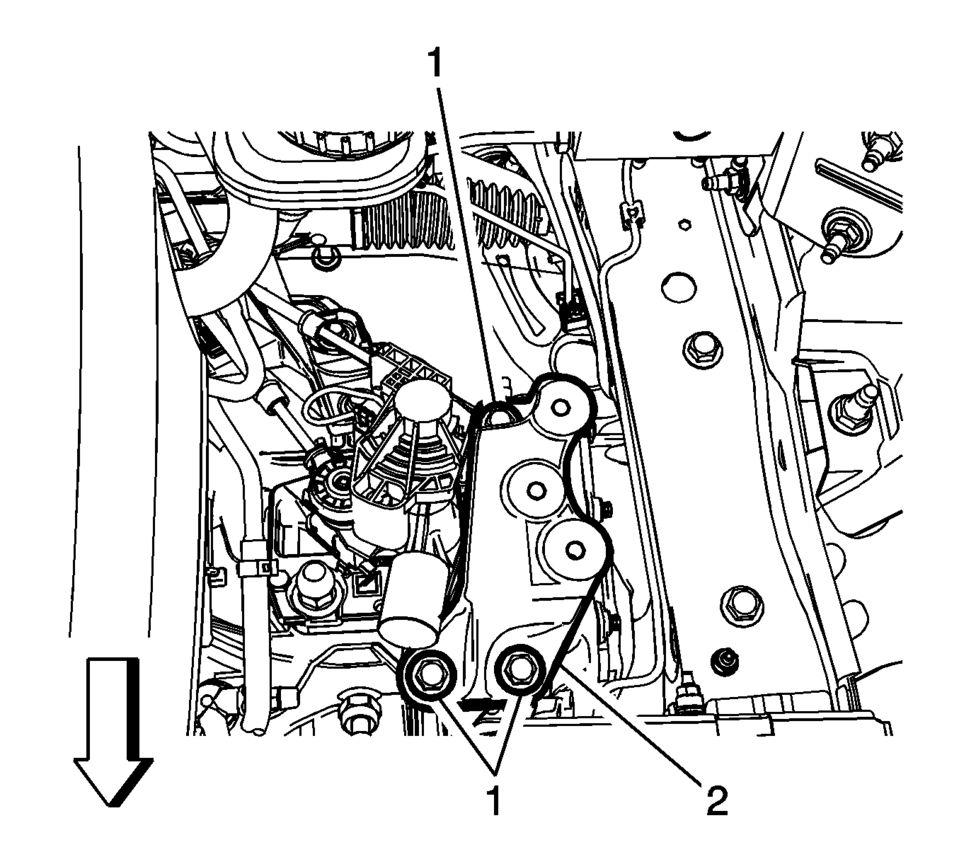
-
- Remove the left transmission mount. Refer to Transmission Mount Replacement - Left Side.
- Remove the three left transmission mount bracket to transmission bolts (1).
- Remove the left transmission mount bracket (2) from the transmission.
- Installation Procedure
-
- Install the left transmission mount bracket (2) to the transmission.
- Install the left transmission mount bracket to transmission
bolts (1) and tighten to 62 Y (46 lb ft)
.
- Install the left transmission mount. Refer to Transmission Mount Replacement - Left Side.
Caution:
Refer to Fastener Caution.
 Transmission Identification Information
mmmmmmmmmmm1c
The code for the M32-6 transmission will be found on the back of the transmission
housing, above the axle shaft. In addition, an Alphacode sticker will be placed
on the cover of t ...
 Transmission Mount Bracket Replacement - Rear
Removal Procedure
Raise and support the vehicle. Refer to
Lifting and Jacking the Vehicle.
Remove the front suspension skid plate, if equipped.
Refer to Drivetrain and Front Su ...
Other materials:
Roof
Sunroof
On vehicles with this feature, the sunroof only operates when the ignition is
turned to ON/RUN or Retained Accessory Power (RAP) is active.
Open/Close: To open the sunroof, press and hold the rear of the switch. To close
the sunroof, press and hold the front of the switch.
Vent: Pre ...
Checking Engine Oil
It is a good idea to check the engine oil level at each fuel fill. In order to
get an accurate reading, the oil must be warm and the vehicle must be on level ground.
The engine oil dipstick handle is a loop. See Engine Compartment Overview for the location of the engine oil dipstick.
1. I ...
Engine Front Cover with Oil Pump Replacement
Removal Procedure
Disconnect the battery negative cable. Refer to Battery Negative Cable
Disconnection and Connection.
Set the engine to TDC. Refer to Camshaft Timing Chain Inspection.
Raise and support the vehicle. Refer to Lifting and Jacking the Vehicle.
Remove ...

0.005