Chevrolet Sonic Repair Manual: Transmission Mount Bracket Replacement - Rear
- Removal Procedure
-
- Raise and support the vehicle. Refer to Lifting and Jacking the Vehicle.
- Remove the front suspension skid plate, if equipped. Refer to Drivetrain and Front Suspension Frame Skid Plate Replacement.
- Using a suitable jack stand, support the rear of the powertrain.
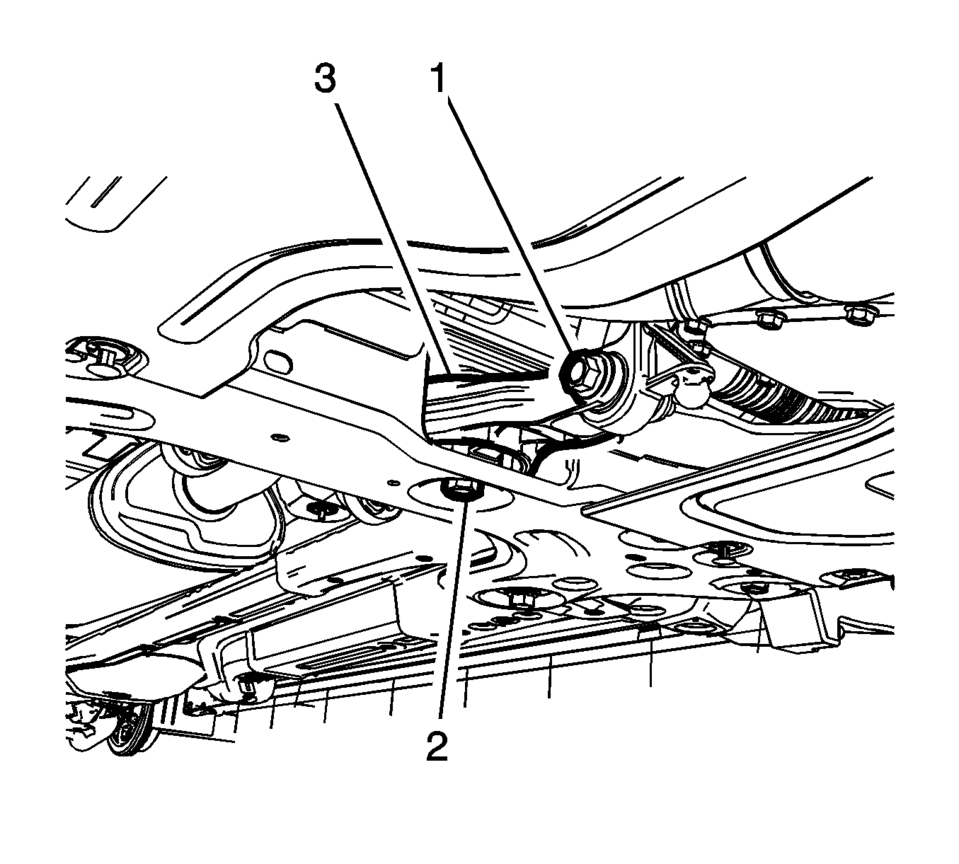
- Remove and DISCARD the transmission rear mount to bracket through bolt (1).
- Remove and DISCARD the transmission rear mount bracket bolts (1).
- Remove the transmission rear mount bracket (2).
- Installation Procedure
-
- Install the transmission rear mount bracket (2).
- Install the NEW transmission rear mount bracket bolts (1)
and tighten to 100 Y (74 lb ft) plus 30?5 degrees
.
- Install the NEW transmission rear mount to bracket
through bolt (1) and tighten to 80 Y (59 lb ft)
plus 45?0 degrees
.
- Remove the jack stand.
- Install the front suspension skid plate, if equipped. Refer to Drivetrain and Front Suspension Frame Skid Plate Replacement.
- Lower the vehicle.
Caution:
Refer to Fastener Caution.
 Transmission Mount Bracket Replacement - Left Side
Removal Procedure
Remove the left transmission mount. Refer to
Transmission Mount Replacement - Left Side.
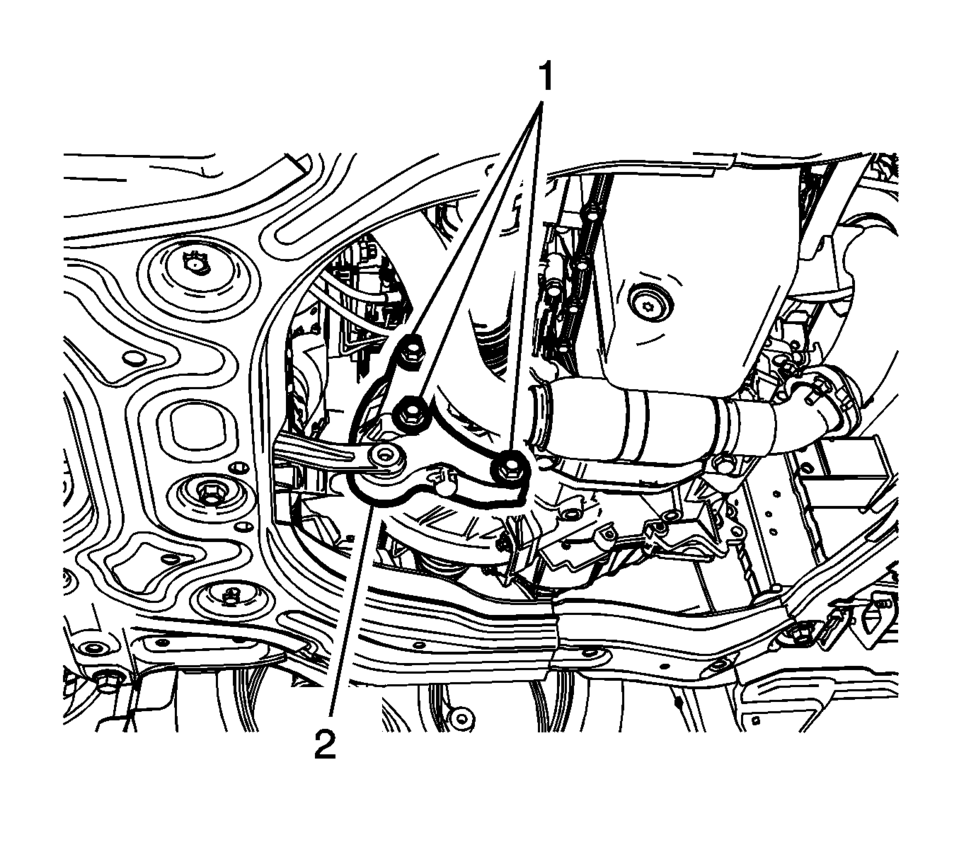
Remove the three left transmission mount bracket to
tr ...
 Transmission Mount Replacement - Left Side
Removal Procedure
Remove the battery tray. Refer to
Battery Tray Replacement.
Install the engine support fixture. Refer to
Engine Support Fixture.
Remove and DIS ...
Other materials:
Forward Collision Alert (FCA) System
For vehicles with FCA, this system is intended to help avoid or reduce the harm
caused by front-end crashes. FCA provides a flashing visual alert and beeps when
approaching a vehicle directly ahead too quickly. FCA also provides a visual alert
if following another vehicle much too closely. The ...
Drunk Driving
Death and injury associated with drinking and driving is a global tragedy.
Warning
Drinking and then driving is very dangerous. Your reflexes, perceptions, attentiveness,
and judgment can be affected by even a small amount of alcohol. You can have a serious
— or even fatal — collision if y ...
Intake Air Pressure and Temperature Sensor Replacement
Intake Air Pressure and Temperature Sensor Replacement
Callout
Component Name
Preliminary Procedure
Remove the left front wheelhouse liner. Refer to
Front Wheelhouse Liner Replacement.
1
Intake A ...

0.0047