Chevrolet Sonic Repair Manual: 3-5-Reverse and 4-5-6 Clutch Fluid Seal Ring Replacement (Gen 1)
|
Callout |
Component Name |
|---|---|
|
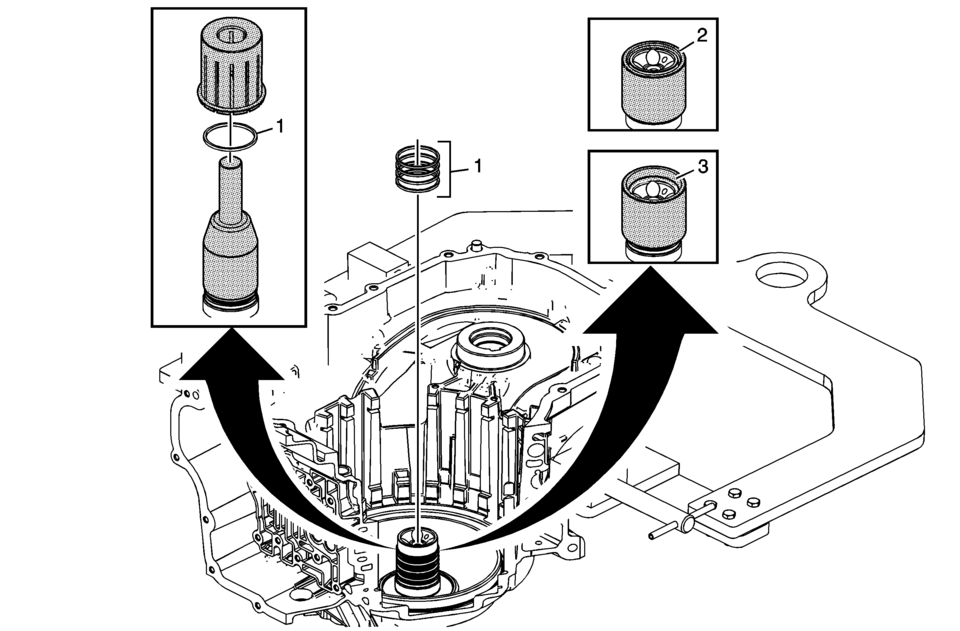
Special Tools
DT-46620 Seal Installer For equivalent regional tools, refer to Special Tools. |
|
|
1 |
3? Reverse and 4?? Clutch Fluid Seals (Qty: 4) Procedure
|
|
2 |
Small Chamfer Up Caution: Do not force the seal installer down over the seals as this will roll and damage the seals. The large chamfer is designed to fit over the over stretched seal. Use a hand to help shrink the seal if the seal installer is difficult to install over the seal rings. Procedure
Install DT-46620-1 which is part of DT-46620 seal installer with the large chamfer end down over the fluid seal rings and leave DT-46620-1 which is part of DT-46620 seal installer on the seals for at least 60 seconds. |
|
3 |
Large Chamfer Up Procedure
|
 2-6 Clutch Piston Removal
2-6 Clutch Piston Removal
Callout
Component Name
1
2? Clutch Spring Retainer
Special Tool
DT-28585 Snap Ring Remo ...
 3-5-Reverse and 4-5-6 Clutch Fluid Seal Ring Replacement (Gen 2)
3-5-Reverse and 4-5-6 Clutch Fluid Seal Ring Replacement
Callout
Component Name
Special Tools
DT-46620 Seal Installer
For e ...
Other materials:
Tire Rotation and Required Services Every 12 000 km/ 7,500 mi
Rotate the tires, if recommended for the vehicle, and perform the following services.
See Tire Rotation.
Check engine oil level and oil life percentage. If needed, change engine
oil and filter, and reset oil life system. See Engine Oil and Engine
Oil Life System.
Check engine coo ...
Rail Dust Damage Repair
Warning: Refer to Eye Protection Warning.
Note: If rail dust has penetrated into the basecoat, the panel requires
refinishing. Ensure all the rail dust has been removed prior to refinishing
or the rust spots will return.
Rail dust damage comes from the tiny iron particles produce ...
Oil Level Indicator and Tube Removal
Remove the oil dipstick.
Remove the oil level indicator tube bolt (1).
Note: If the engine oil level is at the maximum level, oil may
emerge while removing the oil dipstick guide tube.
Remove the oil level indicator tube (2) and oil level indicator seal.
...

0.0097