Chevrolet Sonic Repair Manual: 3-5-Reverse and 4-5-6 Clutch Fluid Seal Ring Replacement (Gen 2)
|
Callout |
Component Name |
|---|---|
|
Special Tools
DT-46620 Seal Installer For equivalent regional tools, refer to Special Tools. |
|
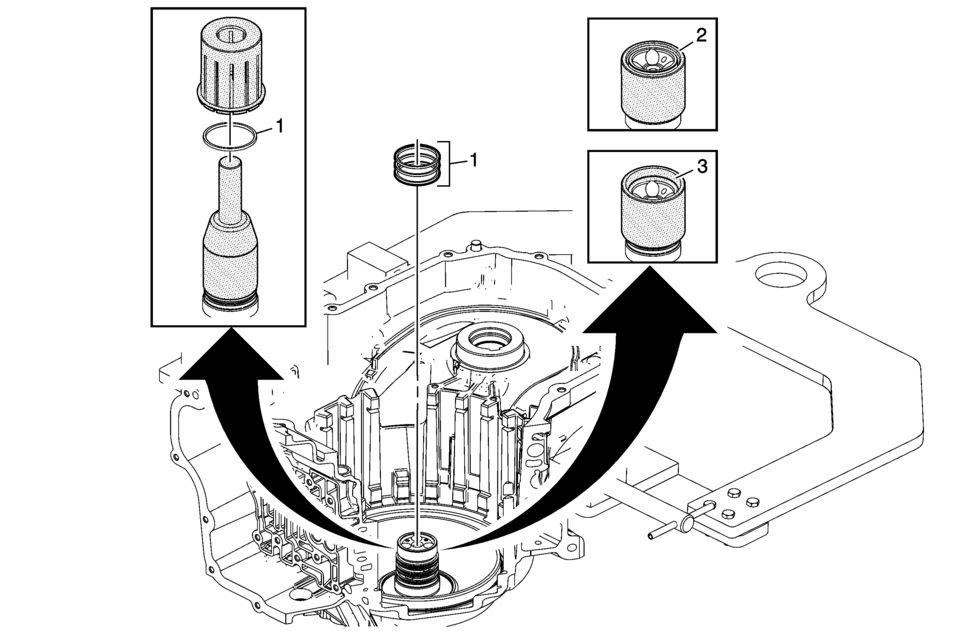
|
1 |
3? Reverse and 4?? Clutch Fluid Seals (Qty: 3) Procedure
|
|
2 |
Small Chamfer Up Caution: Do not force the seal installer down over the seals as this will roll and damage the seals. The large chamfer is designed to fit over the over stretched seal. Use a hand to help shrink the seal if the seal installer is difficult to install over the seal rings. Procedure
Install DT-46620-1 which is part of DT-46620 seal installer with the large chamfer end down over the fluid seal rings and leave DT-46620-1 which is part of DT-46620 seal installer on the seals for at least 60 seconds. |
|
3 |
Large Chamfer Up Procedure
|
 3-5-Reverse and 4-5-6 Clutch Fluid Seal Ring Replacement (Gen 1)
3-5-Reverse and 4-5-6 Clutch Fluid Seal Ring Replacement
Callout
Component Name
Special Tools
DT-46620 Seal Installer
For e ...
 3-5-Reverse and 4-5-6 Clutch Housing Assemble (6T30/40/45/50 - Gen 2)
Table 1:
4?? Clutch Piston Installation
Table 2:
4?? Clutch Fluid Dam Installation
Table 3:
3? Reverse Clutch Plates Installation
Table 4:
Reluctor Wh ...
Other materials:
Heated Seats Description and Operation
Heated Seat Components
The driver and passenger heated seats each consist of the following components:
Left heated seat switch
Right heated seat switch
HVAC control module
Seat heating control module
Seat cushion heating element
Seat back heating element
Seat cushion ...
Rear Brake Hose Replacement (Body to Axle - Disc Brake)
Removal Procedure
Warning: Refer to Brake Dust Warning.
Warning: Refer to Brake Fluid Irritant Warning.
Raise and support the vehicle. Refer to Lifting and Jacking the Vehicle.
Remove the tire and wheel assembly. Refer to Tire and Wheel Removal
and Install ...
2-6 Clutch Piston Installation (6T40/45/50)
2-6 Clutch Piston Installation
Callout
Component Name
1
2?E Clutch Piston Assembly
Note:
Position the 2?E piston air bleed and large slot toward the
top of the case.
DT-47796 seal protector ...

0.0069