Chevrolet Sonic Repair Manual: Air Conditioning Compressor and Condenser Hose Replacement (LUW)
- Removal Procedure
-
- Recover the refrigerant. Refer to Refrigerant Recovery and Recharging.
- Disconnect the A/C refrigerant pressure sensor electrical connector.
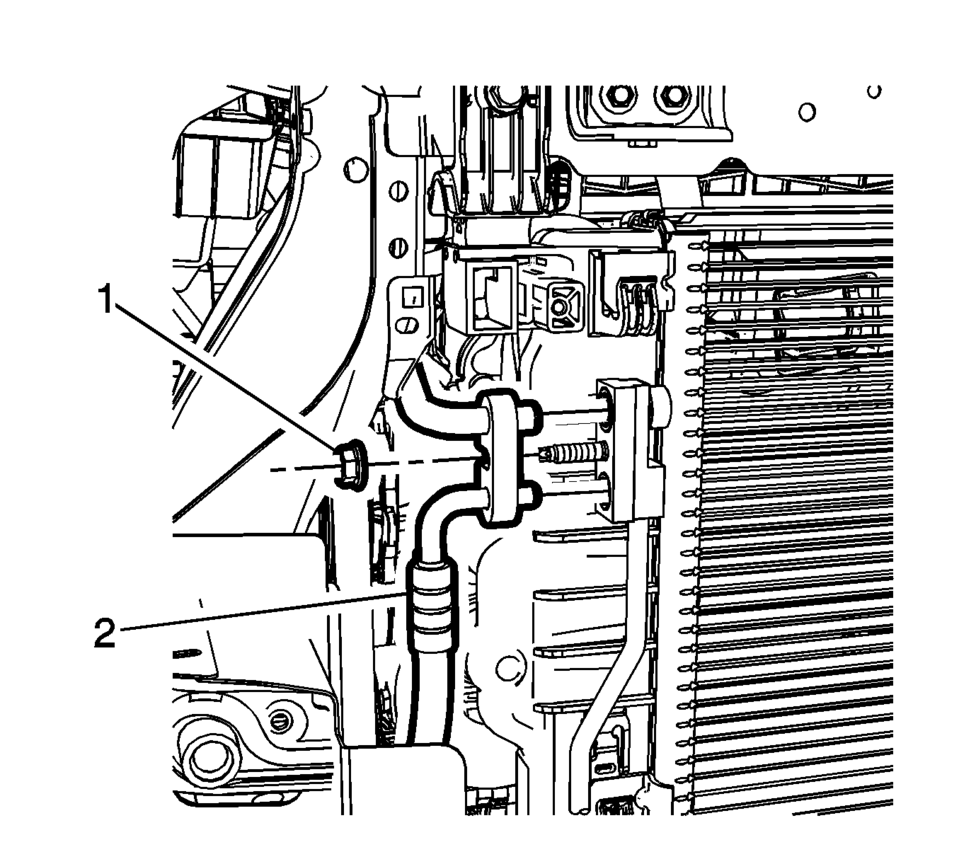
- Remove air conditioning compressor and condenser hose nut (1).
- Remove air conditioning compressor and condenser hose (2) from A/C condenser.
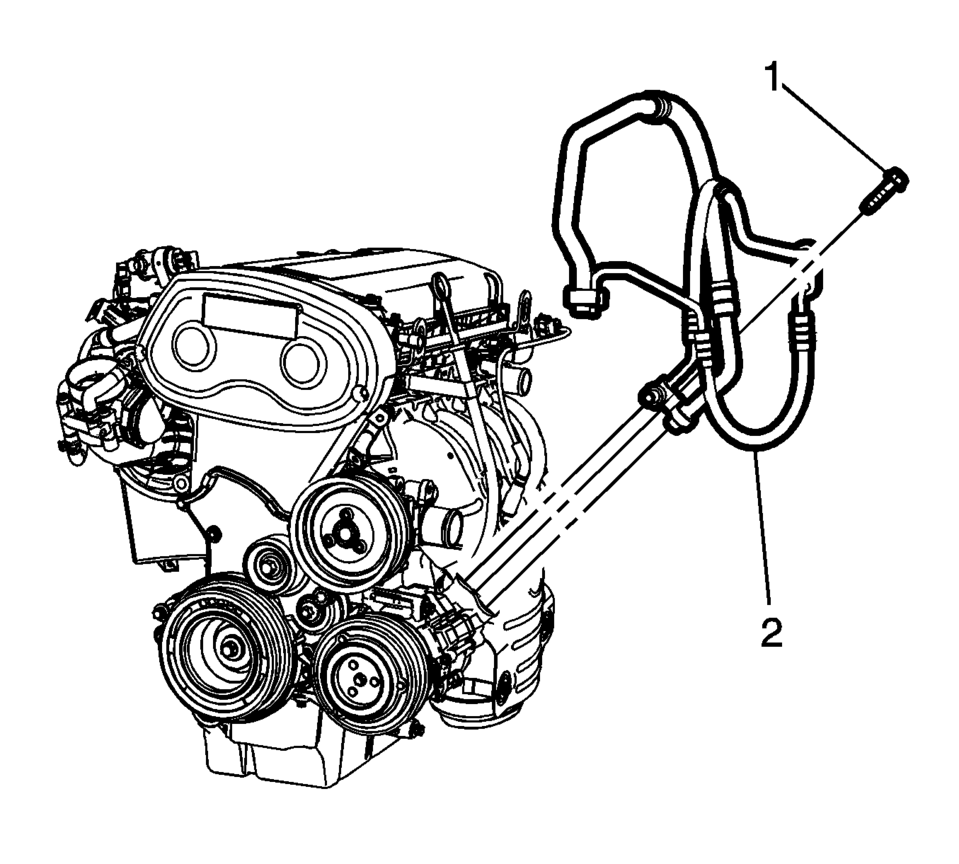
- Remove A/C compressor and condenser hose bolt (1).
- Remove A/C compressor and condenser hose (2) from A/C compressor.
- Remove air conditioning compressor and condenser hose nut (1).
- Remove air conditioning compressor and condenser hose (2) from refrigerant hose.
- Remove air conditioning compressor and condenser hose from the vehicle.

- Installation Procedure
-
- Install air conditioning compressor and condenser hose.
- Install air conditioning compressor and condenser hose (2) to the refrigerant hose.
- Install air conditioning compressor and condenser hose nut (1). Tighten
nut to 22 Y (16 lb ft)
.
- Install air conditioning compressor and condenser hose (2) to the A/C compressor.
- Install air conditioning compressor and condenser hose bolt (1). Tighten
bolt to 22 Y (16 lb ft)
.
- Install air conditioning compressor and condenser hose (2) to the A/C condenser.
- Install air conditioning compressor and condenser hose nut (1). Tighten
nut to 22 Y (16 lb ft)
.
- Connect the A/C refrigerant pressure sensor electrical connector.
- Evacuate and charge the refrigerant system. Refer to Refrigerant Recovery and Recharging.
Note:
Use NEW system seals. Refer to Air Conditioning System Seal Replacement.
Caution:
Refer to Fastener Caution.
 Air Conditioning Compressor and Condenser Hose Replacement (LUV)
Removal Procedure
Recover the refrigerant. Refer to Refrigerant Recovery and Recharging.
Remove the drivetrain and front suspension frame skid plate if equipped.
Refer to Drive ...
 Air Conditioning Condenser Replacement (LDE,LUW)
Air Conditioning Condenser Replacement
Callout
Component Name
Preliminary Procedure
Recover the refrigerant. Refer to Refrigerant R ...
Other materials:
Body Lock Pillar Upper Trim Panel Replacement (Sedan)
Body Lock Pillar Upper Trim Panel Replacement
Callout
Component Name
Preliminary Procedure
Disable the SIR system. Refer to SIR Disabling and Enabling.
Remove the body side trim panel. Refer to Body Side Trim Panel Replace ...
Secondary Air Injection Pump Air Cleaner Pipe Replacement
Secondary Air Injection Pump Air Cleaner Pipe Replacement
Callout
Component Name
1
Hose Retainer (QTY:2)
Note: Squeeze the retainer on opposite sides to release.
2
Secondary A ...
Plastic Collar Quick Connect Fitting Service
Removal Procedure
Warning: Refer to Gasoline/Gasoline Vapors
Warning.
Note: There are several types of plastic collar fuel and evaporative
emission quick connect fittings used on this vehicle.
Bartholomew (1)
Q Release (2)
Squeeze to ...

0.0104