Chevrolet Sonic Repair Manual: Battery Positive and Negative Cable Replacement
- Removal Procedure
-
- Disconnect the negative battery cable. Refer to Battery Negative Cable Disconnection and Connection.
- Remove the fuse block and battery positive cable cover.
- Remove the battery tray. Refer to Battery Tray Replacement.
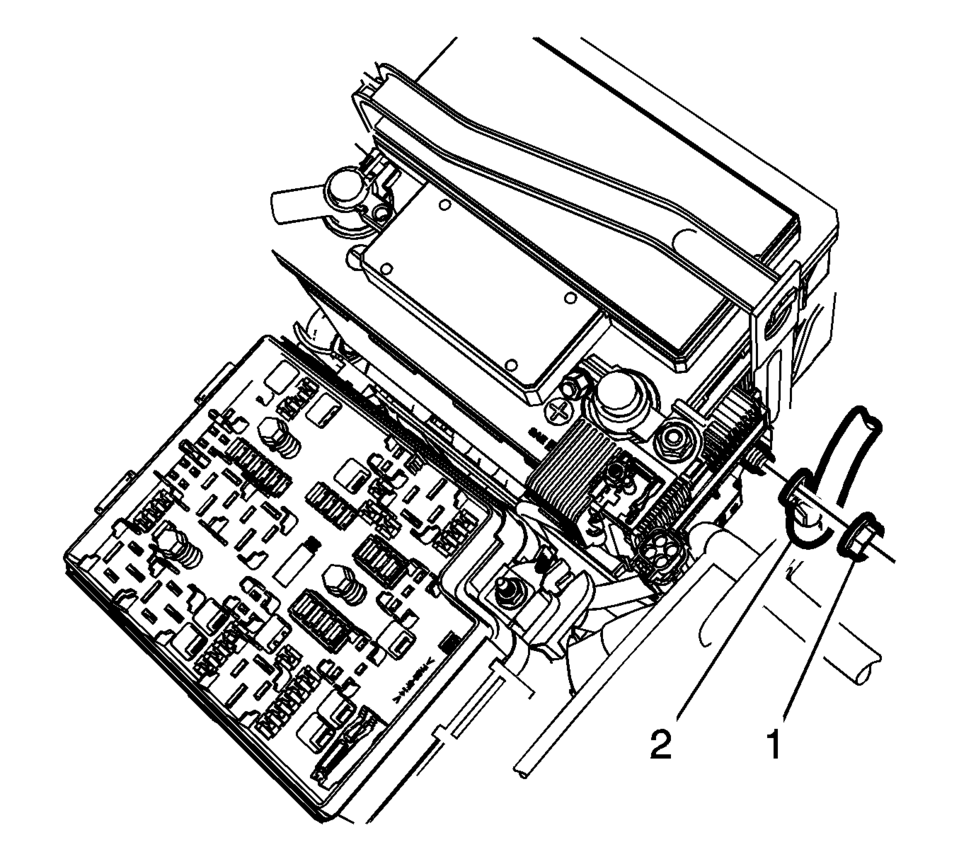
- Remove the battery positive nut (1) and the battery positive cable (2), from the battery positive cable junction block.
- Remove the battery negative cable nut (1) and the battery negative cable (2), from the chassis frame stud.
- Remove the drivetrain and front suspension frame skid plate. Refer to Drivetrain and Front Suspension Frame Skid Plate Replacement.
- Remove the battery positive cable nut (2) and the battery positive cable (3), from the back of the generator.
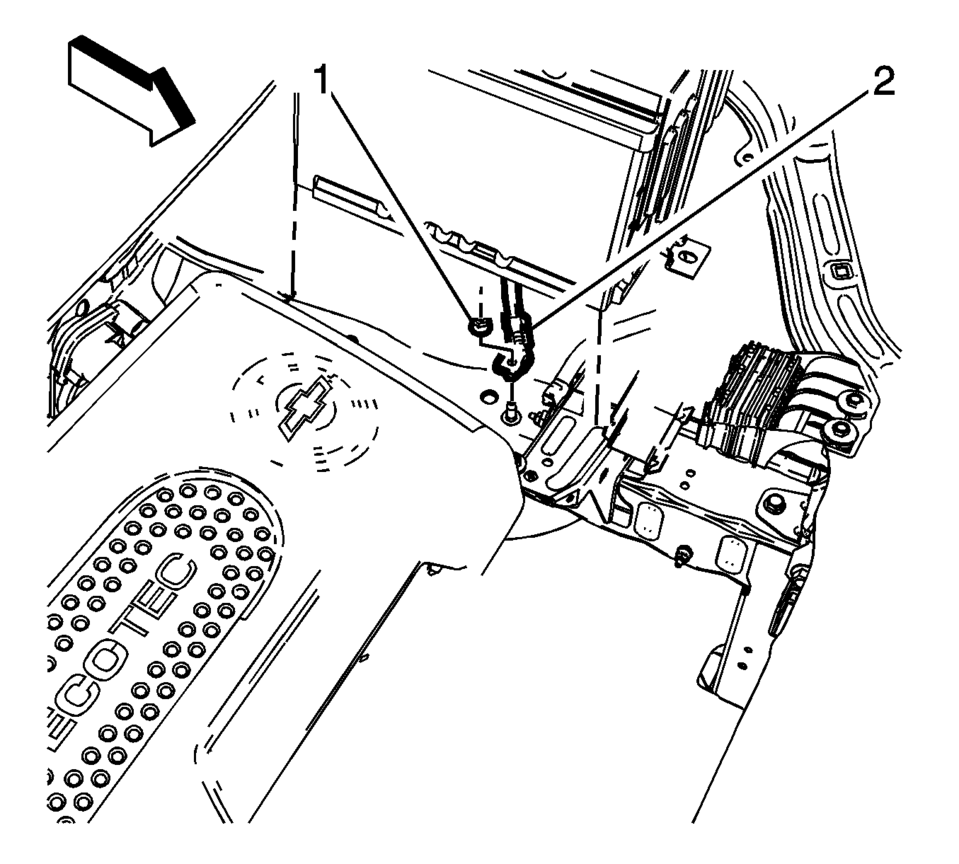
- Remove the battery negative cable stud/nut (1) and the starter solenoid nut (2).
- Remove the battery positive and negative cable (1) from the engine compartment.


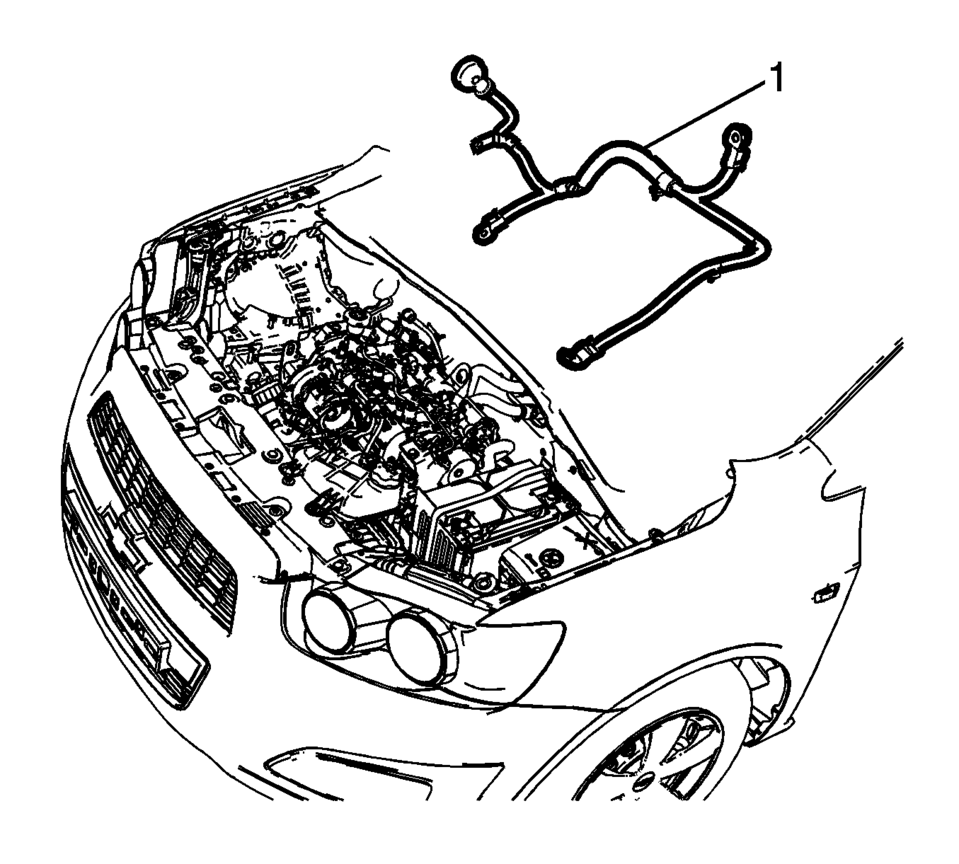
Note:
Visualize the routing of the battery positive and negative cable within the engine compartment.
- Installation Procedure
-
- Install the battery positive cable (3) to the back of the generator
and tighten nut (2) to 20 Y (15 lb ft)
.
- Install the battery positive cable (3) to the starter solenoid and tighten
nut (2) to 12 Y (9 lb ft)
.
- Install the battery negative cable to the starter and tighten the stud/nut (1)
to 25 Y (18 lb ft)
.
- Install the drivetrain and front suspension frame skid plate. Refer to Drivetrain and Front Suspension Frame Skid Plate Replacement.
- Install the battery negative cable nut (1) and the battery negative
cable (2), to the chassis frame stud and tighten to 22 Y (16 lb ft)
.
- Install the battery positive cable (2) to the battery positive cable
extension cable junction block and tighten nut (1) to 12 Y (9 lb ft)
.
- Install the battery tray. Refer to Battery Tray Replacement.
- Connect the negative battery cable. Refer to Battery Negative Cable Disconnection and Connection.
- Install the fuse block and battery positive cable cover.
Caution:
Refer to Fastener Caution.
- Install the battery positive cable (3) to the back of the generator
and tighten nut (2) to 20 Y (15 lb ft)
 Battery Positive Cable Replacement
Removal Procedure
Disconnect the negative battery cable. Refer to Battery Negative Cable
Disconnection and Connection.
Remove the underhood fuse block cover.
Remove the ...
 Battery Replacement
Removal Procedure
Open the hood.
Disconnect the negative battery cable. Refer to Battery Negative Cable
Disconnection and Connection.
Remove the battery retainer bo ...
Other materials:
Vehicle Alarm System
This vehicle has an anti-theft alarm system.
The indicator light on the instrument panel near the windshield indicates the
status of the system.
Off: Vehicle is disarmed.
On Solid: Vehicle is secured during the delay to arm the system.
Fast Flash: Vehicle is unsecured. A door, the hood, or t ...
Menu System
Controls
The Push/MENU/TUNE knob, Push/ MENU/TUNE button, and / BACK button are used to
navigate the menu system.
Push/MENU/TUNE Knob:
Turn to:
Enter the menu system.
Highlight a menu option.
Select a value.
Push/MENU/TUNE Button:
Press to:
Select or activate the highlighted men ...
Shoulder Belt Replacement - Rear (Sedan)
Shoulder Belt Replacement - Rear
Callout
Component Name
Preliminary Procedure
Remove the rear window panel trim. Refer to Rear Window Panel Trim Replacement.
1
Rear Seat Shoulder Belt Anchor Plat ...

0.0064