
Chevrolet Sonic Repair Manual: Brake Pressure Modulator Valve Pipe Replacement
- Removal Procedure
-
Warning:
Refer to Brake Fluid Irritant Warning.
Caution:
Refer to Brake Fluid Effects on Paint and Electrical Components Caution.
Caution:
Always connect or disconnect the wiring harness connector from the EBCM/EBTCM with the ignition switch in the OFF position. Failure to observe this precaution could result in damage to the EBCM/EBTCM.
- Remove the battery. Refer to Battery Replacement.
- Clean the area surrounding the brake pressure modulator valve (BPMV) of any accumulated dirt and debris.
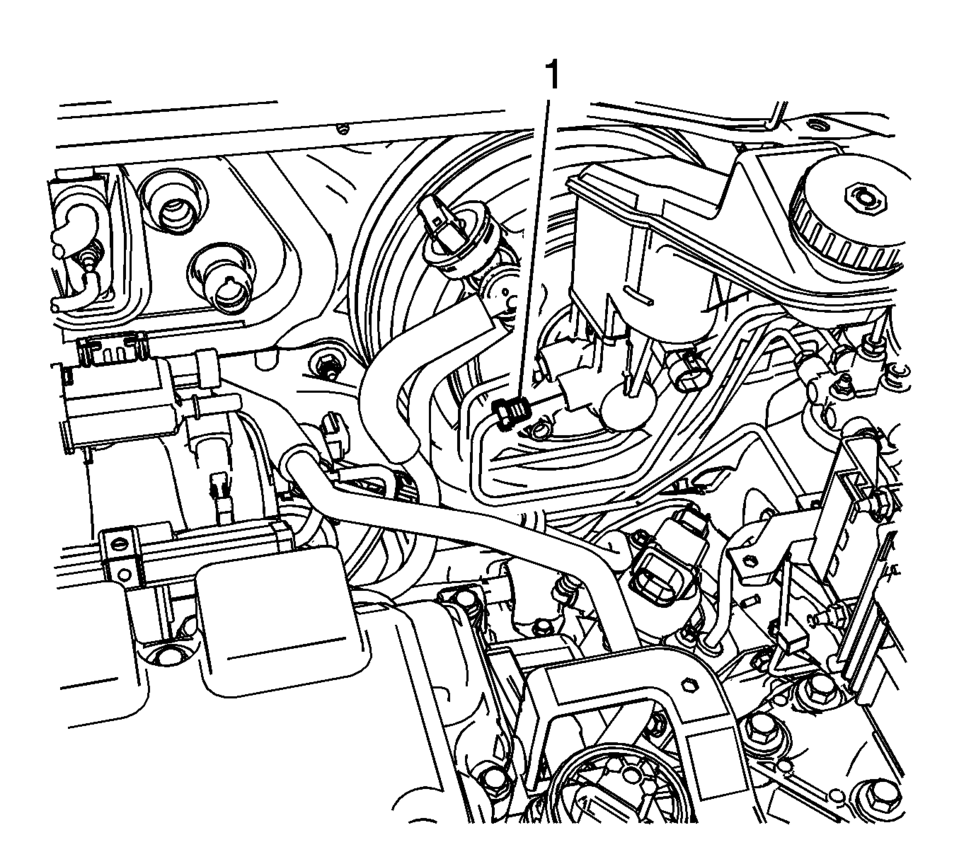
- Disconnect the master cylinder secondary brake pipe fitting (1) from the master cylinder.
- Plug the master cylinder outlet port to prevent brake fluid loss and contamination.
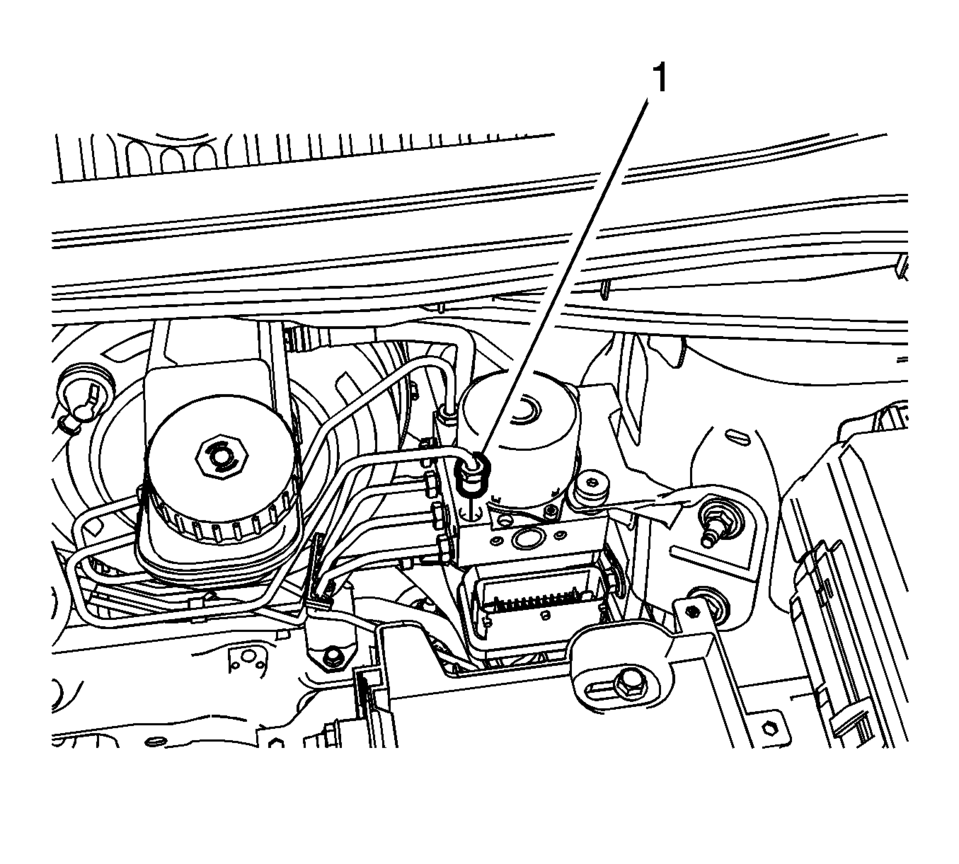
- Disconnect the master cylinder secondary brake pipe fitting (1) from the BPMV.
- Plug the BPMV inlet port to prevent brake fluid loss and contamination.
- Remove the master cylinder secondary brake pipe assembly.
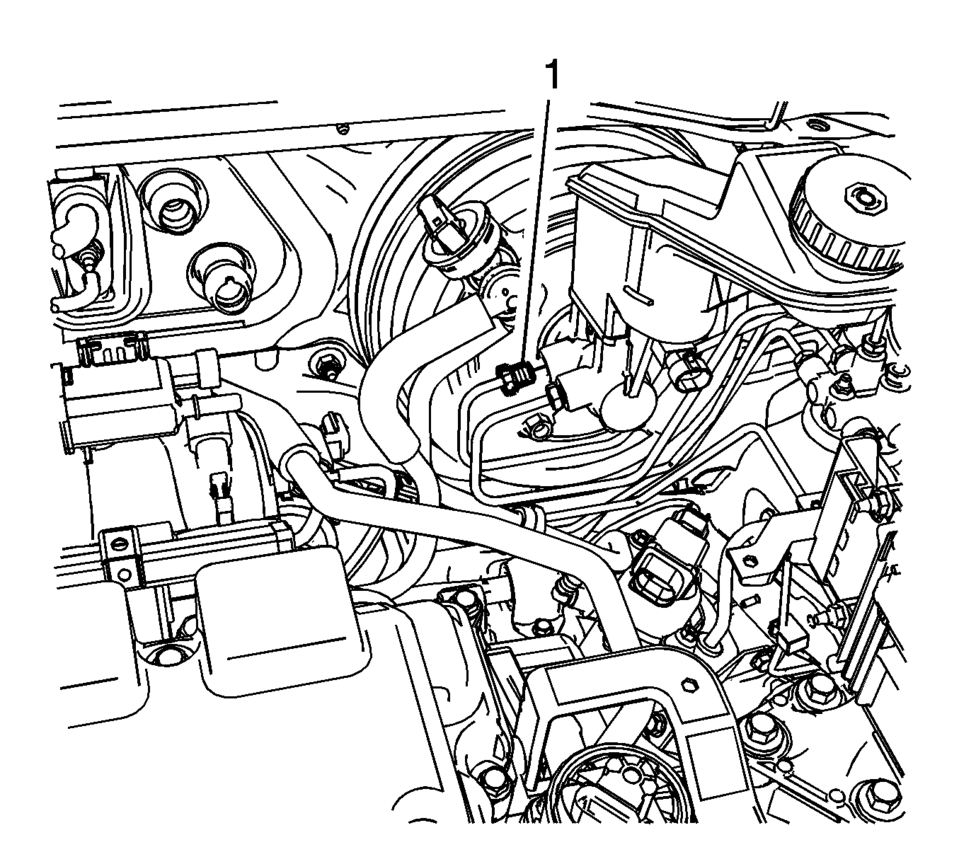
- Disconnect the master cylinder primary brake pipe fitting (1) from the master cylinder.
- Plug the master cylinder outlet port to prevent brake fluid loss and contamination.
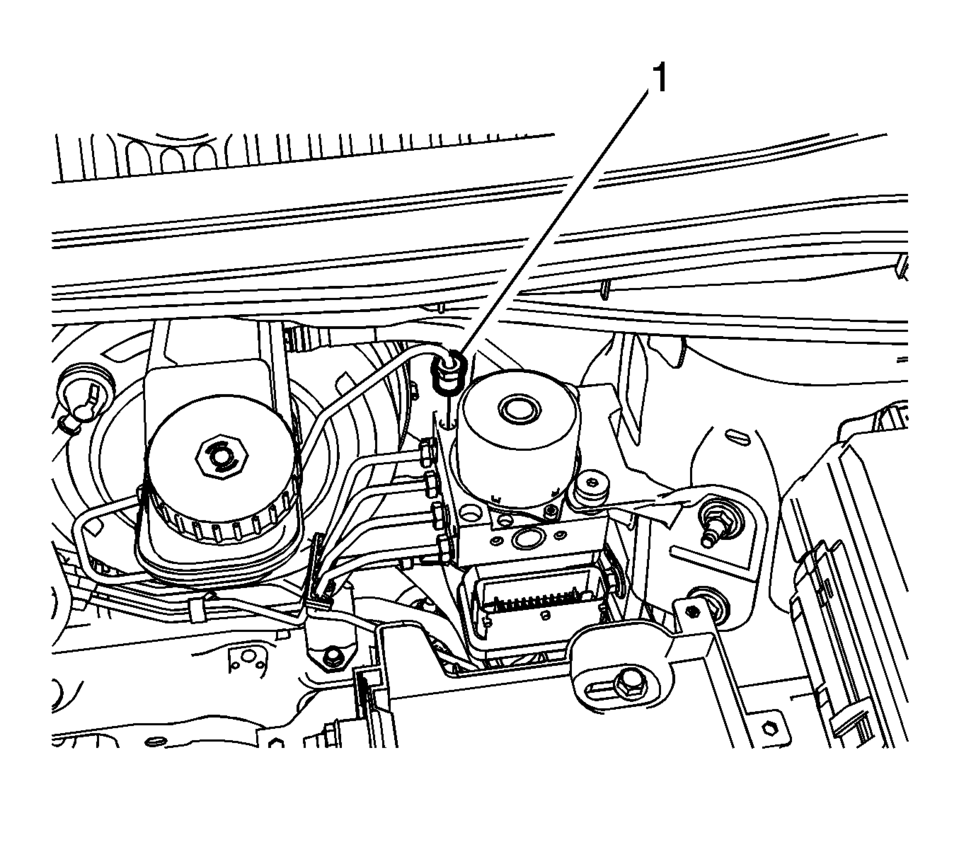
- Disconnect the master cylinder primary brake pipe fitting (1) from the BPMV.
- Plug the BPMV inlet port to prevent brake fluid loss and contamination.
- Remove the master cylinder primary brake pipe assembly.
- Installation Procedure
-
- Install the master cylinder primary brake pipe assembly.
- Connect the master cylinder primary brake pipe fitting (1) to the BPMV
and tighten to 18 Y (13 lb ft)
.
- Connect the master cylinder primary brake pipe fitting (1) to the master
cylinder and tighten to 18 Y (13 lb ft)
.
- Install the master cylinder secondary brake pipe assembly.
- Connect the master cylinder secondary brake pipe fitting (1) to the
BPMV and tighten to 18 Y (13 lb ft)
.
- Connect the master cylinder secondary brake pipe fitting (1) to the
master cylinder and tighten to 18 Y (13 lb ft)
.
- Install the battery. Refer to Battery Replacement.
- Bleed the hydraulic brake system. Refer to Hydraulic Brake System Bleeding.
Caution:
Refer to Fastener Caution.
 Brake Pressure Modulator Valve Bracket Replacement
Removal Procedure
Remove the brake pressure modulator valve (BPMV) and bracket assembly.
Refer to Brake Pressure Modulator Valve Replacement.
Remove the BPMV boltsR ...
 Brake Pressure Modulator Valve Replacement
Removal Procedure
Warning: Refer to Brake Fluid Irritant Warning.
Caution: Refer to Brake Fluid Effects on Paint and Electrical
Components Caution.
Caution: Always ...
Other materials:
GM Mobility Reimbursement Program
This program is available to qualified applicants for cost reimbursement of eligible
aftermarket adaptive equipment required for the vehicle, such as hand controls or
a wheelchair/ scooter lift for the vehicle.
For more information on the limited offer, visit www.gmmobility.com or call the
...
Electronic Brake Control Module Programming and Setup
Note:
DO NOT program a control module unless directed to by a service procedure
or a service bulletin. If the ECU is not properly configured with the correct
calibration software, the ECU will not control all of the vehicle features
properly.
Ensure the programming tool is ...
Water Outlet Replacement (LUV)
Removal Procedure
Drain the engine coolant system. Refer to Cooling System Draining and
Filling.
Remove the following:
Engine coolant air bleed hose (1)
Engine coolant temperature sensor (2) and connector clip (3)
Heated oxygen senso ...

0.0129