
Chevrolet Sonic Repair Manual: Brake Shoe Replacement (J93, J94)
- Removal Procedure
-
- Raise and support the vehicle. Refer to Lifting and Jacking the Vehicle.
- Remove the tire and wheel assembly. Refer to Tire and Wheel Removal and Installation.
- Remove the brake drum. Refer to Brake Drum Replacement.
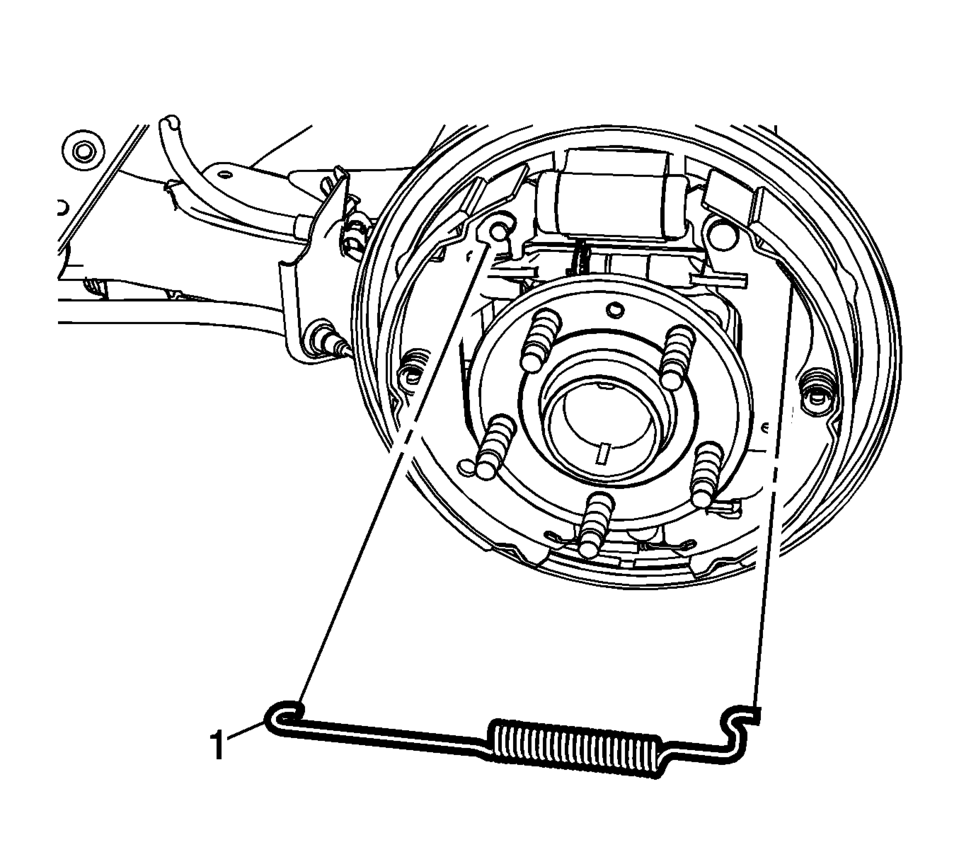
- Remove the upper brake shoe return spring (1).
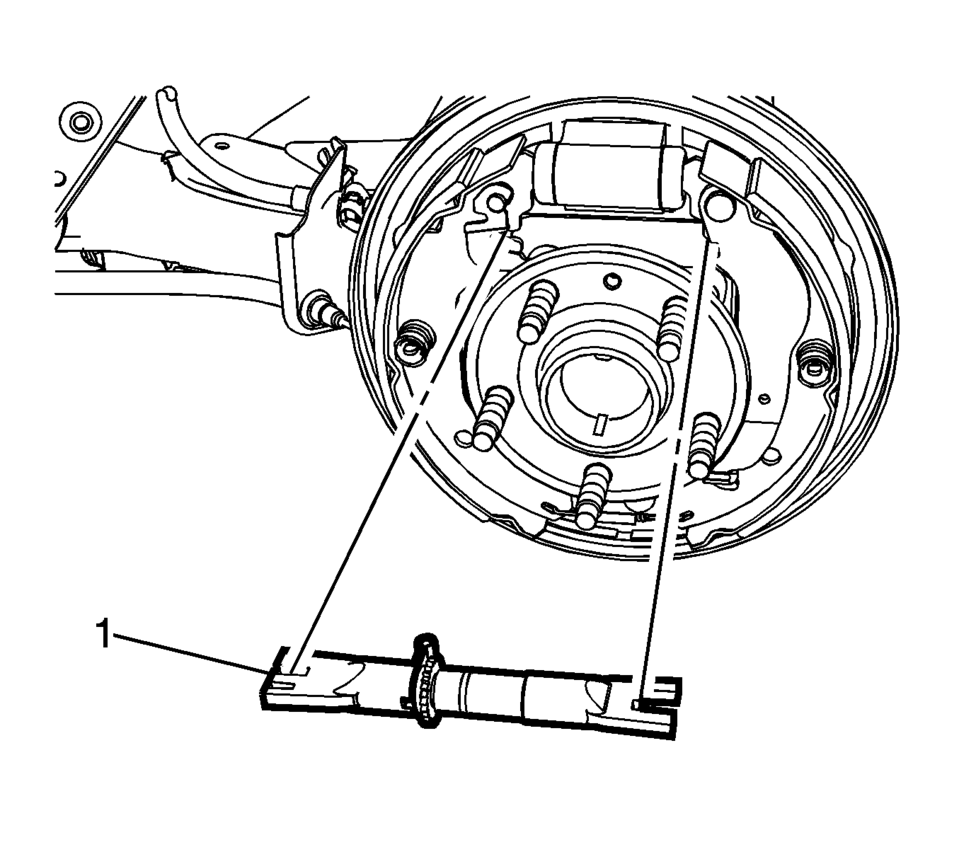
- Remove brake shoe adjuster (1).
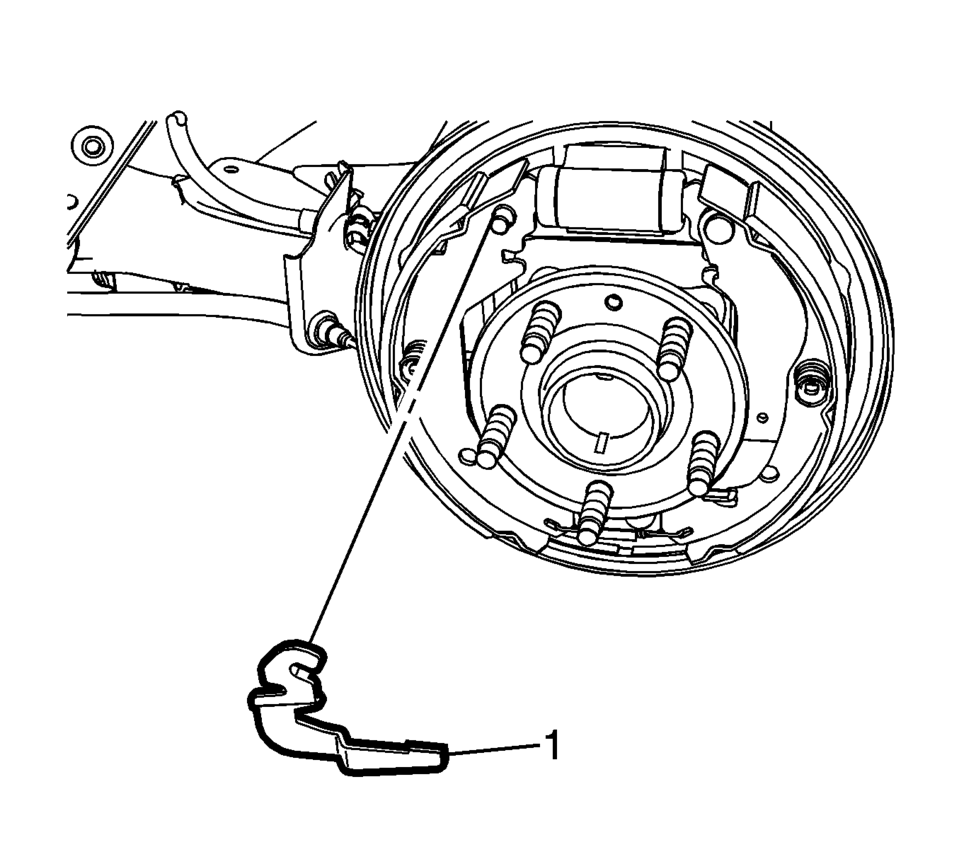
- Remove the brake shoe adjuster actuator lever (1).
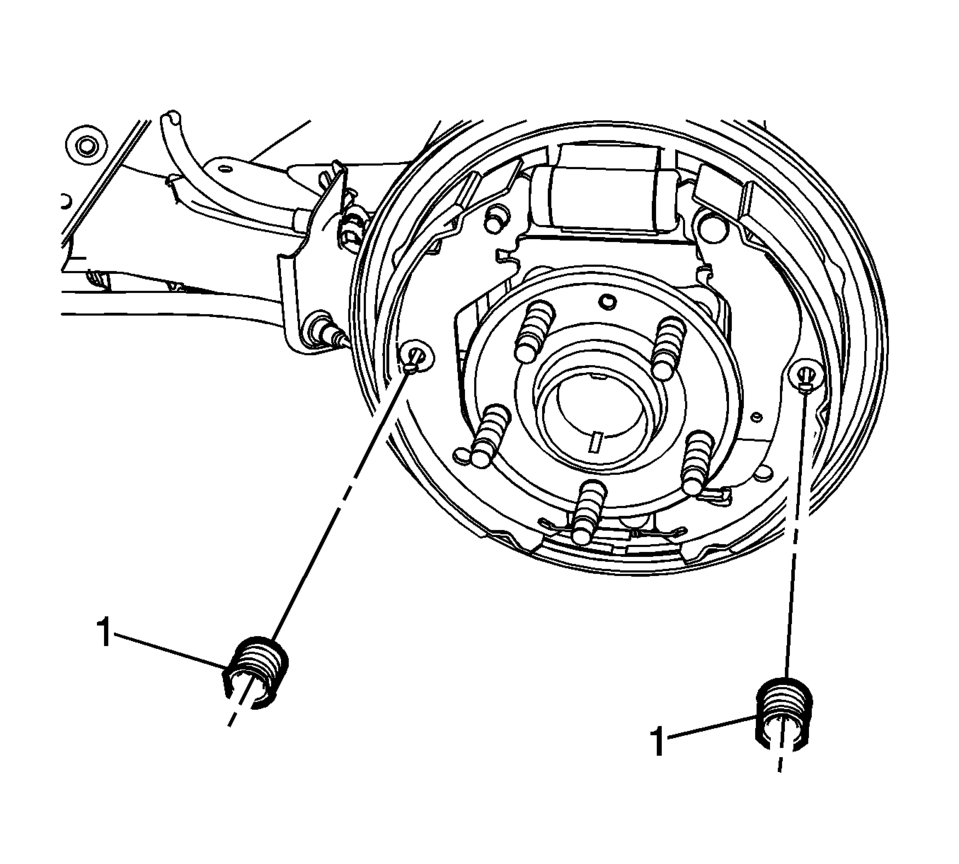
- Remove the brake shoe hold down spring and cup assemblies (1) by compressing the spring and rotating the assembly 1/4 turn.
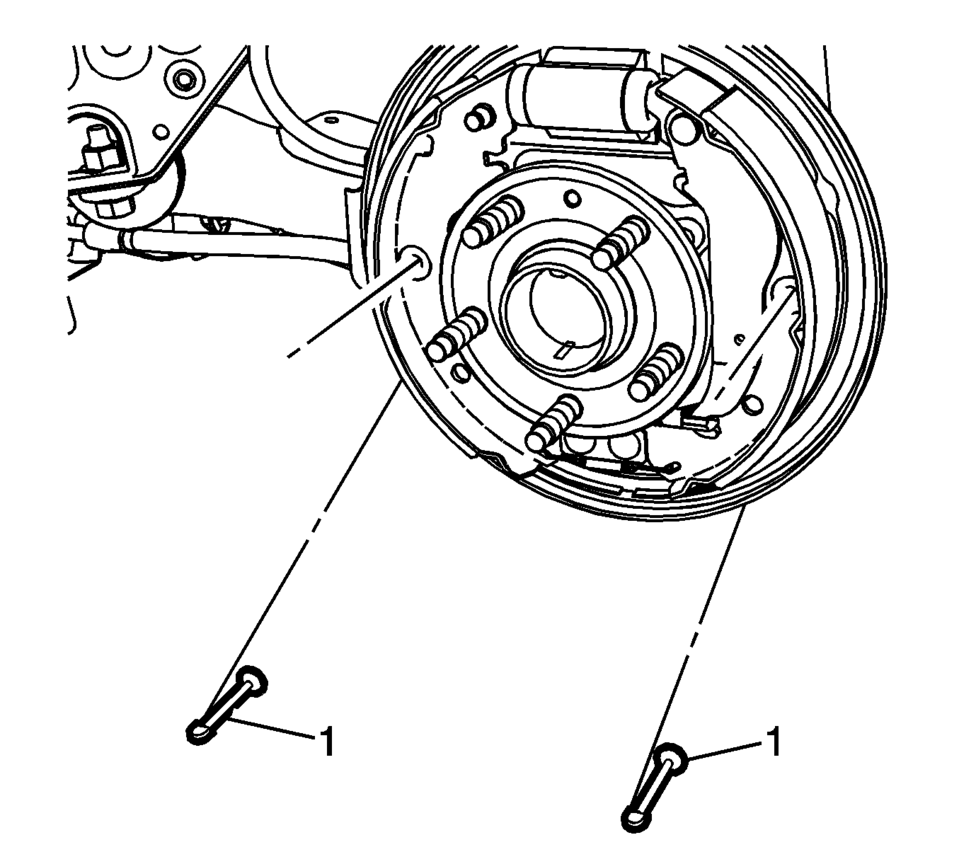
- Remove the hold down spring and cup assembly pins (1).
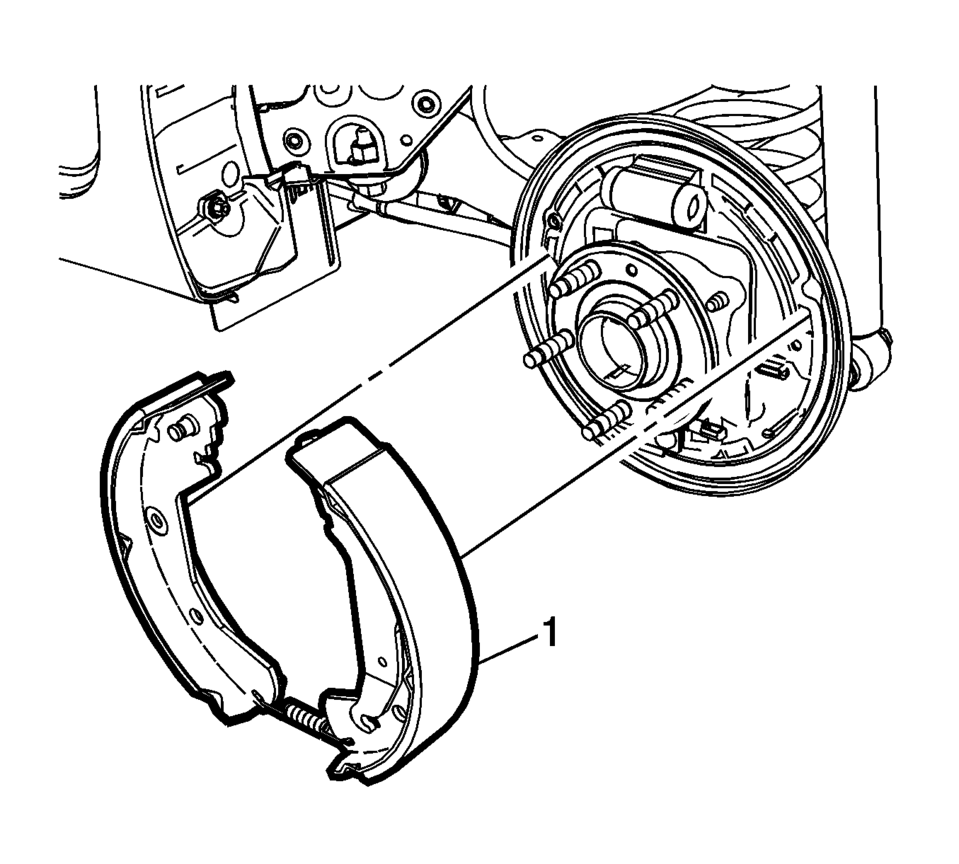
- Spread the top of the brake shoe assembly (1) and lift the assembly over the wheel hub.
- Release the park brake actuator lever from the park brake cable eyelet.
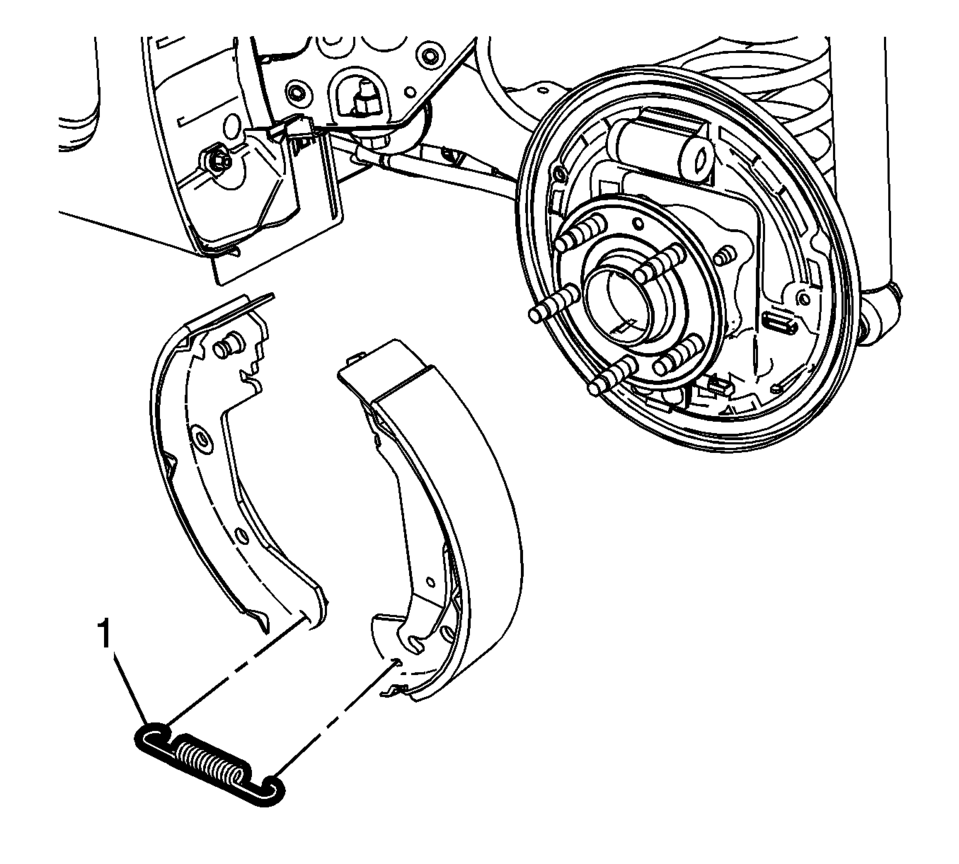
- Remove the lower brake shoe return spring (1).
- Inspect the drum brake hardware and replace any components, as necessary. Refer to Drum Brake Hardware Inspection.
Warning:
Refer to Brake Dust Warning.
Note:
Always replace brake shoes in axle sets.
- Installation Procedure
-
- Clean the drum brake backing plate of any dirt and debris.
- Apply a light coat of high temperature brake lubricant to the brake drum backing plate shoe contact surfaces.
- Install the lower brake shoe return spring (1).
- Install the park brake actuator lever to the park brake cable eyelet.
- Spread the top of the brake shoe assembly (1) and lift the assembly over the wheel hub.
- Position the brake shoe assembly to the drum brake backing plate.
- Install the hold down spring and cup assembly pins (1).
- Install the brake shoe hold down spring and cup assemblies (1) by compressing the spring and rotating the assembly 1/4 turn.
- Install the brake shoe adjuster actuator lever (1).
- Install brake shoe adjuster (1).
- Install the upper brake shoe return spring (1).
- Adjust the drum brakes. Refer to Drum Brake Adjustment.
- Install the brake drum. Refer to Brake Drum Replacement.
- Install the tire and wheel assembly. Refer to Tire and Wheel Removal and Installation.
 Special Tools
Illustration
Tool Number/Description
CH 21177
J 21177-A
Drum to Brake Shoe Clearance Gauge
...
 Hydraulic Brakes
...
Other materials:
Special Tools (MIT Tool Instructions)
Bluetooth Pairing for Vehicles with
Radio RPO: UF7
Either reset the pin code on the radio to 0000, or go under Device Info on
the radio and see what the pin code is (to enter it later on the MIT).
Turn the BT discoverable ON in the radio Bluetooth
settings.
Press Pair De ...
Front Bumper Upper Impact Bar Replacement
Front Bumper Upper Impact Bar Replacement
Callout
Component Name
Preliminary Procedure
Remove the front bumper fascia. Refer to Front Bumper Fascia Replacement.
1
Front Bumper Impact Bar Bolt (Qt ...
Transmission Rear Mount Replacement
Removal Procedure
Raise and support the vehicle. Refer to
Lifting and Jacking the Vehicle.
Remove and DISCARD the rear transmission mount bracket
to rear mount through bolt (1).
Remove rear transmission mount to frame bolt (3).
Push and hold ...

0.0054