Chevrolet Sonic Repair Manual: Charge Air Cooler Replacement
|
Callout |
Component Name |
|---|---|
Preliminary Procedures
|
|
|
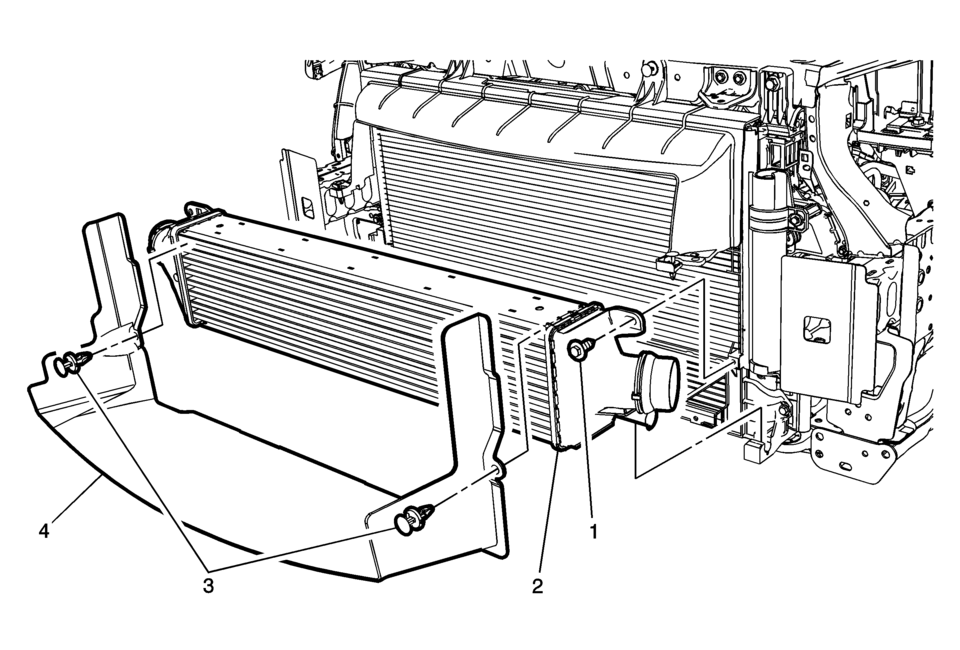
1 |
Charge Air Cooler Fastener (Qty 2) Caution: Refer to Fastener Caution.
10 Y (89 lb in) |
|
2 |
Charge Air Cooler Procedure
Pull the charge air cooler upward to release the cooler from the rubber grommets. |
|
3 |
Charge Air Cooler Air Deflector Fasteners (Qty 2) Procedure
Remove the charge air cooler air deflector fasteners. |
|
4 |
Charge Air Cooler Air Deflector |
 Charge Air Cooler Outlet Air Hose Replacement
Removal Procedure
Remove the front bumper fascia. Refer to Front Bumper Fascia Replacement.
Loosen the clamp (1) at the charge air cooler outlet pipe (2) to throt ...
 Intake Manifold
...
Other materials:
Rear Side Door Weatherstrip Replacement - Body Side
Rear Side Door Weatherstrip Replacement - Body Side
Callout
Component Name
Preliminary Procedures
Remove the upper center pillar trim. Refer to Center Pillar Upper
Trim Panel Replacement.
Remove the lower center pillar tr ...
Low and Reverse and 1-2-3-4 Clutch Housing Cleaning and Inspection
Low and Reverse and 1-2-3-4 Clutch Housing Cleaning and Inspection
Callout
Component Name
Caution: After cleaning the transmission components, allow
to air dry. Do not use cloth or paper towels in order to dry any transmi ...
AEB with Pedestrian Detection system limitations
WARNING
The Nissan Armada AEB with Pedestrian Detection system includes important
operational limitations. Failure to understand and follow these limitations when
driving the Nissan Armada may result in serious injury or even fatal consequences.
The Nissan Armada AEB with Pedestrian Detecti ...

0.0085