Chevrolet Sonic Repair Manual: Control Solenoid Valve and Transmission Control Module Assembly Installation
|
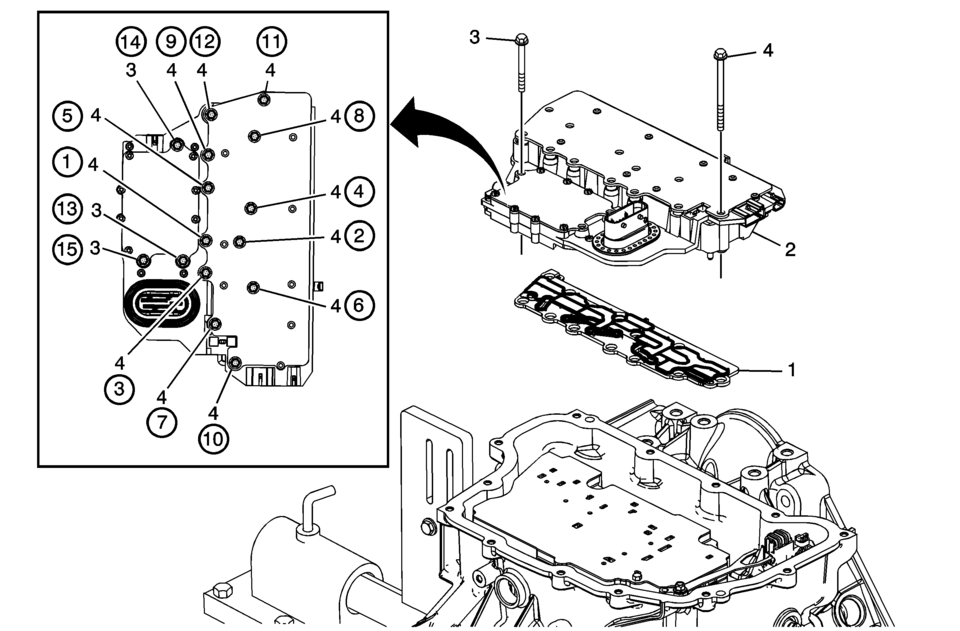
Callout |
Component Name |
|---|---|
|
1 |
Control Solenoid Valve Assembly Filter Plate Caution: Use care when removing or installing the filter plate assembly. A broken or missing retaining tab may not adequately secure the filter plate to the control solenoid valve assembly, resulting in possible damage or contamination. Note: Install a NEW filter plate to prevent fluid leaks past the fluid seals. |
|
2 |
Control Solenoid (w/Body and TCM) Valve Assembly |
|
3 |
Control Valve Body Bolt M5 x 40.5 (Qty: 3) Caution: Refer to Fastener Caution.
7 Y (62 lb in) |
|
4 |
Control Valve Body Bolt M6 x 97 (Qty: 12) Tighten
10 Y (89 lb in) |
 Control Solenoid Valve and Transmission Control Module Assembly Inspection
Verify the conditions listed below do not exist. Carefully
inspect the control solenoid valve assembly connectors and pins (1, 2, 4, 6)
for the condition. Repair or replace as neces ...
 Control Solenoid Valve and Transmission Control Module Assembly Replacement
Removal Procedure
Remove the transmission control valve body cover.
Refer to Control Valve Body Cover Replacement.
Disconnect the output speed sensor electrical con ...
Other materials:
Tire-to-Wheel Match-Mounting (Vectoring)
Note: After remounting a tire to a wheel or after replacing a tire
and/or a wheel, remeasure the tire and wheel assembly runout in order to verify
that the amount of runout has been reduced and brought to within tolerances.
Ensure that the tire and wheel assembly is properly balanced ...
Oil Pan Installation
Special Tools
EN-49980 Guidance Pins
For equivalent regional tools, refer to Special Tools.
Clean the sealing surfaces from old sealing material, dirt, oil and grease.
Note: The sealing bead should be applied close to the inner edge
of the oil pan. Take care that the oil suctio ...
Manual Shift Detent Lever with Shaft Position Switch Assembly Replacement
Special Tools
DT-41229 Manual Shaft Pin Installer
DT-48550 Detent Lever Pin Remover
For equivalent regional tools, refer to Special Tools.
Removal Procedure
Disconnect the transmission range selector lever cable
terminal (1) from the transmission manual shi ...

0.0075