Chevrolet Sonic Repair Manual: Crankshaft Rear Oil Seal Replacement
Special Tools
EN-658 Rear Main Seal Installer
For equivalent regional tools, refer to Special Tools.
- Removal Procedure
-
- If equipped with automatic transmission, remove the flex plate. Refer to Automatic Transmission Flex Plate Replacement.
- If equipped with a manual transmission, remove the flywheel. Refer to Engine Flywheel Replacement.
- Using a flat-bladed tool, remove the rear crankshaft oil seal (1).
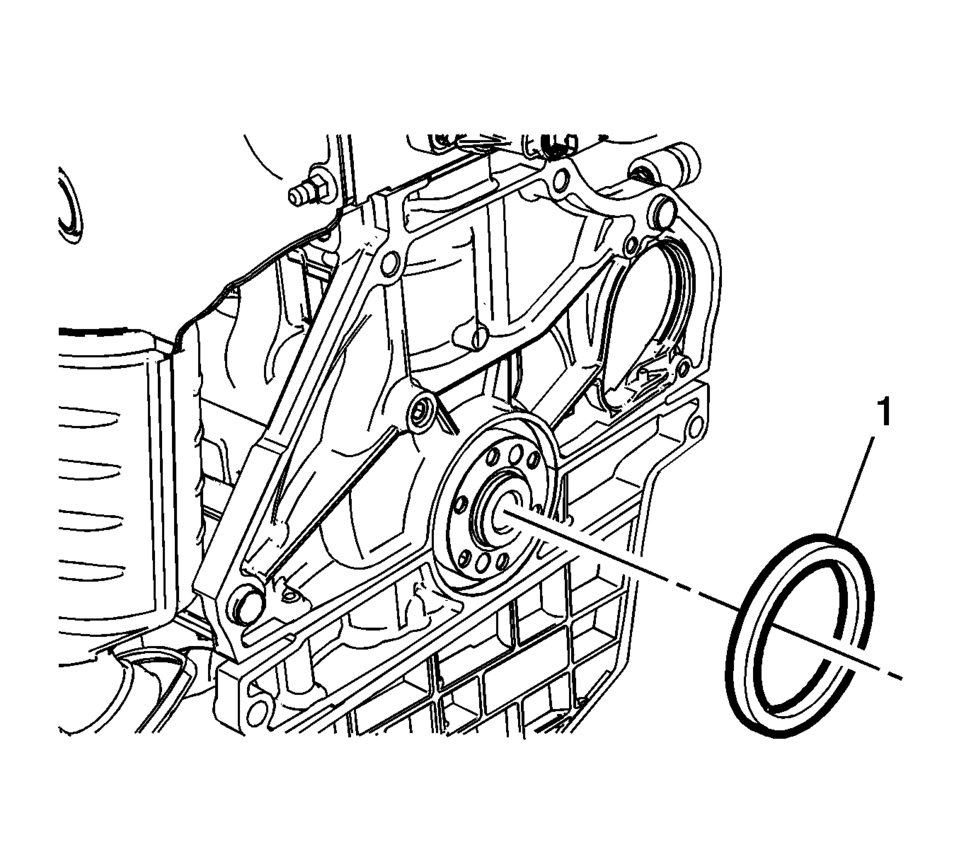
Note:
Do not damage the outside diameter of the crankshaft or chamber with any tool.
- Installation Procedure
-
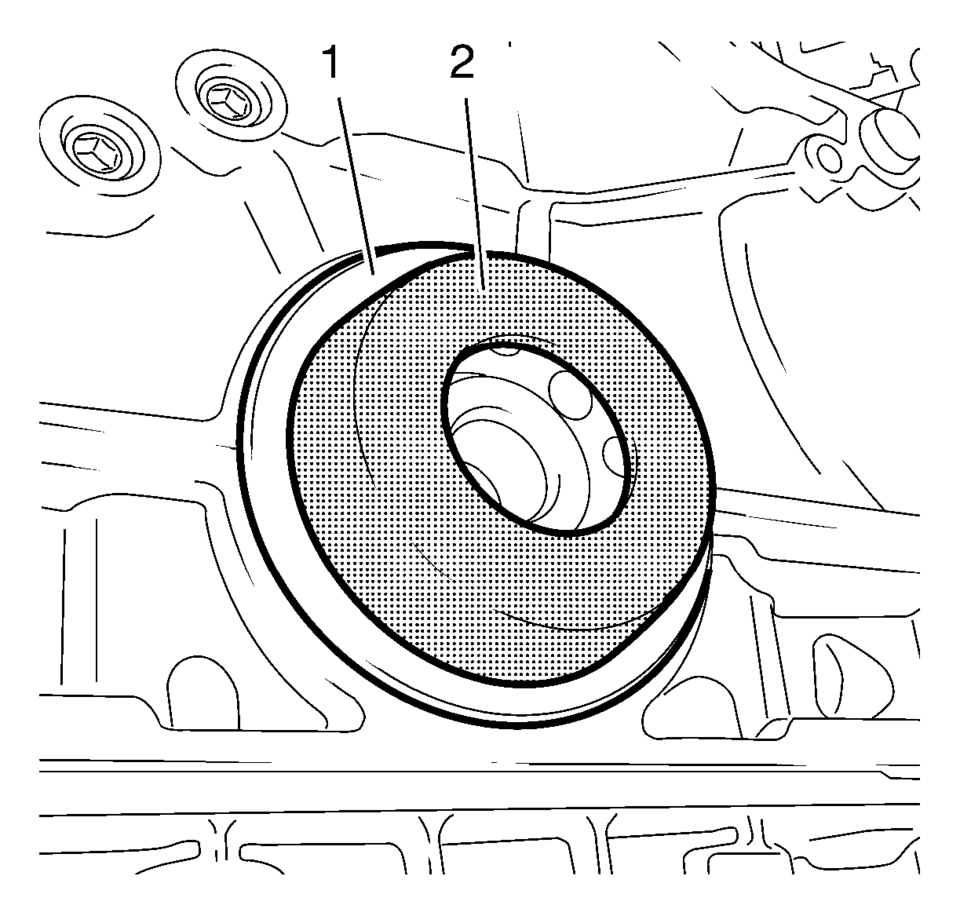
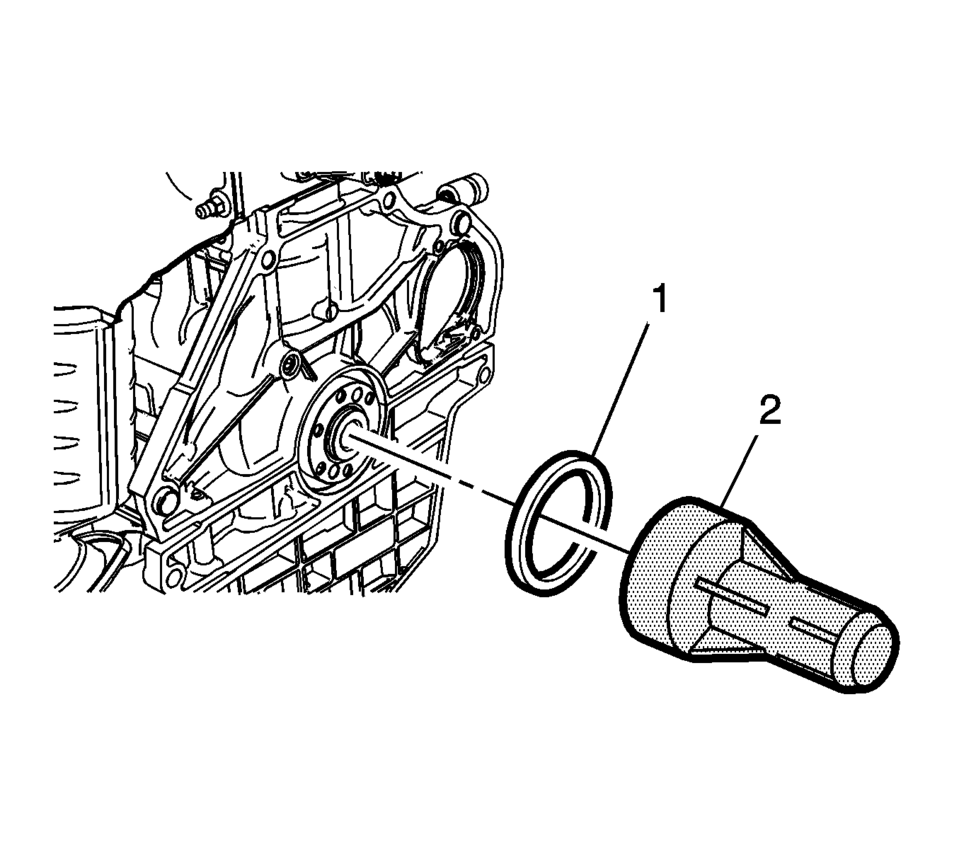
- Install the crankshaft rear oil seal (1) with EN-658 installer (2).
- Using the EN-658 installer (2) , install a NEW crankshaft real oil seal (1).
- If equipped with a manual transmission, install the flywheel. Refer to Engine Flywheel Replacement.
- If equipped with automatic transmission, install the flex plate. Refer to Automatic Transmission Flex Plate Replacement.
 Crankshaft Rear Oil Seal Installation
Special Tools
EN-658-1 Installer
EN-235-6 Installer
For equivalent regional tools, refer to Special Tools.
Slide the crankshaft rear oil seal (2) across the EN-235-6 installe ...
 Exhaust2
...
Other materials:
Rear Side Door Weatherstrip Replacement - Body Side
Rear Side Door Weatherstrip Replacement - Body Side
Callout
Component Name
Preliminary Procedures
Remove the upper center pillar trim. Refer to Center Pillar Upper
Trim Panel Replacement.
Remove the lower center pillar tr ...
Windshield Replacement
Special Tools
BO-24402-A Glass Sealant Remover (Cold Knife)
BO-39032 Stationary Glass Removal Tool
Use an adhesive that is approved by GM
For equivalent regional tools, refer to Special Tools.
Removal Procedure
Open the hood.
Remove the windshield wiper arms. Refer to Wi ...
Fuel System Description
Fuel System Overview
The fuel system is an electronic returnless on-demand design. A returnless
fuel system reduces the internal temperature of the fuel tank by not returning
hot fuel from the engine to the fuel tank. Reducing the internal temperature
of the fuel tank results in lo ...

0.0048