Chevrolet Sonic Repair Manual: Drum Brake Hardware Replacement (J93, J94)
- Removal Procedure
-
- Raise and support the vehicle. Refer to Lifting and Jacking the Vehicle.
- Remove the tire and wheel assembly. Refer to Tire and Wheel Removal and Installation.
- Remove the brake drum. Refer to Brake Drum Replacement.
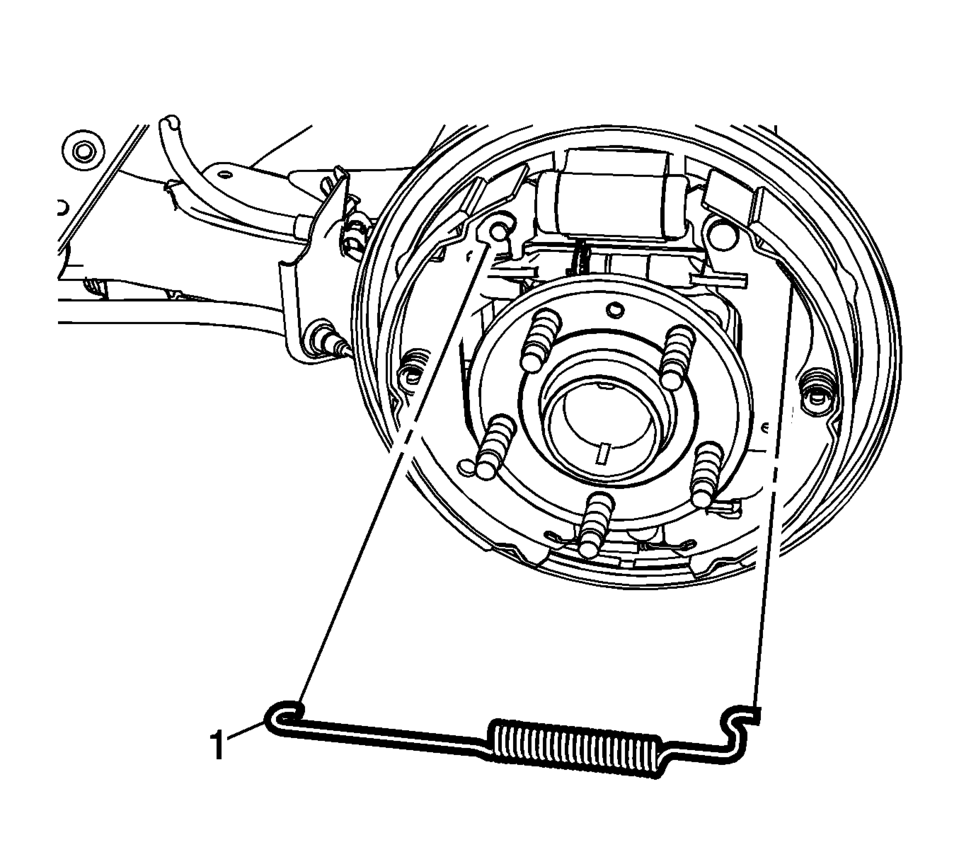
- Remove the upper brake shoe return spring (1).
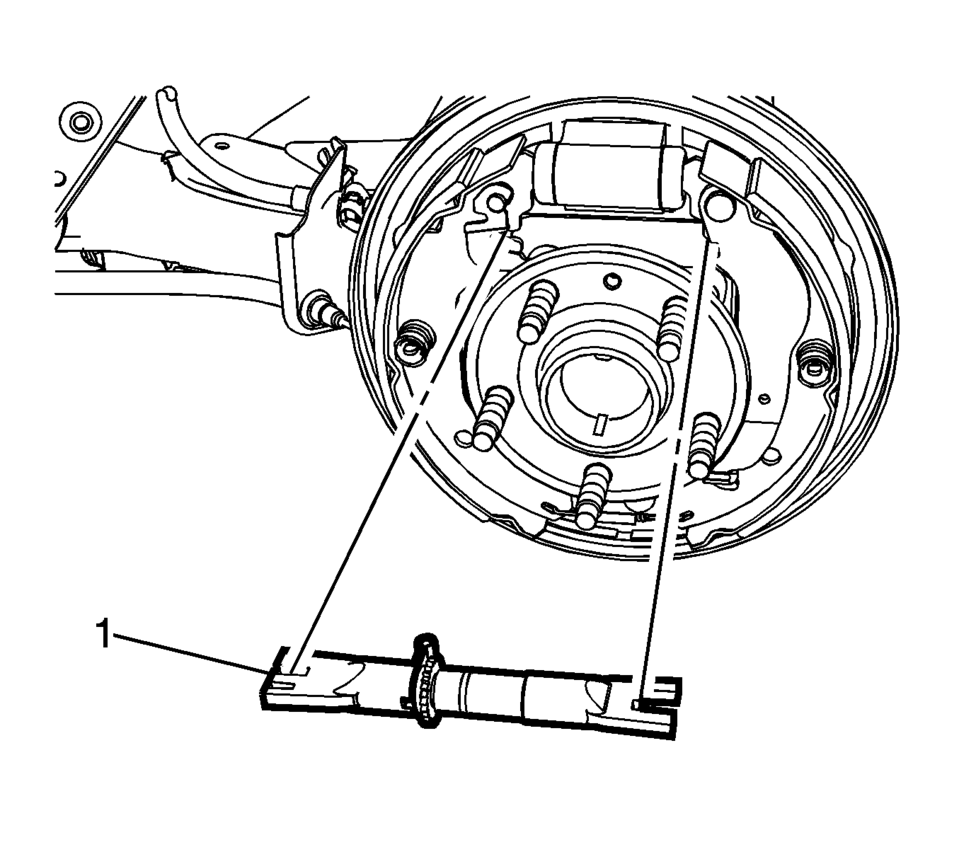
- Remove brake shoe adjuster (1).
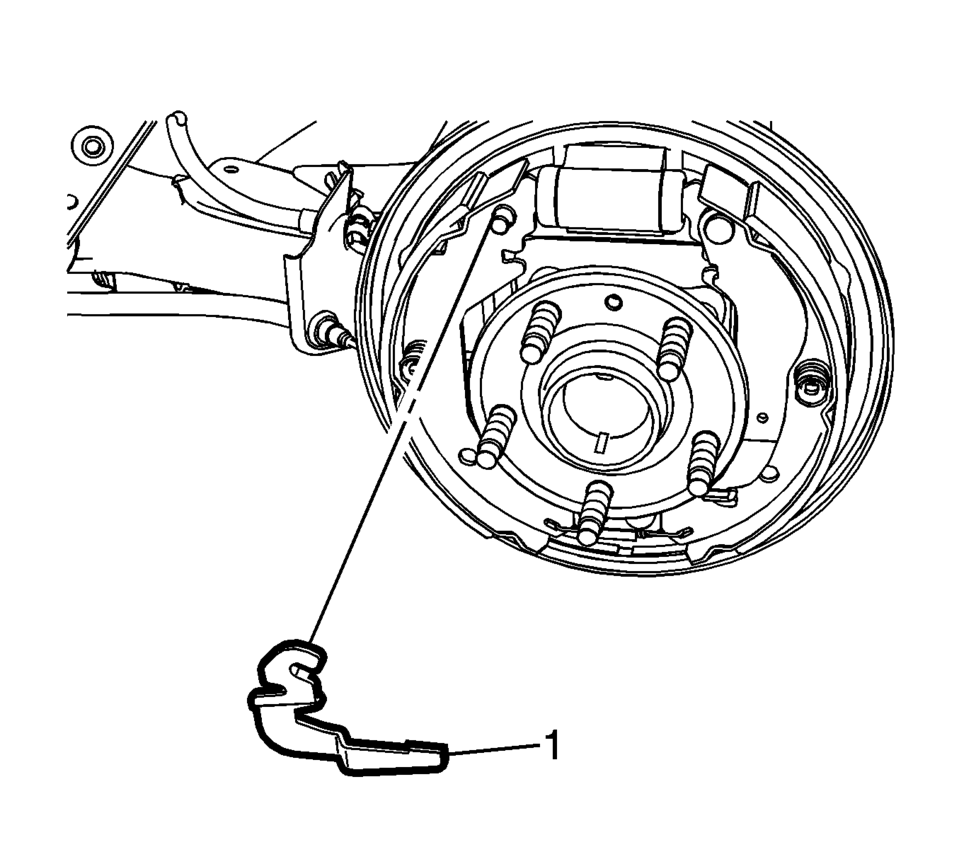
- Remove the brake shoe adjuster actuator lever (1).
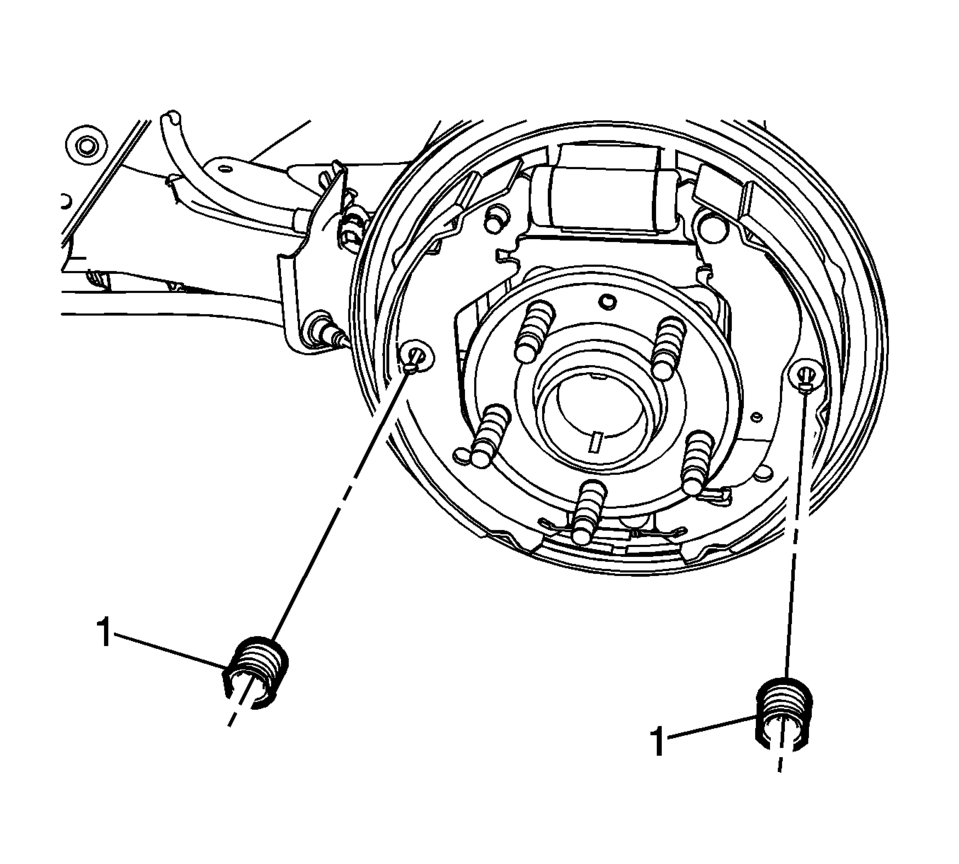
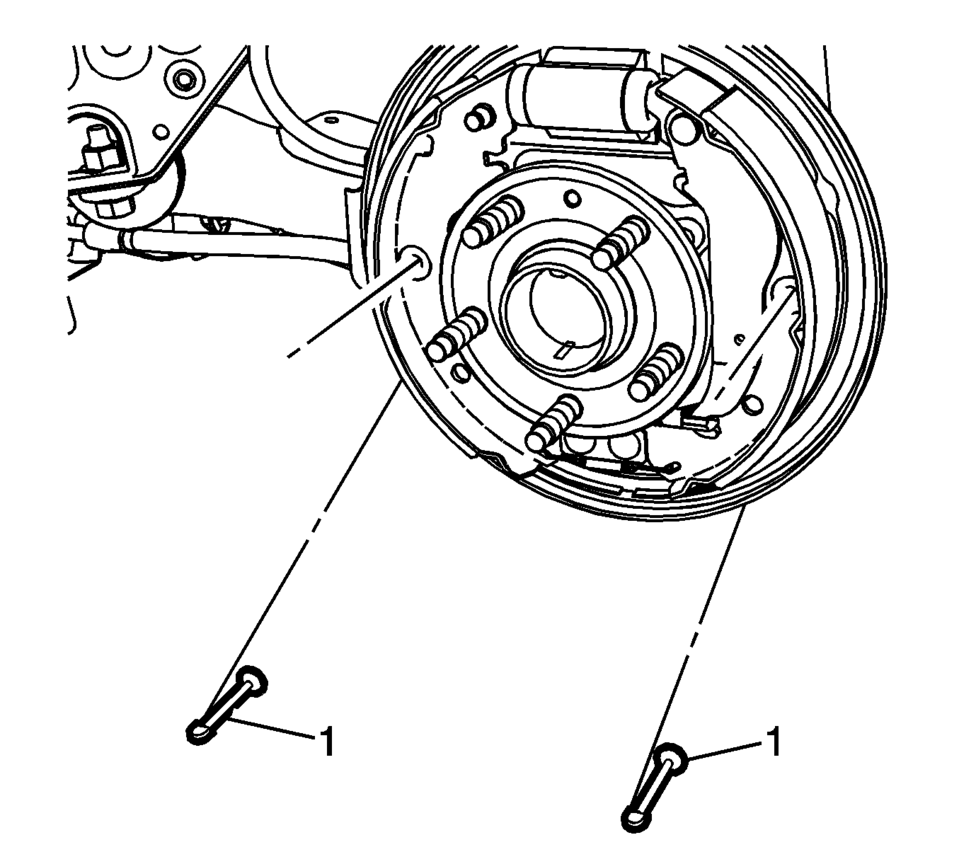
- Remove the brake shoe hold down spring and cup assemblies (1) by compressing the spring and rotating the assembly 1/4 turn.
- Remove the hold down spring and cup assembly pins (1).
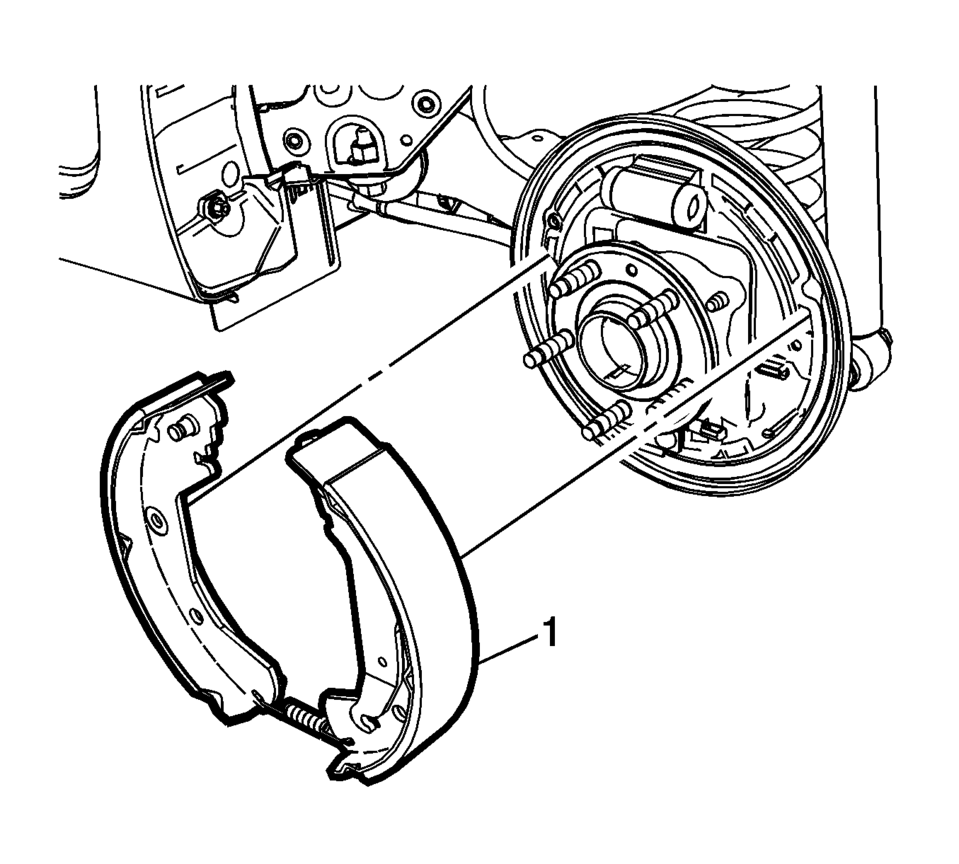
- Spread the top of the brake shoe assembly (1) and lift the assembly over the wheel hub.
- Release the park brake actuator lever from the park brake cable eyelet.
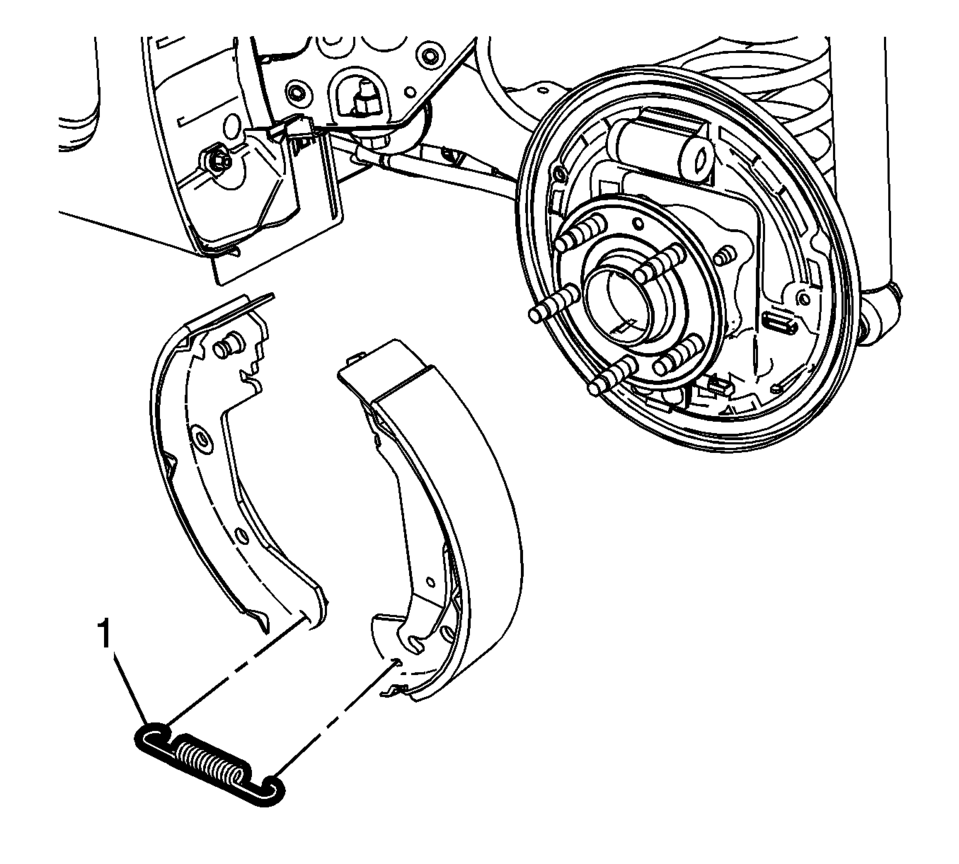
- Remove the lower brake shoe return spring (1).
- Inspect the drum brake hardware and replace any components, as necessary. Refer to Drum Brake Hardware Inspection.
Warning:
Refer to Brake Dust Warning.
- Installation Procedure
-
- Clean the drum brake backing plate of any dirt and debris.
- Apply a light coat of high temperature brake lubricant to the brake drum backing plate shoe contact surfaces.
- Install the lower brake shoe return spring (1).
- Install the park brake actuator lever to the park brake cable eyelet.
- Spread the top of the brake shoe assembly (1) and lift the assembly over the wheel hub.
- Position the brake shoe assembly to the drum brake backing plate.
- Install the hold down spring and cup assembly pins (1).
- Install the brake shoe hold down spring and cup assemblies (1) by compressing the spring and rotating the assembly 1/4 turn.
- Install the brake shoe adjuster actuator lever (1).
- Install brake shoe adjuster (1).
- Install the upper brake shoe return spring (1).
- Adjust the drum brakes. Refer to Drum Brake Adjustment.
- Install the brake drum. Refer to Brake Drum Replacement.
- Install the tire and wheel assembly. Refer to Tire and Wheel Removal and Installation.
 Drum Brake Hardware Inspection
Warning: Refer to Brake Dust Warning.
Visually inspect the drum brake upper return spring (1) for the following
conditions:
Excessive corrosion
Excessive stretchin ...
 Drum Brake System Description and Operation
System Component Description
The drum brake system consists of the following:
Drum Brake Shoes
Applies mechanical output force, from hydraulic brake wheel cylinders,
to frict ...
Other materials:
Top Tether Anchor
A top tether (3, 4) anchors the top of the child restraint to the vehicle. A
top tether anchor is built into the vehicle. The top tether attachment (2) on the
child restraint connects to the top tether anchor in the vehicle in order to reduce
the forward movement and rotation of the child re ...
Manual Transmission Shift Lever and Selector Lever Cable Replacement
Removal Procedure
Remove the battery tray. Refer to
Battery Tray Replacement.
Disconnect the shift lever and selector lever cable
end (1) from the transmission shift lever and selector lever.
Pull the cable retainers (2) to release the shift
le ...
How to enable/disable the I-BSI system
Example
ProPILOT Assist switch (design may vary depending on the Nissan Armada model)
Vehicle information display
Steering-wheel-mounted control (right side)
To configure the Nissan Armada Intelligent Blind Spot Intervention (I-BSI) system,
follow these steps:
1. Press the
butt ...

0.0054