
Chevrolet Sonic Repair Manual: Front Wheel Drive Shaft Seal Replacement - Right Side
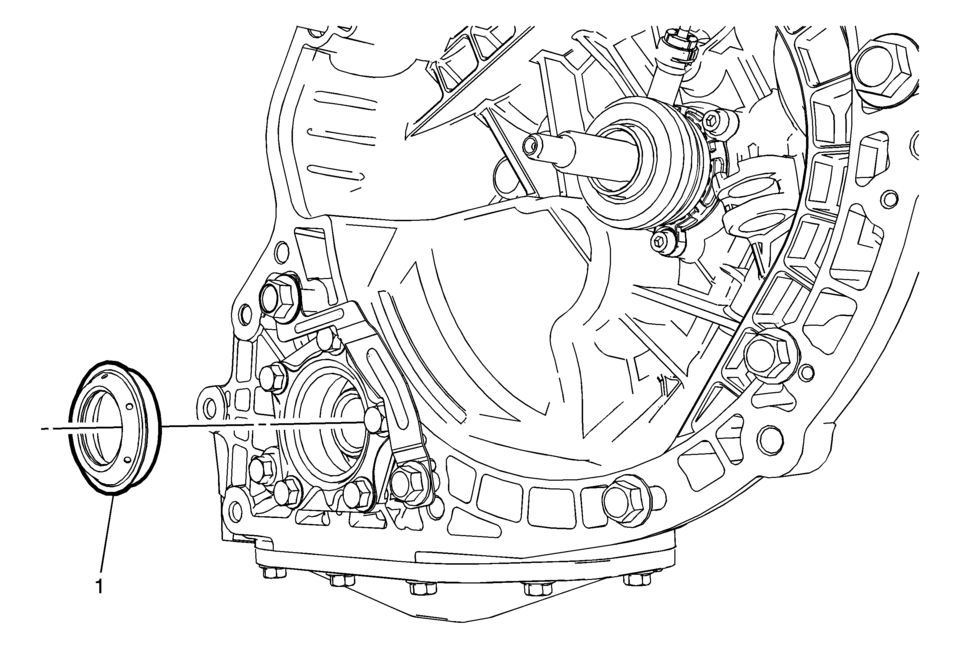
|
Callout |
Component Name |
|---|---|
Preliminary Procedures
|
|
|
1 |
Right Front Wheel Drive Shaft Oil Seal Procedure
Note: Do not reuse the wheel drive shaft oil seal.
For equivalent regional tools, refer to Special Tools. |
 Front Wheel Drive Shaft Seal Replacement - Left Side
Special Tools
DT-446 Installer Drift
DT-7004 Slide Hammer
DT-23129 Universal Seal Remover
For equivalent regional tools, refer to Special Tools.
Removal Procedure
Raise and ...
 Gear Position Sensor Replacement
Gear Position Sensor Replacement
Callout
Component Name
Preliminary Procedure
Unclip the engine control module (ECM) and bracke ...
Other materials:
Brake Pedal Position Sensor Replacement
Removal Procedure
Remove the instrument panel lower trim pad cover. Refer to Instrument
Panel Lower Trim Pad Cover Replacement.
Disconnect the brake pedal position sensor electrical connector.
Remove the brake pedal position sensor bolt?€‰(1).
Remove t ...
Electrical Center Identification Views
Figure 1:
X70A Relay Block - Underhood Label (LUV)
Figure 2:
X70A Relay Block - Underhood, Top View (LUV)
Figure 3:
X50A Fuse Block - Underhood Label (LUV)
Figure 4:
X50A Fuse Block - Underhood Label (LUW)
...
Engine Coolant Fan Replacement (LUV)
Engine Coolant Fan Replacement
Callout
Component Name
Preliminary Procedure
Remove the engine coolant fan shroud. Refer to Engine Coolant Fan Shroud
Replacement.
1
Engine Coolant Fan Motor Elect ...

0.0048