Chevrolet Sonic Repair Manual: Headlamps, Front Turn Signal and Parking Lamps
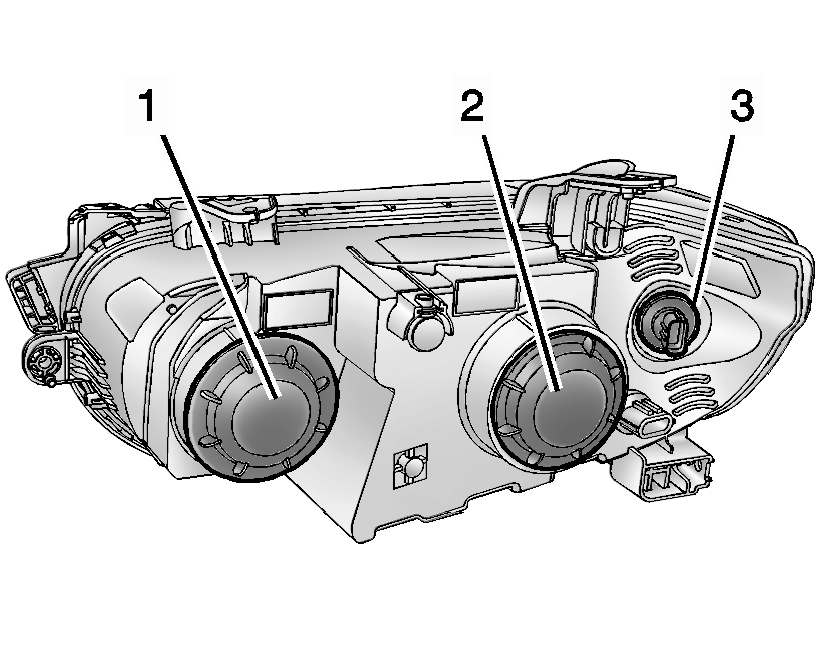
Passenger Side Shown, Driver Side Similar
- High-Beam Headlamp
- Low-Beam Headlamp
- Parking/Turn Signal Lamps
- High-Beam Headlamp/Low-Beam Headlamp
-
- Open the hood. See Hood.
- For the driver side bulb, remove the windshield washer bottle filler neck by turning it one-quarter turn counterclockwise and pulling it straight up and out of the bottle.
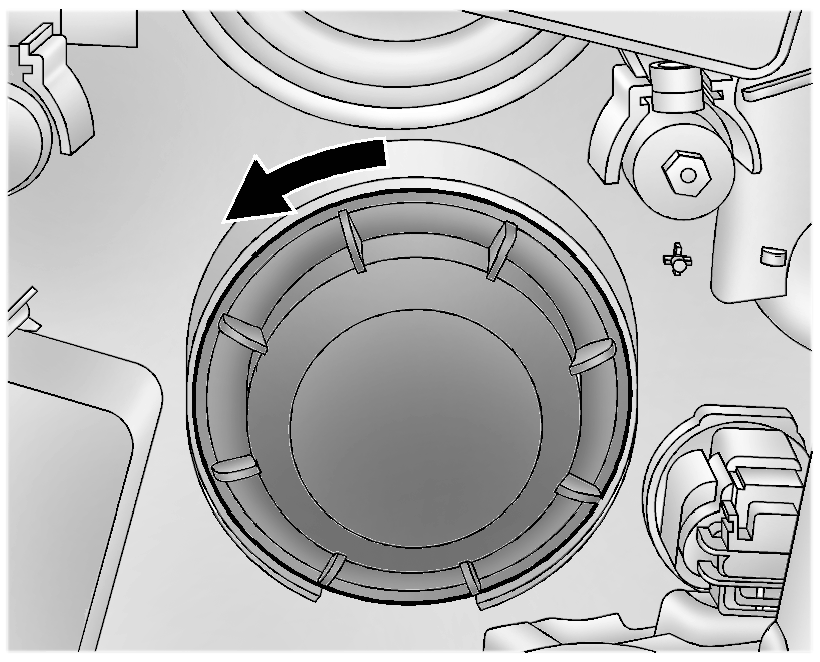
- Remove the headlamp bulb access cover.
- Turn the bulb counterclockwise and pull straight back.
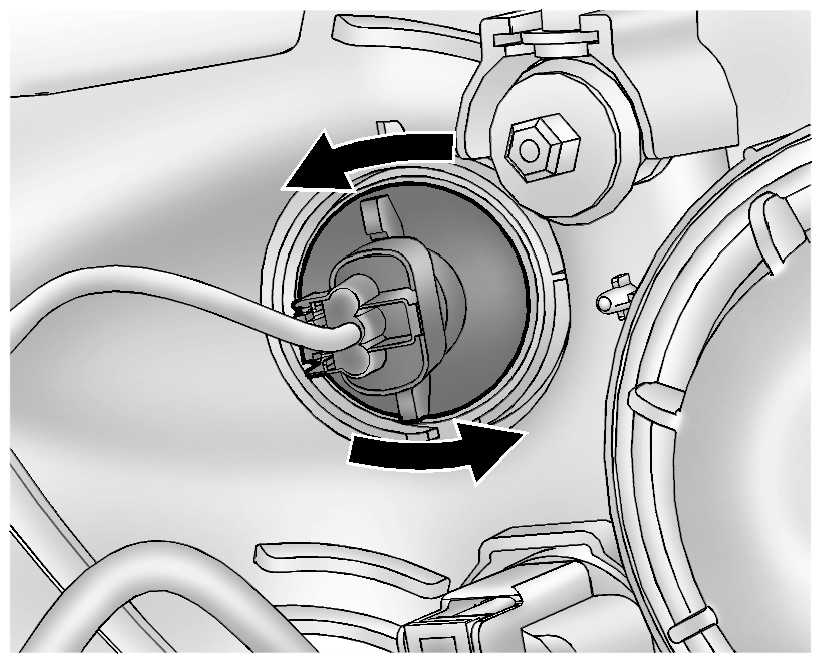
- Disconnect the wiring harness connector from the bulb.
- Install the new bulb in the headlamp assembly by turning clockwise.
- Reconnect the wiring harness connector.
- Install the headlamp bulb access cover.
- For the driver side bulb, replace the windshield washer bottle filler neck by turning it one-quarter turn clockwise into the bottle.
- Parking/Turn Signal Lamp
-
- Open the hood. See Hood.
- Remove the parking/turn signal lamp bulb socket from the headlamp assembly by turning counterclockwise.
- Remove the bulb from the bulb socket by pulling it straight out.
- Install the new bulb in the bulb socket.
- Install the bulb socket into the headlamp assembly by turning clockwise.
 Headlamp Bulb Replacement
Headlamp Bulb Replacement
Callout
Component Name
Preliminary Procedure
Open and support the hood assembly.
1
...
 License Plate Lamp
Lamp Assembly
Bulb Assembly
Bulb Socket
Bulb
Lamp Assembly
To replace one of these bulbs:
Push the left end of the lamp assemb ...
Other materials:
Liftgate Strut Replacement
Liftgate Strut Replacement
Callout
Component Name
1
Liftgate Strut
Warning: When a lift gate hold open device is being removed
or installed, provide alternate support to avoid the possibility of
damage ...
Front Side Door Window Switch Bezel Replacement (Left Side)
Front Side Door Window Switch Bezel Replacement
Callout
Component Name
Preliminary Procedure
Remove the front side door trim. Refer to Front Side Door Trim Replacement.
1
Front Side Door Window S ...
Seat Adjustment
Manual Seats
Warning: You can lose control of the vehicle if you try to adjust
a driver seat while the vehicle is moving. Adjust the driver seat only when
the vehicle is not moving.
To adjust a manual seat:
Pull the handle at the front of the seat.
Slide the ...

0.0062