Chevrolet Sonic Repair Manual: Ignition Coil Replacement
Special Tools
EN-6009 Remover and Installer Ignition Coil
For equivalent regional tools, refer to Special Tools.
- Removal Procedure
-
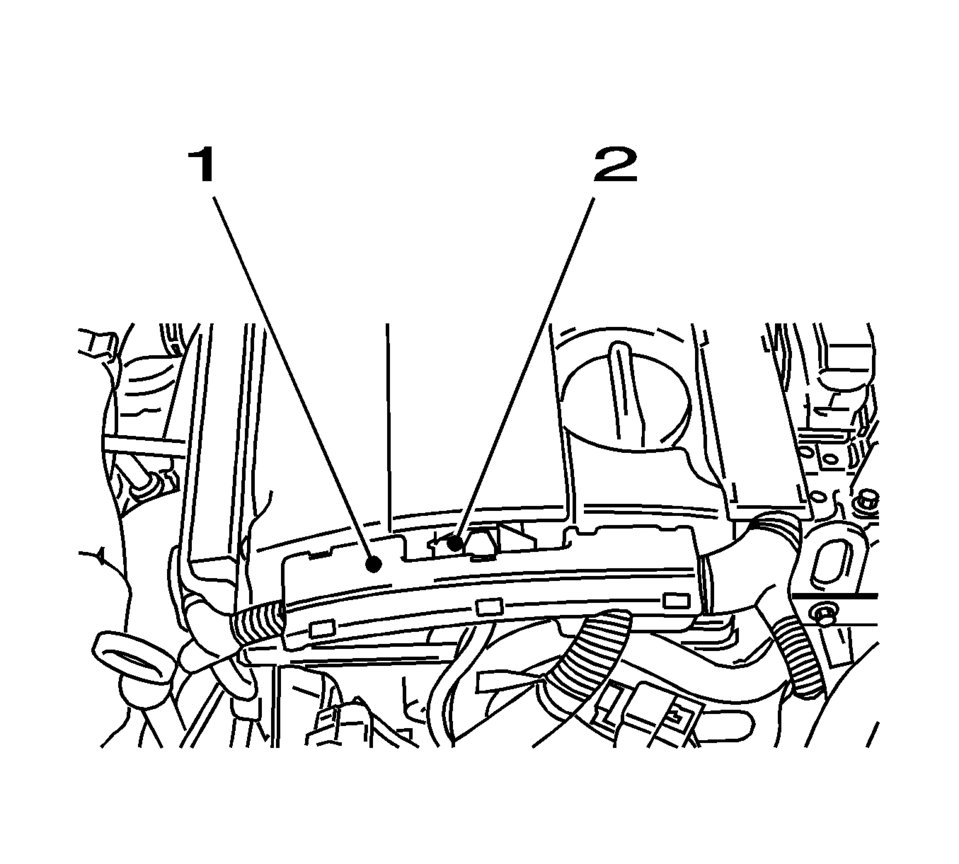
- Remove the engine wiring harness guide (1) from the cylinder head.
- Disconnect the ignition coil electrical connector (2).
- Remove the cover of the ignition coil in the direction of the arrow.
- Remove the ignition coil bolts.
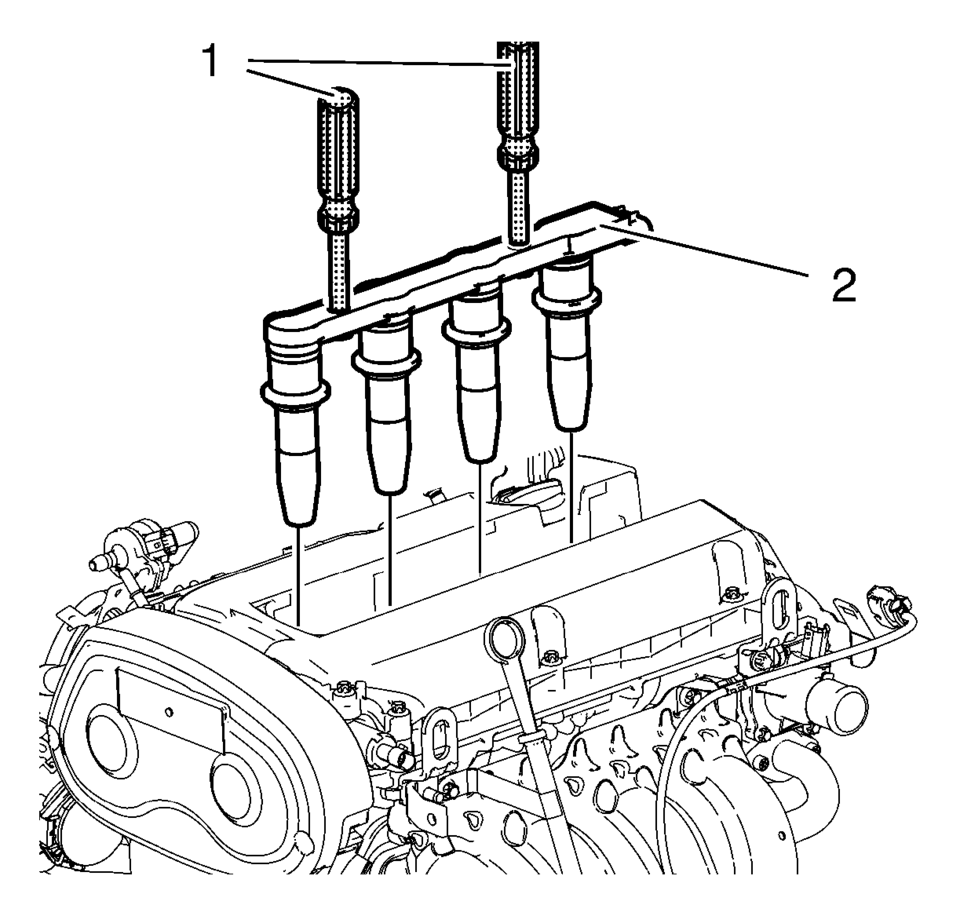
- Install the EN-6009 remover/installer (1).
- Remove the ignition coil (2).
- Remove the EN-6009 remover/installer (1).
Note:
Note the arrow on the cover.
- Installation Procedure
-
- Install the EN-6009 remover/installer (1).
- Install the ignition coil (2).
- Remove the EN-6009 remover/installer (1).
- Install the ignition coil fasteners and tighten to 8 Y (71 lb in)
.
- Install the ignition coil cover in the opposite direction of the arrow.
- Connect the ignition coil electrical connector (2).
- Install the engine wiring harness guide (1) at the cylinder head.
Note:
Note the arrow on the cover.
 Ignition Coil Removal
Special Tools
EN-6009 Remover and Installer Ignition Module
For equivalent regional tools, refer to Special Tools.
Remove the 2 ignition coil bolts (1).
Install EN- ...
 Spark Plug Inspection
Spark Plug Usage
Ensure that the correct spark plug is installed. An incorrect spark
plug causes driveability conditions.
Ensure that the spark plug has the correct heat range. An ...
Other materials:
Rear Bumper Impact Bar Replacement (Sedan)
Rear Bumper Impact Bar Replacement
Callout
Component Name
Preliminary Procedure
Remove the rear bumper fascia. Refer to Rear Bumper Fascia Replacement.
1
Rear Bumper Impact Bar Bolt (Qty:?€‰4 ...
Driver or Passenger Seat Shoulder Belt Replacement (with A69)
Driver or Passenger Seat Shoulder Belt Replacement
Callout
Component Name
Warning: Refer to SIR Warning.
Warning: Refer to SIR Inflator Module Handling and Storage
Warning.
Warning: Refer to SIR ...
Fuel Tank Draining
Warning: Refer to Gasoline/Gasoline Vapors
Warning.
Note: The fuel tank must be drained with a suitable, commercially-available
fuel removal unit and suction hose - follow safety regulations and national
legislation. The fuel tank is fitted with a refill limit float valv ...

0.0058