Chevrolet Sonic Repair Manual: Lower Control Arm Replacement
- Removal Procedure
-
- Raise and support the vehicle. Refer to Lifting and Jacking the Vehicle.
- Remove the tire and wheel assembly. Refer to Tire and Wheel Removal and Installation.
- Remove the front wheelhouse rear liner. Refer to Front Wheelhouse Liner Replacement.
- Remove the front wheelhouse liner inner front extension. Refer to Front Wheelhouse Liner Inner Front Extension Replacement.
- Disconnect the steering linkage tie rod end from the steering knuckle. Refer to Steering Linkage Outer Tie Rod Replacement.
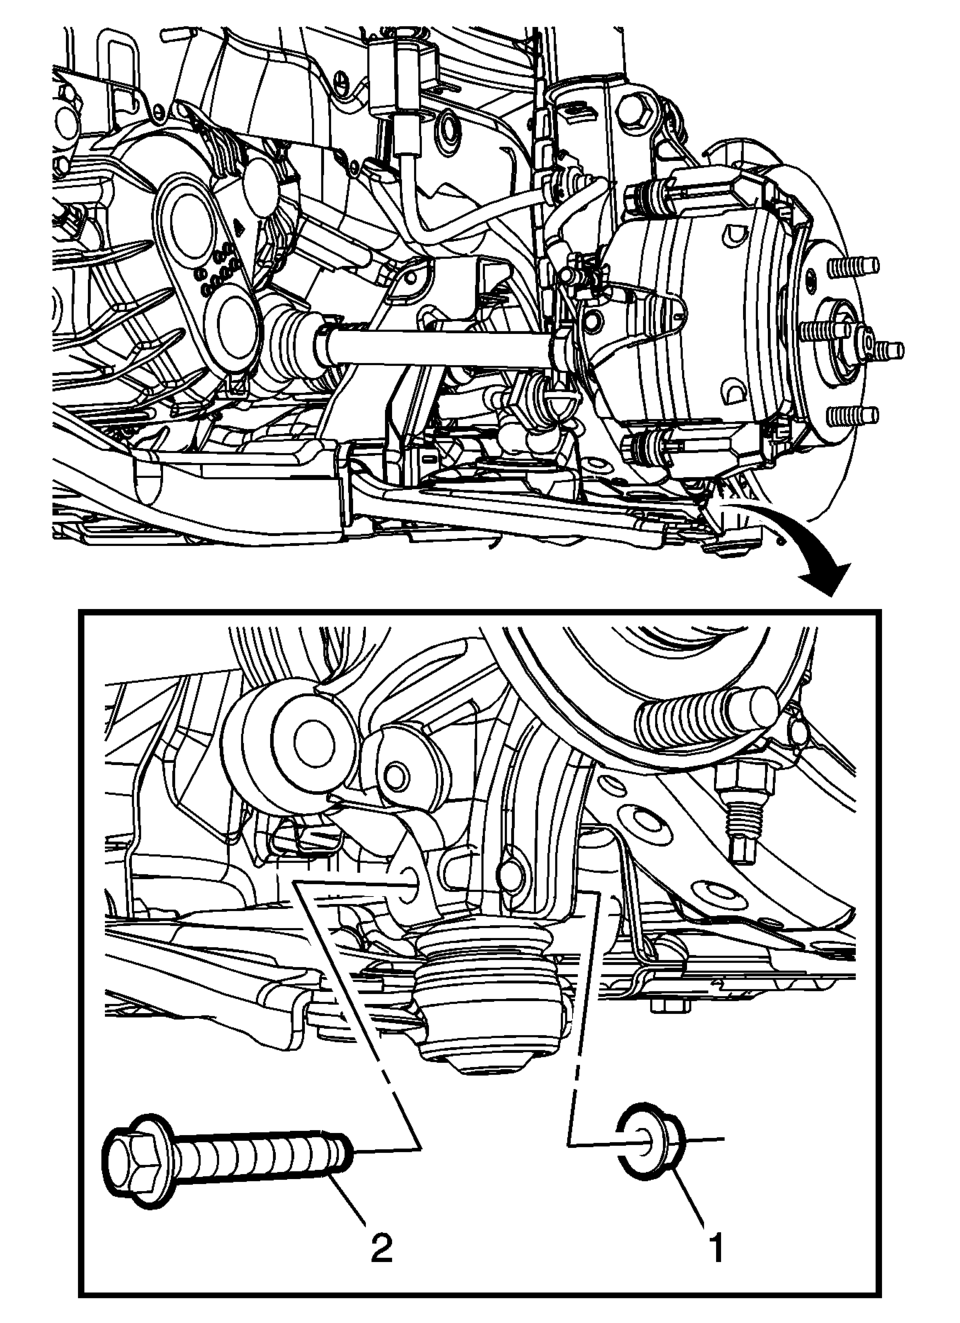
- Remove the lower ball joint nut (1) and bolt (2).
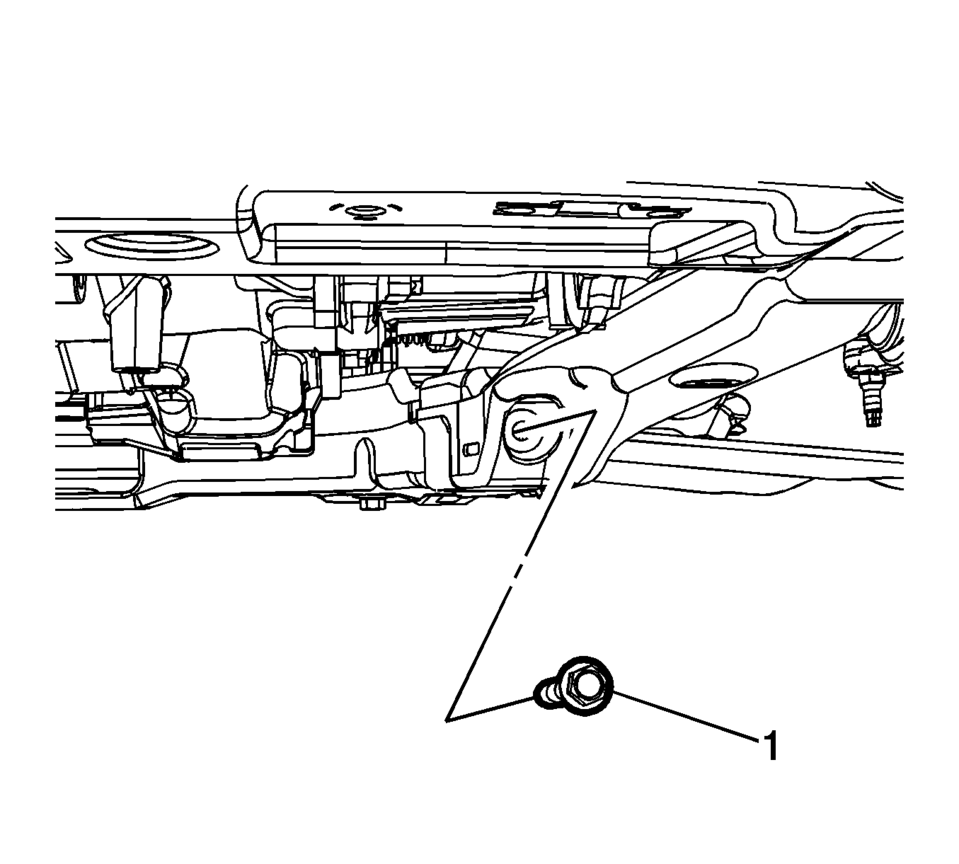
- Remove and discard the front lower control bolt (1). Replace with NEW only.
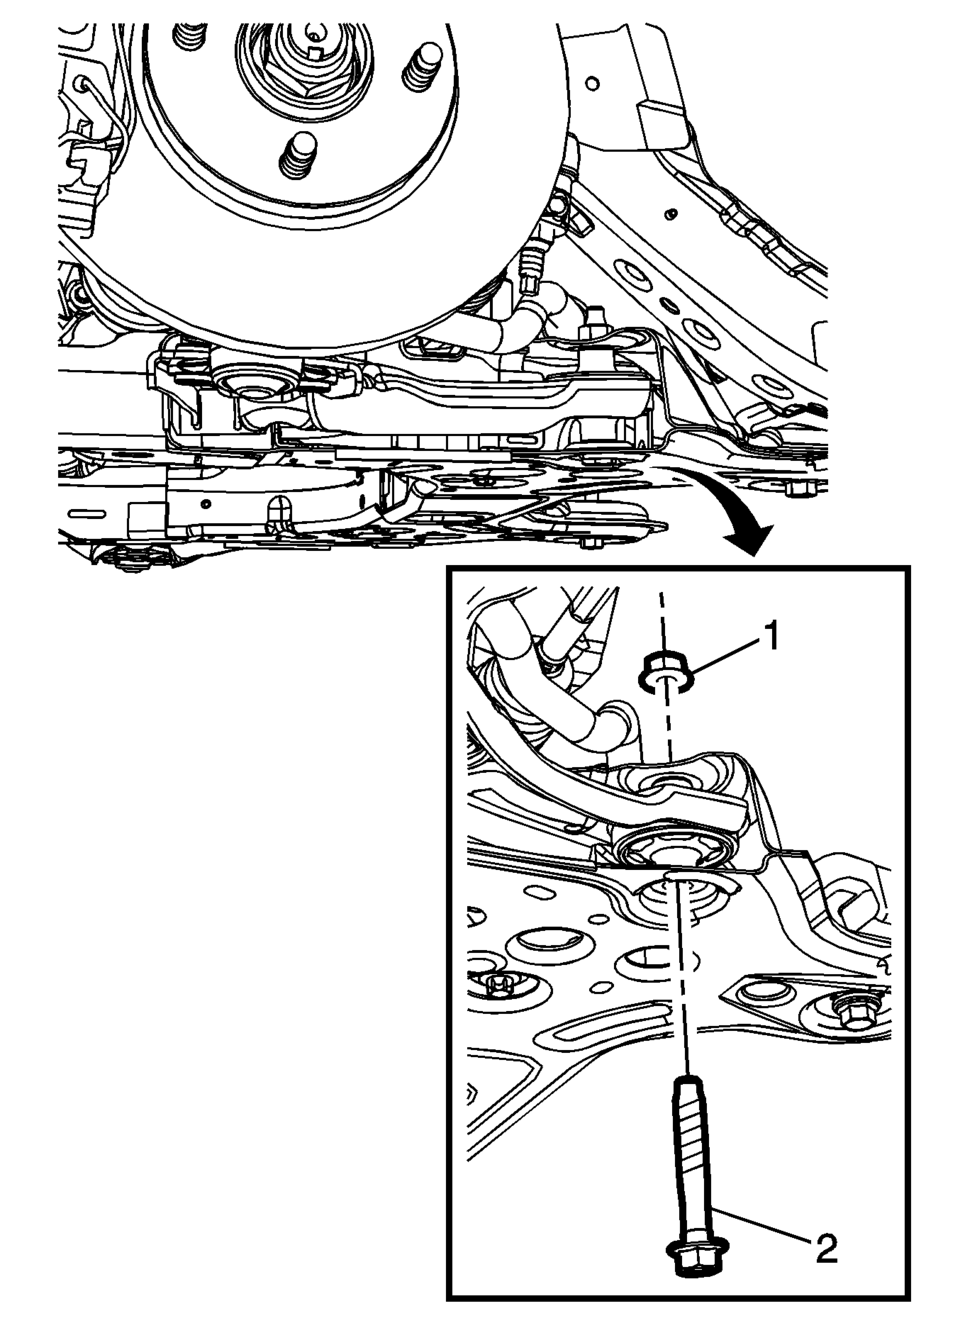
- Remove the front lower control arm rear nut (1) and bolt (2).
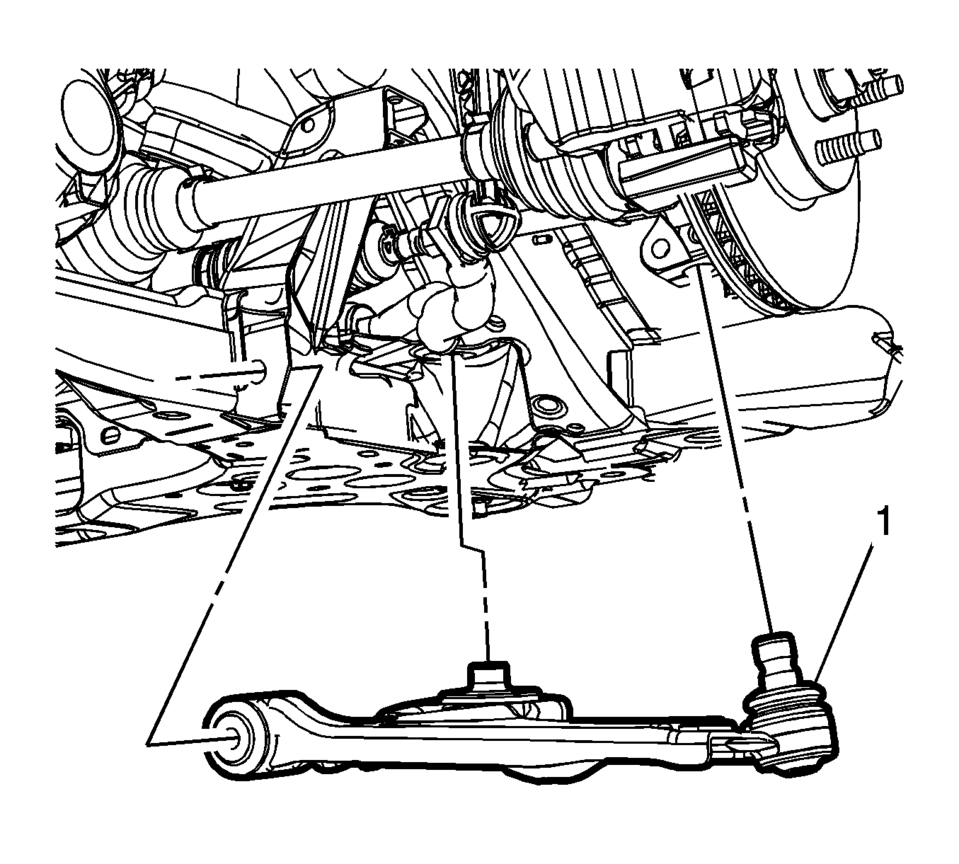
- Push the front brake corner forward and then remove the front lower control arm (1).
Note:
DO NOT reuse the ball joint nut. The nut is NOT reusable.
Note:
DO NOT reuse the rear lower control arm nut. The nut is NOT reusable.
- Installation Procedure
-
- Push the front brake corner forward and then position the lower control arm (1) in the vehicle.
- Install the NEW front lower control arm front bolt (1) and tighten to.
Note:
Install the front lower control arm rear bolt and nut hand tight to hold the lower control arm in place while tightening the front lower control arm bolt.
- First Pass: 115 Y (85 lb ft)
- Final Pass: plus 65 degrees
- Tighten the NEW front lower control arm rear nut (1) to:
- First Pass: 160 Y (118 lb ft)
- Final Pass: plus 35 degrees
- Install the NEW lower ball joint bolt (2) and nut (1) and tighten the to nut (1):
- First Pass: 30 Y (22 lb ft)
- Second Pass: release 120 degrees
- Third Pass: 30 Y (22 lb ft)
- Final Pass: plus 35 degrees
- Install the steering linkage tie rod end on the steering knuckle. Refer to Steering Linkage Outer Tie Rod Replacement.
- Install the front wheelhouse liner inner front extension. Refer to Front Wheelhouse Liner Inner Front Extension Replacement.
- Install the front wheelhouse rear liner. Refer to Front Wheelhouse Liner Replacement.
- Install the tire and wheel assembly. Refer to Tire and Wheel Removal and Installation.
- Lower the vehicle.
 Rear Compartment Lid Hinge Torque Rod Replacement
Rear Compartment Lid Hinge Torque Rod Replacement
Callout
Component Name
Warning: Refer to Hood Hold-Open Device Warning.
...
 Front Wheel Bearing and Hub Replacement
Special Tools
CH-50559 Wheel Hub/Bearing Remover Kit
For equivalent regional tools, refer to Special Tools.
Removal Procedure
Raise and support the vehicle. Refer to Lifting and Jac ...
Other materials:
Rear Seat Back Cushion Hinge Replacement
Rear Seat Back Cushion Hinge Replacement
Callout
Component Name
Preliminary Procedure
Remove the rear seat cushion. Refer to Rear Seat Cushion Removal
and Installation
Remove the rear seat back cushion. Refer to Rear Seat ...
Battery Positive Cable Replacement
Removal Procedure
Disconnect the negative battery cable. Refer to Battery Negative Cable
Disconnection and Connection.
Remove the underhood fuse block cover.
Remove the battery positive nut (1) and the battery positive cable (2),
from the underhood fus ...
Intake Manifold Tuning Valve Actuator Replacement
Intake Manifold Tuning Valve Actuator Replacement
Callout
Component Name
Preliminary Procedure
Properly raise and support the vehicle. Refer to
Lifting and Jacking the Vehicle.
1
Intake Manifold ...

0.0063