Chevrolet Sonic Repair Manual: Manual Transmission Shift Lever and Selector Lever Cable Adjustment
- Remove the floor console. Refer to Front Floor Console Replacement.
- Lift upward and disengage (do not remove) both cable lock adjusters (1) to release the internal cable assembly, one for each side.
- Block the shift control housing, push the selector lever (2) backwards and push (arrow) the blocking device (1) towards the shift control housing.
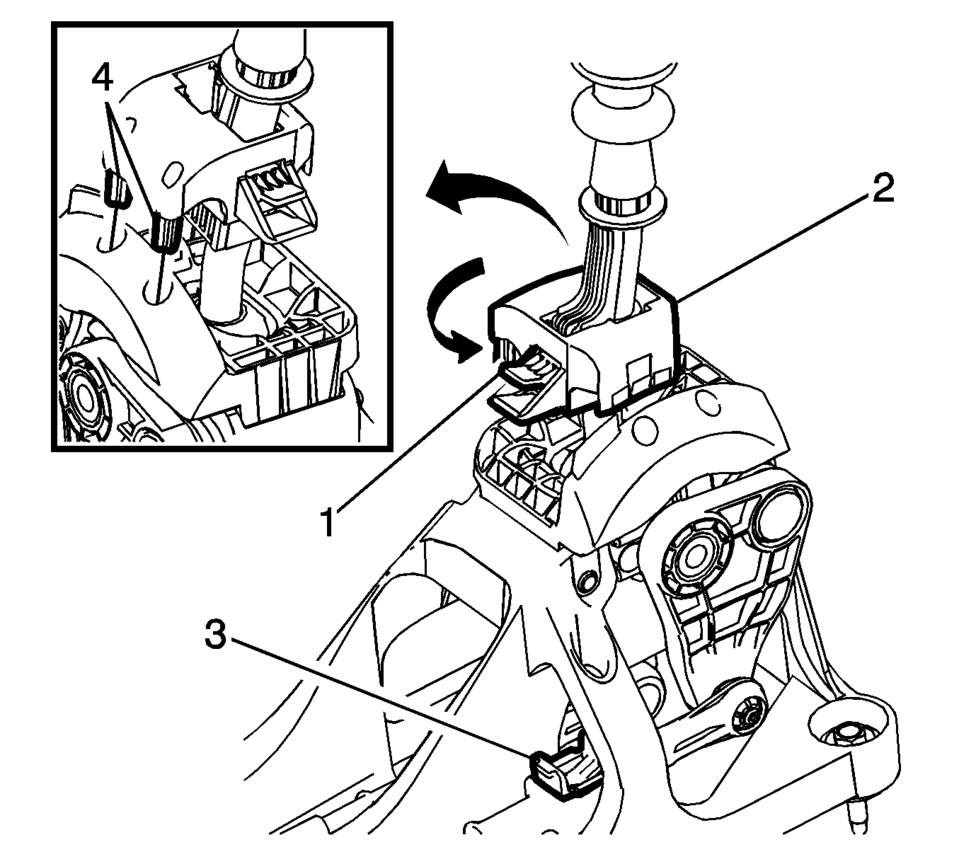
- lock the position of the shift control lever by rotating the reverse lockout device with the following instructions:
- Push down on tab (1) and pull up on device (2) to release from installed position.
- Rotate device 180 degrees so tab (1) is in the rear of the shift control assembly.
- Secure integral pins (4) in holes located on shifter base by pushing down device (2).
- Secure adjuster locks (3) by pushing down until locked. One for each cable.
- Reposition the reverse lockout device with the following instructions:
- Push down on tab (1) and pull up on device (2) to release from installed position.
- Rotate device (2) 180 degrees so tab (1) is in the front of the shift control assembly.
- Push downward on the reverse lockout device (2) until tab (1) snaps into detent.
- Unblock the shift control housing, push slightly the selector lever (2) backwards and pull (arrow) the blocking device away from the shift control housing.
- Install the floor console. Refer to Front Floor Console Replacement.
- Verify correct operation of the transmission control assembly.

Note:
The hole of the transmission gear control (2) must be aligned to the hole in the base so the pin (1) can pass thru both. The transmission gear control will be locked in the 1? neutral position.
Note:
During this procedure DO NOT touch or preload the fixed shift lever as this may cause mis-adjustment to the shift system.
Note:
When unblocking the blocking device (1) a defined snap noise should be audible, a snap effect should be felt.
 Automatic Transmission Range Selector Lever Replacement
Removal Procedure
Set the park brake and chock the wheels.
Disconnect the transmission range selector lever cable
terminal (1) from the transmission manual shift leve ...
 Manual Transmission Shift Lever and Selector Lever Cable Replacement
Removal Procedure
Remove the battery tray. Refer to
Battery Tray Replacement.
\i
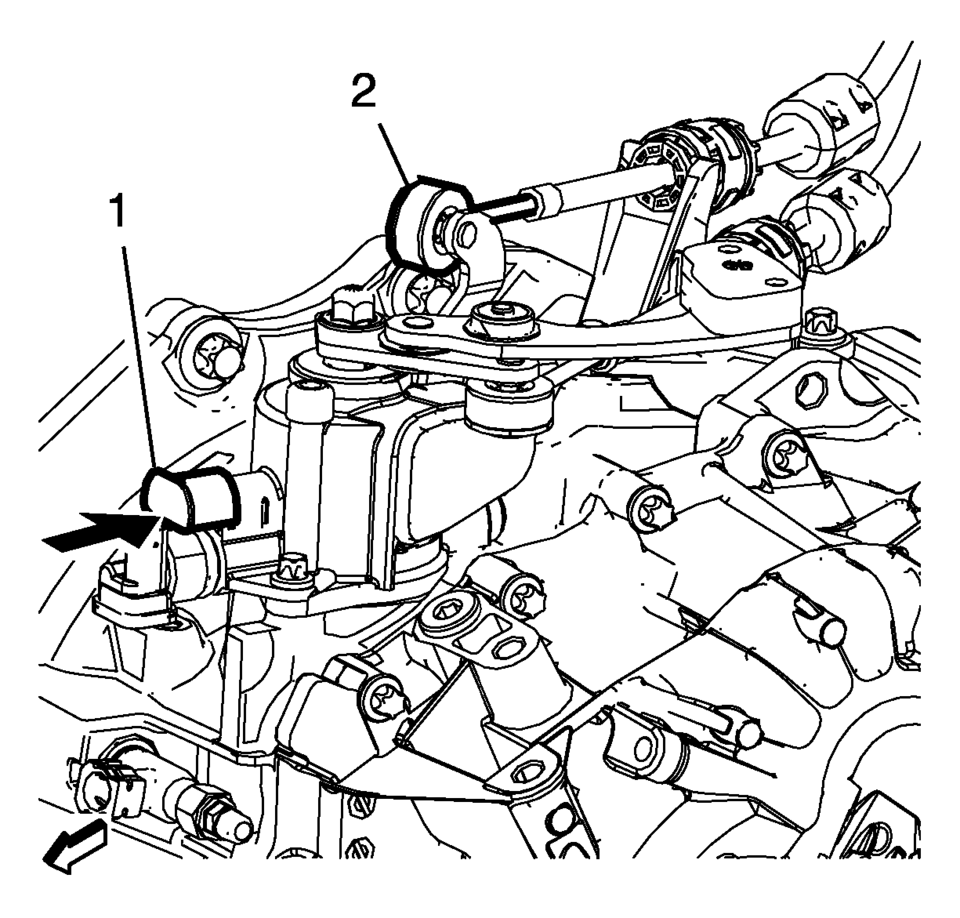
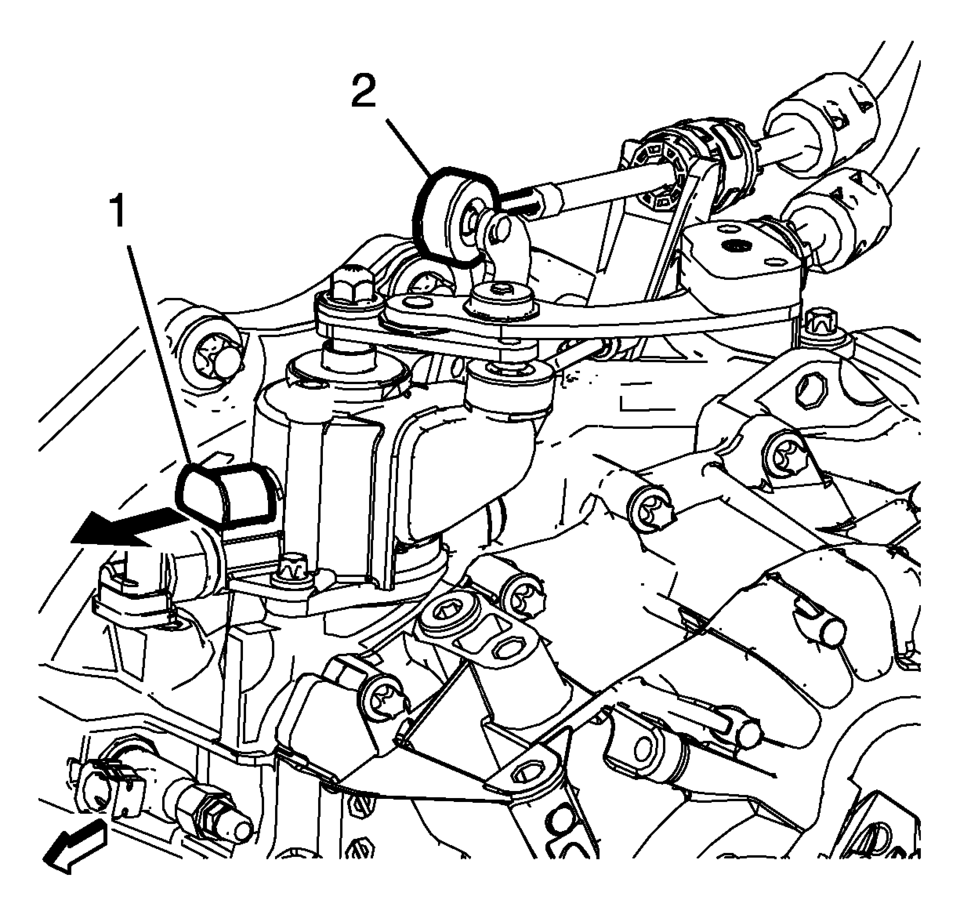
Disconnect the shift lever and selector cable ends (1)
from the transmission s ...
Other materials:
Floor Mats
Warning
If a floor mat is the wrong size or is not properly installed, it can interfere
with the pedals. Interference with the pedals can cause unintended acceleration
and/or increased stopping distance which can cause a crash and injury. Make sure
the floor mat does not interfere with the pe ...
Brake Pad and Rotor Burnishing
Warning: Road test a vehicle under safe conditions and while obeying
all traffic laws. Do not attempt any maneuvers that could jeopardize vehicle
control. Failure to adhere to these precautions could lead to serious personal
injury and vehicle damage.
Burnishing the brake pads and br ...
Engine Coolant Fan Resistor Mount Repair
Engine Coolant Fan Resistor Mount Repair
Callout
Component Name
Preliminary Procedure
Remove the fasteners securing the radiator surge tank to the engine
shroud and position the surge tank out of the way. Refer to Radiator
...

0.0062