Chevrolet Sonic Repair Manual: Rear Wheel Bearing and Hub Replacement (Disc Brake)
Special Tools
EN–45059 Angle Meter
For equivalent regional tools, refer to Special Tools.
- Removal Procedure
-
- Raise and suitably support the vehicle. Refer to Lifting and Jacking the Vehicle.
- Remove the tire and wheel assembly. Refer to Tire and Wheel Removal
and Installation.
Caution:
Support the brake caliper with heavy mechanic wire, or equivalent, whenever it is separated from its mount and the hydraulic flexible brake hose is still connected. Failure to support the caliper in this manner will cause the flexible brake hose to bear the weight of the caliper, which may cause damage to the brake hose and in turn may cause a brake fluid leak.
- Without disconnecting the hydraulic brake flex hose, remove and support the rear brake caliper and bracket as an assembly. Refer to Rear Brake Caliper Replacement.
- Remove the rear brake rotor. Refer to Rear Brake Rotor Replacement.
- Remove the wheel speed sensor bolt (1).
- Remove the wheel speed sensor (2).
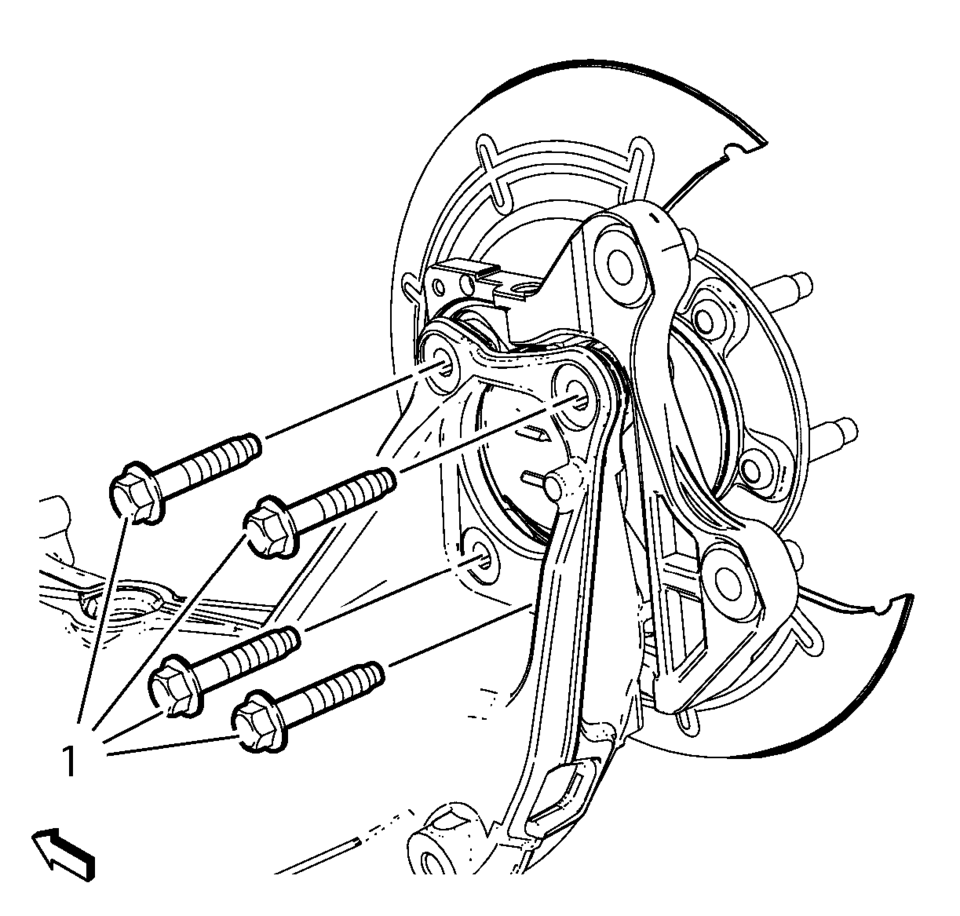
- Remove and DISCARD the 4 wheel bearing/hub mounting bolts (1).
- Remove the wheel bearing/hub assembly (2) and rear brake shield (1) from the rear axle.

- Installation Procedure
-
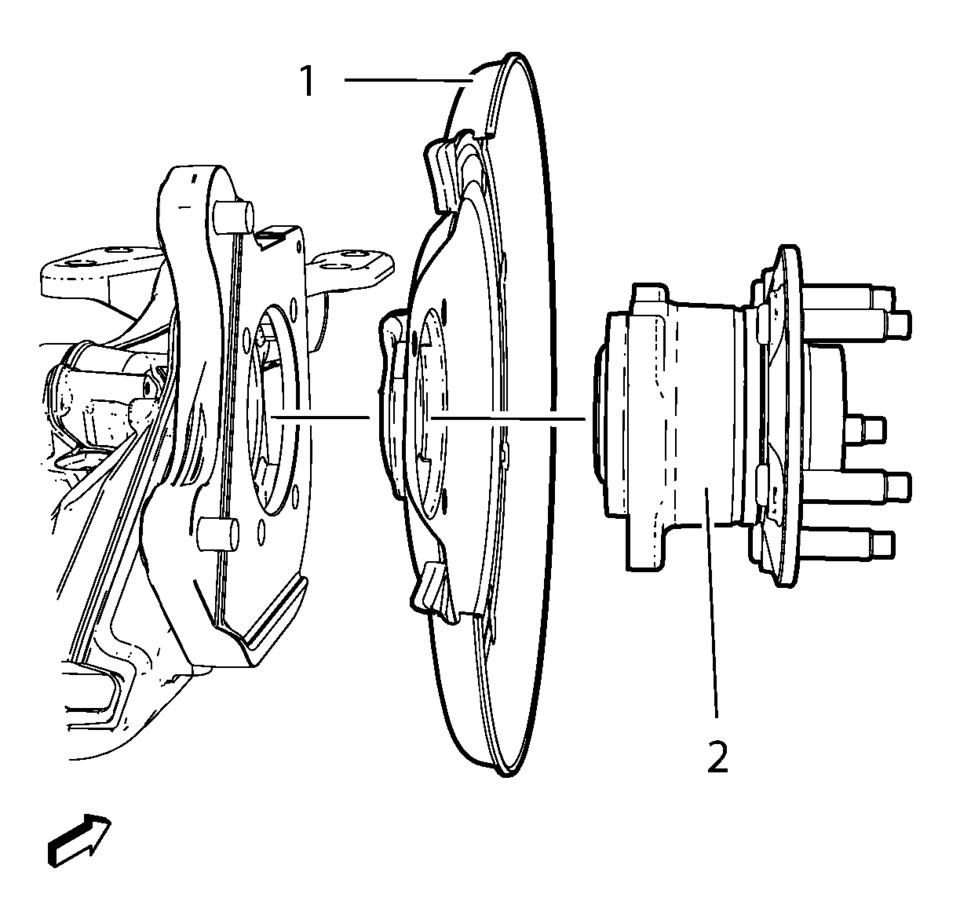
- Position the rear brake shield (1) and wheel bearing/hub assembly (2) in the rear axle.
- Install the 4 NEW wheel bearing/hub mounting bolts (1) and tighten a
first pass to 58 Y (43 lb ft)
. Tighten the bolts evenly, in a cross-pattern.
- Install the wheel speed sensor (2).
- Install the wheel speed sensor bolt (1) and tighten to 6 Y (53 lb in)
.
- Install the brake rotor. Refer to Rear Brake Rotor Replacement.
- Install the brake caliper and bracket as an assembly. Refer to Rear Brake Caliper Replacement.
- Install the tire and wheel assembly. Refer to Tire and Wheel Removal and Installation.
- Lower the vehicle.
Caution:
Refer to Fastener Caution.
 Rear Disc Brake Mounting and Hardware Inspection
Warning: Refer to Brake Dust Warning.
Caution: Support the brake caliper with heavy mechanic wire, or
equivalent, whenever it is separated from its mount and the hydraulic flexible
...
 Special Tools
Illustration
Tool Number/Description
CH-41013
J 41013
Rotor Resurfacing Kit
CH-42450 ...
Other materials:
Air Vents
Use the air vents located in the center and on the side of the instrument panel
to direct the airflow. Move the slats on the center air vents to direct airflow.
Turn the knobs on the side air vents counterclockwise or clockwise to open or
close off the airflow.
Operation Tips
Clear away an ...
Uniform Tire Quality Grading
Quality grades can be found where applicable on the tire sidewall between tread
shoulder and maximum section width. For example:
Treadwear 200 Traction AA Temperature A
The following information relates to the system developed by the United States
National Highway Traffic Safety Administration ...
Radio and Telephone Control Switch Replacement
Radio and Telephone Control Switch Replacement
Callout
Component Name
Preliminary Procedure
Remove the sterring wheel inflatable restraint module. Refer to
Airbag Steering Wheel Module Replacement.
1
...

0.008