Chevrolet Sonic Repair Manual: Relay Replacement (Within an Electrical Center)
Special Tools
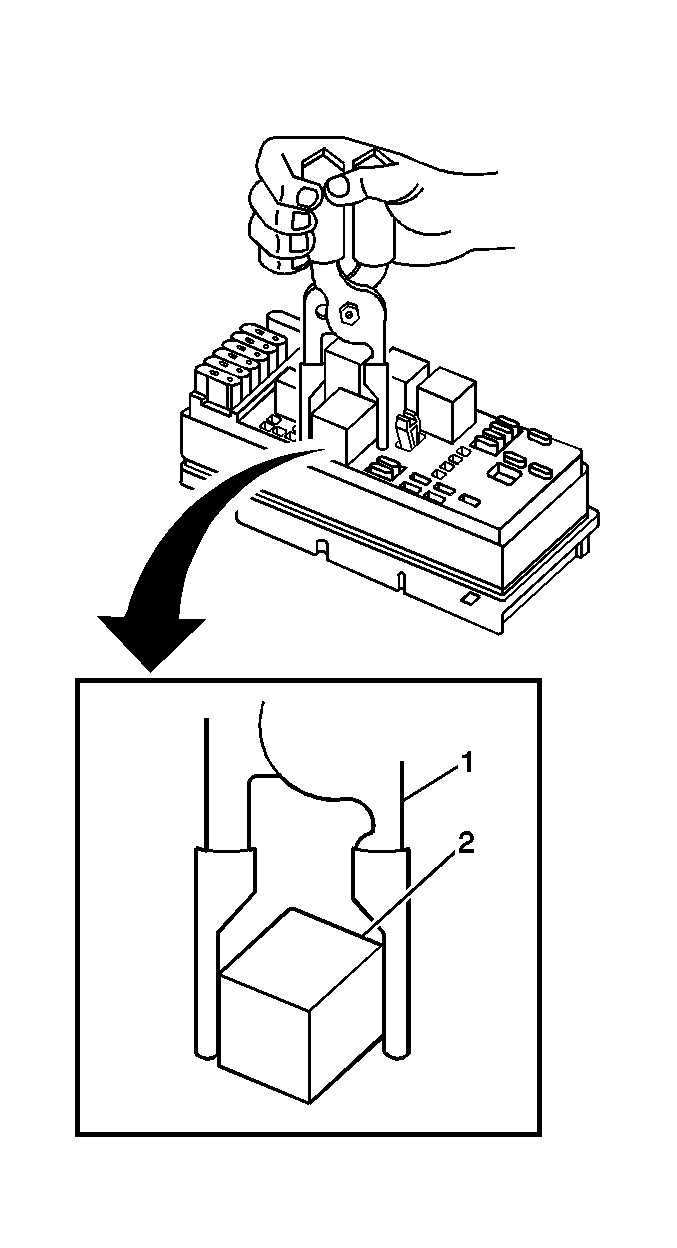
EL-43244 Relay Puller Pliers
- Removal Procedure
-
- Remove the electrical center cover.
- Always note the orientation of the relay.
- If equipped with a notch style relay; observe the location of the notch on the old relay to verify the new relay is installed with the notch in the same location.
- Ensure that the electrical center is secure, as not to put added stress on the wires or terminals.
- Locate the relay. Refer to Electrical Center Identification Views to locate the electrical center where the relay exists.
- Using the EL-43244 (1) position the tool on opposing corners of the relay (2).
- Remove the relay (2) from the electrical center.
Note:
Caution:
Use EL-43244 to pull the relay straight out from the electrical center terminals. The use of pliers or a flat bladed tool could damage the electrical center.
- Installation Procedure
-
- Install the relay (2) in the same position as removed.
- Install the electrical center cover.
 Relay Replacement (Attached to Wire Harness)
Removal Procedure
Locate the relay. Refer to the Master Electrical Component List to locate
the relay in the vehicle.
Remove any fasteners which hold the relay in place.
...
 HVAC
HVAC
...
Other materials:
Hood Rear Seal Replacement
Hood Rear Seal Replacement
Callout
Component Name
1
Hood Rear Seal
Procedure
Clean the area where the seal will be mounted. Use a suitable solvent
with a mixture of 50?€‰percent isopropyl alcohol and 50?â ...
Front Floor Console Cover Replacement (Manual Transmission)
Removal Procedure
Use a flat bladed plastic trim tool in order to release the retainers
securing the console cover?€‰(1) to the console assembly.
Reach under the console cover assembly?€‰(1) and release the retainer
tabs securing the transmission shif ...
Airbag Roof Side Rail Module Replacement - Rear
Airbag Roof Side Rail Module Replacement - Rear
Callout
Component Name
Warning: In order to prevent SIR deployment, personal injury,
or unnecessary SIR system repairs, do not strike the door or the door
pillar in the ...

0.006