
Chevrolet Sonic Repair Manual: Transmission Case Assemble (Gen 1)
Special Tools
- 3-9506289 Universal Adapter
- J-840733 Driver
- R-0007758 Holding Fixture
- R-0007761 Universal Handle
- R-0007770 Holding Fixture Adapter Plates
- T-9804669 Seal Installer
- T-0307000 Extractor and Driver Fixture
For equivalent regional tools, refer to Special Tools.
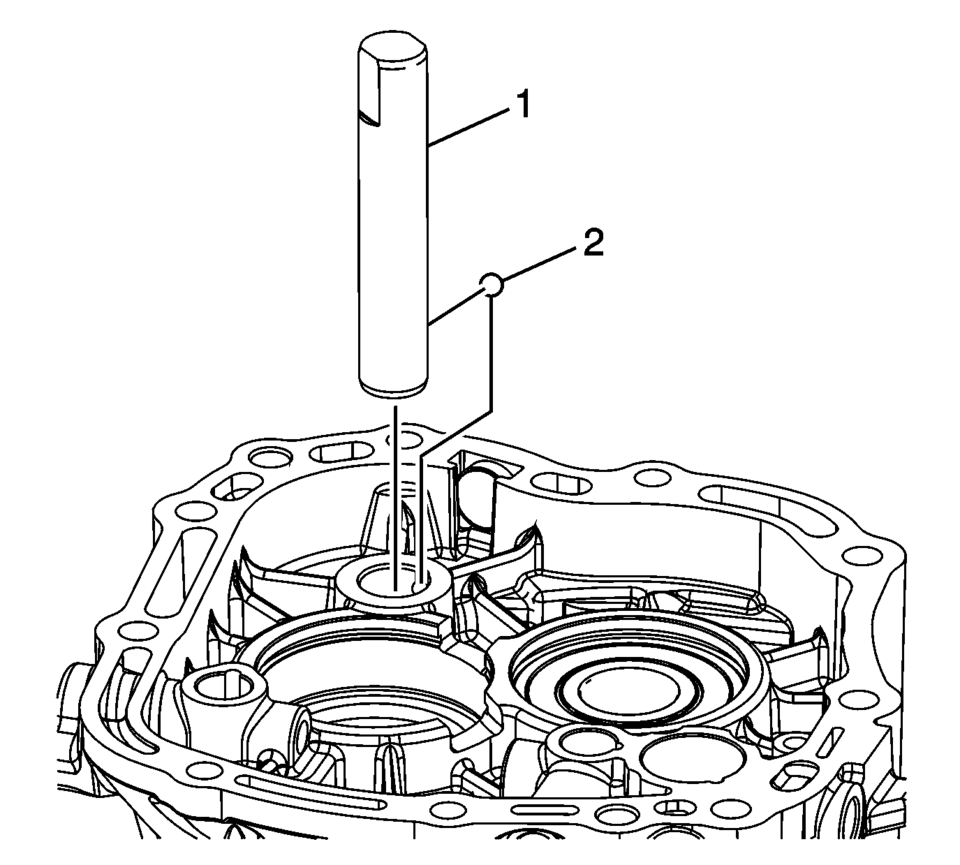
- Install the reverse idler gear shaft retaining ball (2).
- Install the reverse idler gear shaft (1).
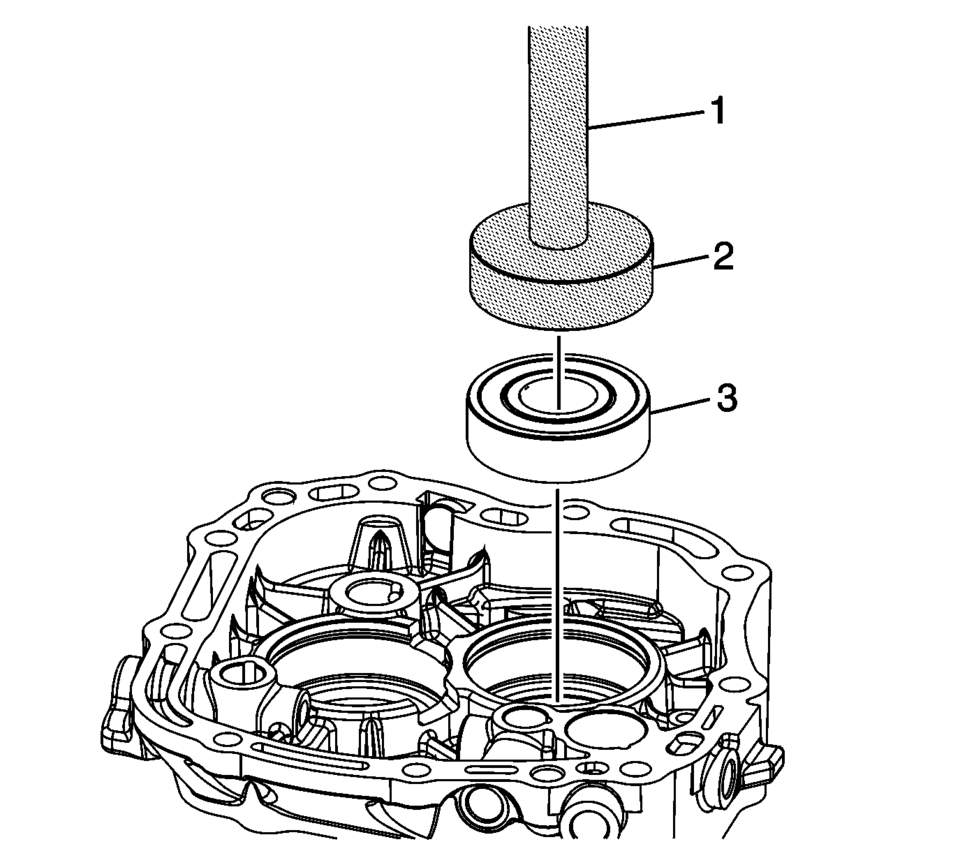
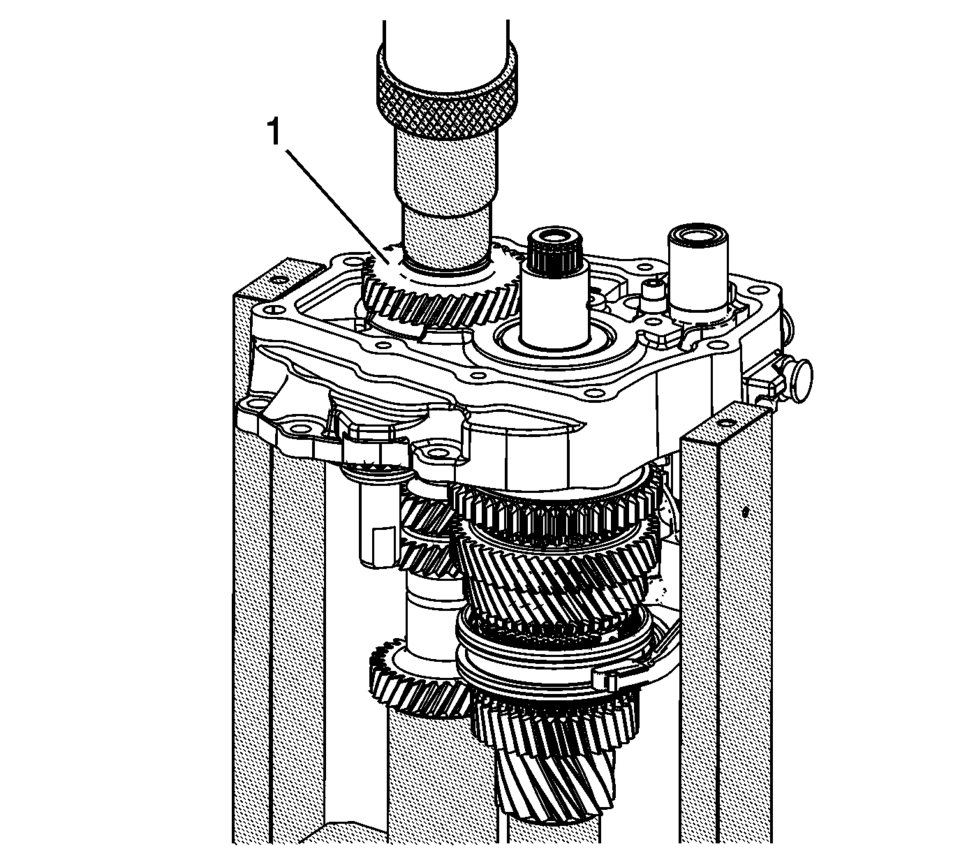
- Using T-9804669 seal installer (2) and R-0007761 handle (1), install the mainshaft bearing (3) into the case.
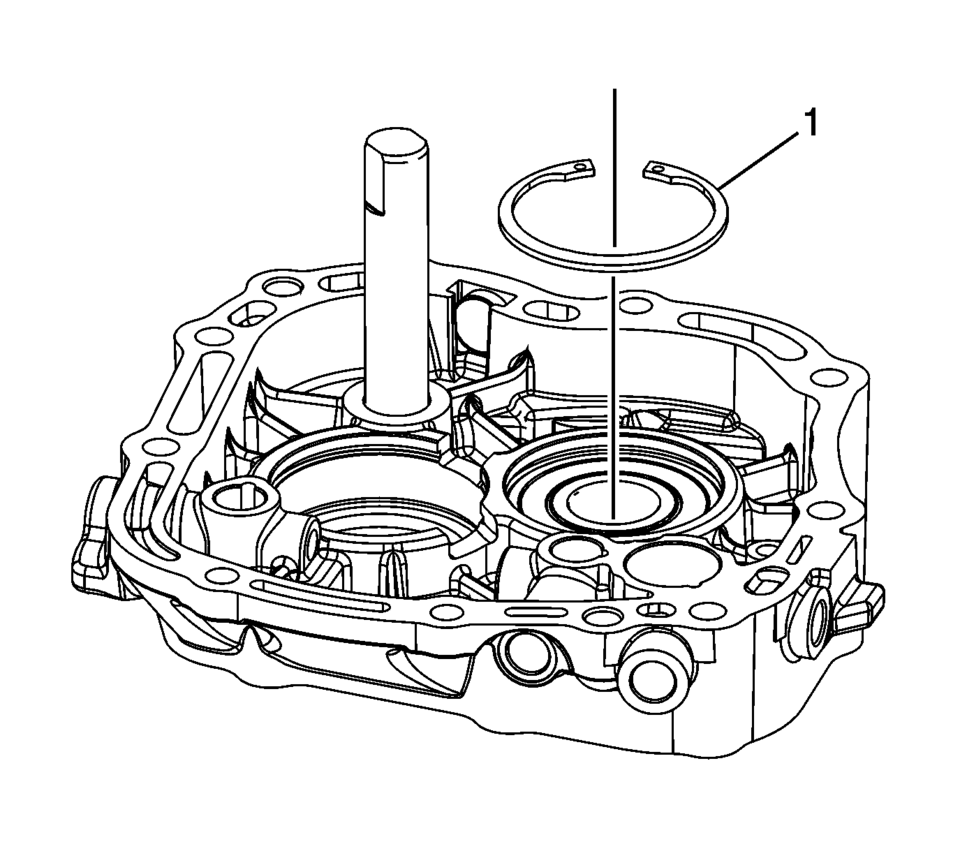
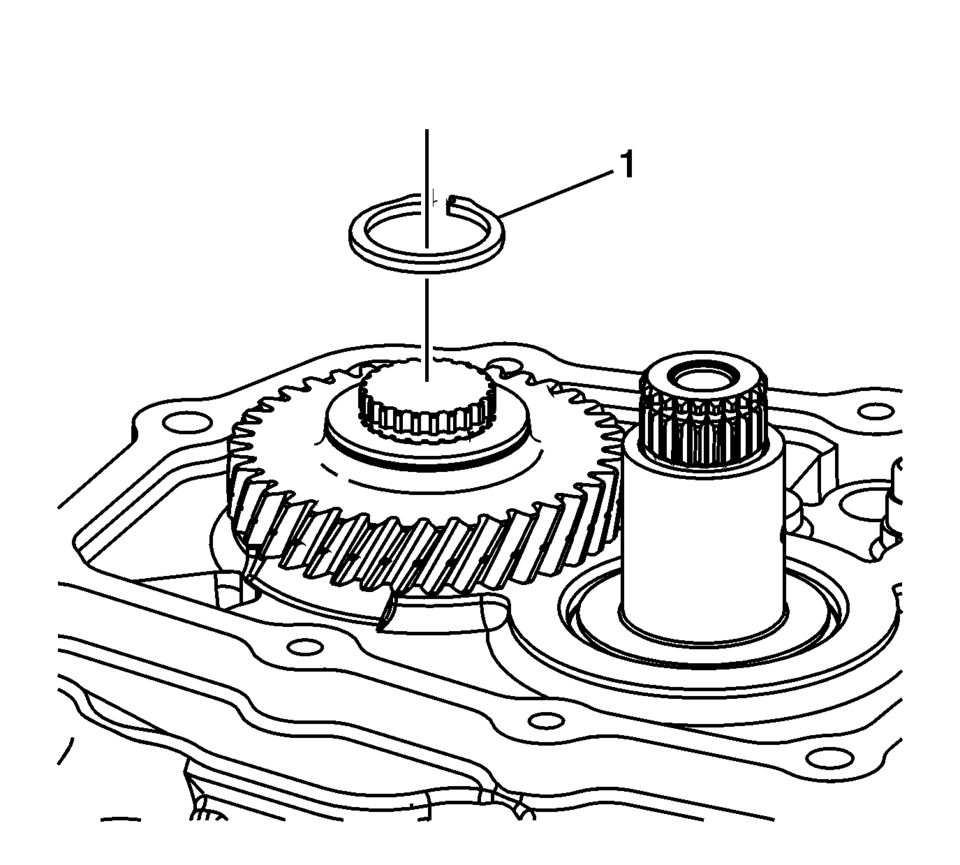
- Install the mainshaft bearing retaining ring (1).
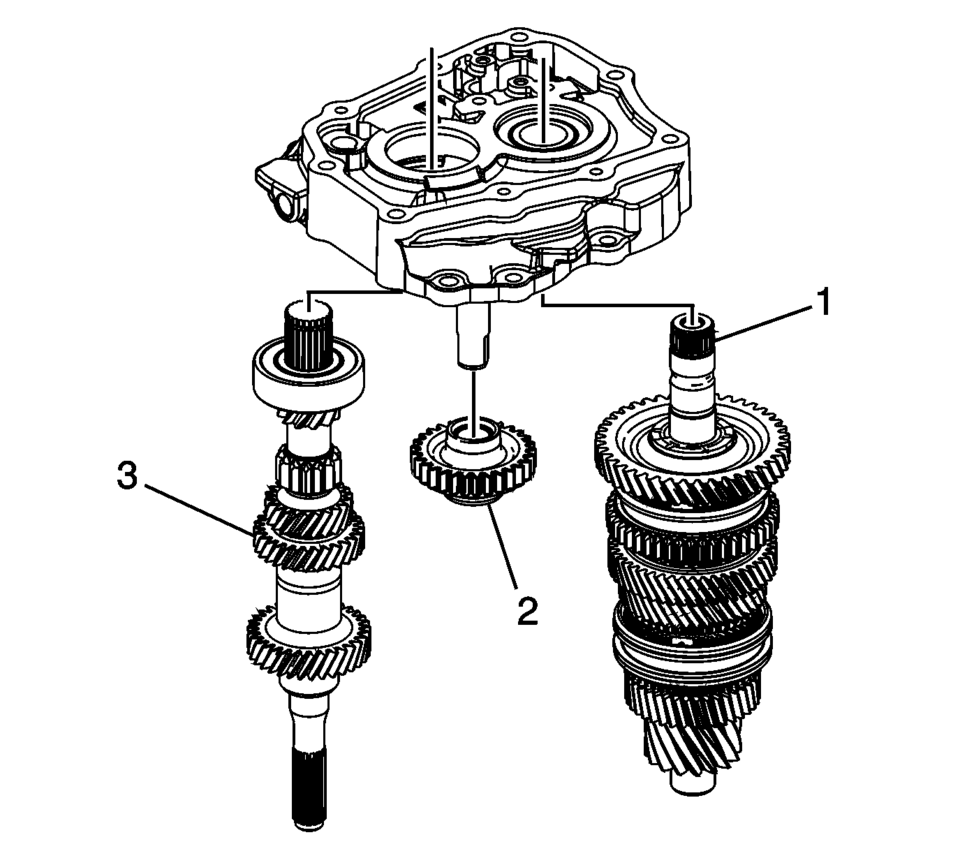
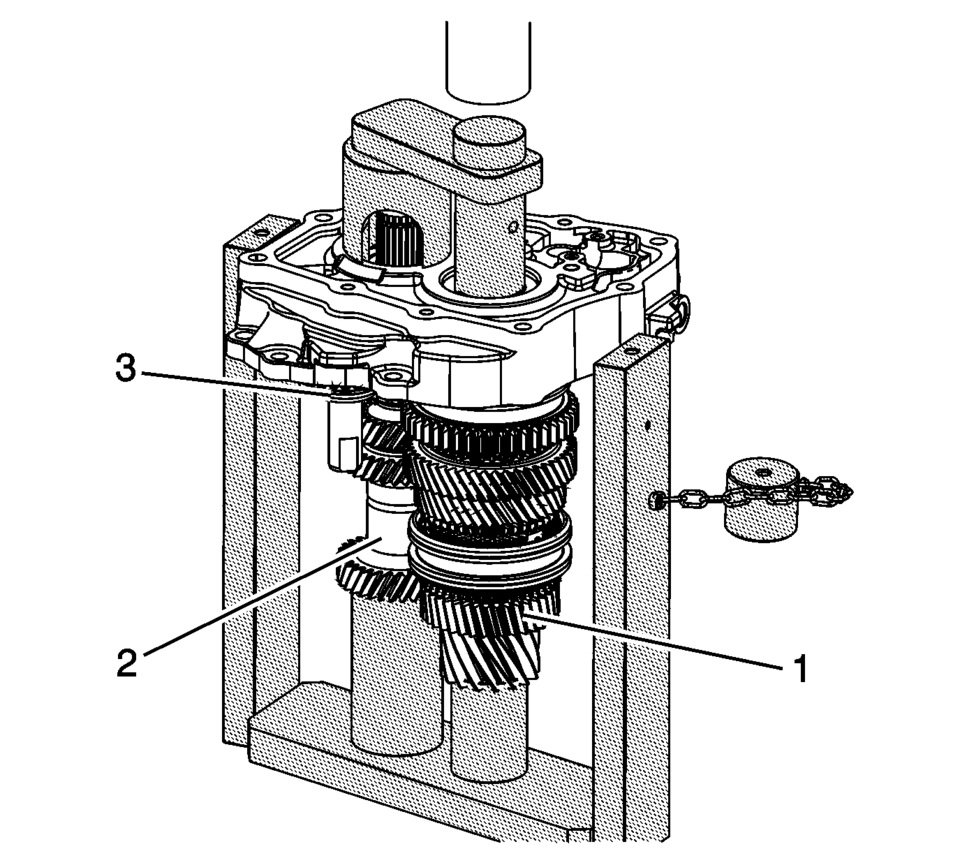
- Install the input shaft (3), reverse idler gear (2) and mainshaft (1) onto the T-0307000 driver fixture with top plate removed.
- Guide the shafts (1?) into the bores, and support the reverse idler gear (3) while pressing into the case.
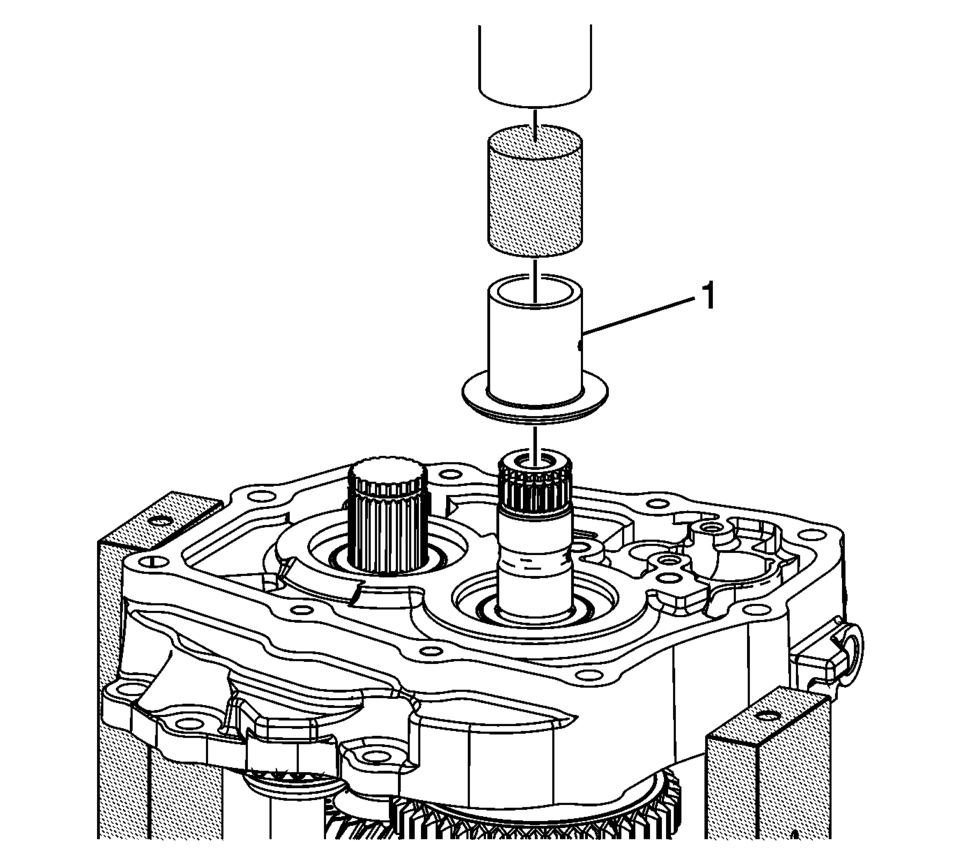
- Using the T-0307000 driver fixture , press the 5th gear bearing race (1) onto the mainshaft.
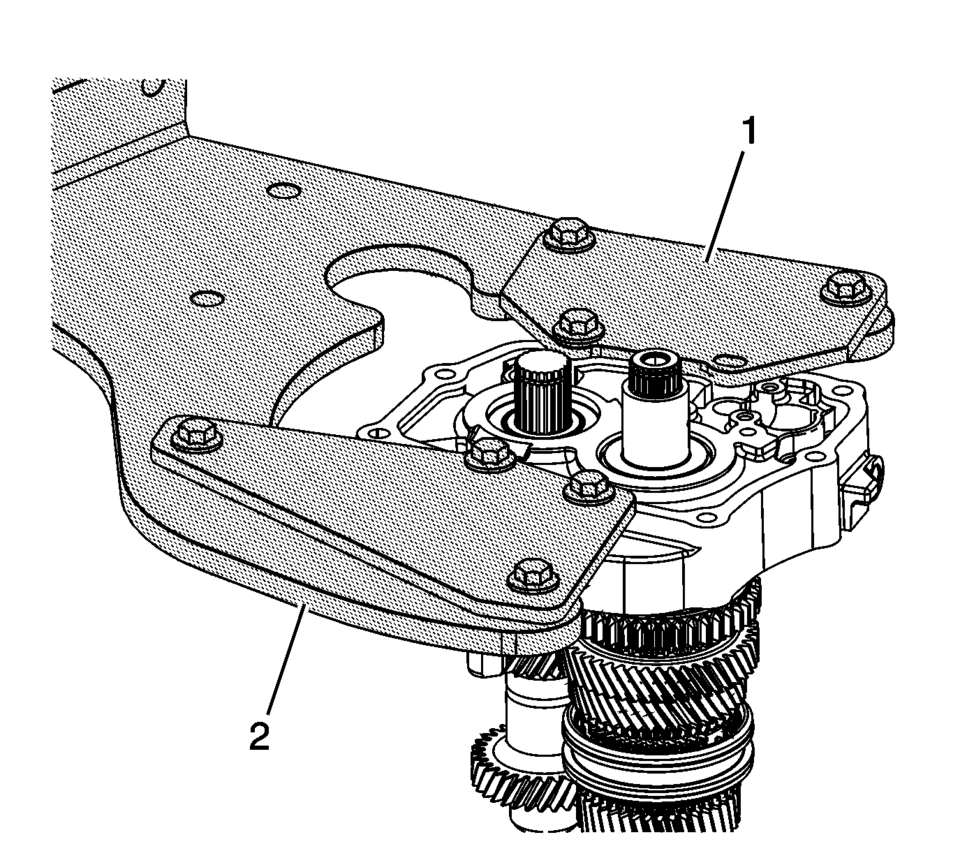
- Install the case and shafts assembly onto the R-0007770 adapter plates (1) and R-0007758 holding fixture (2).
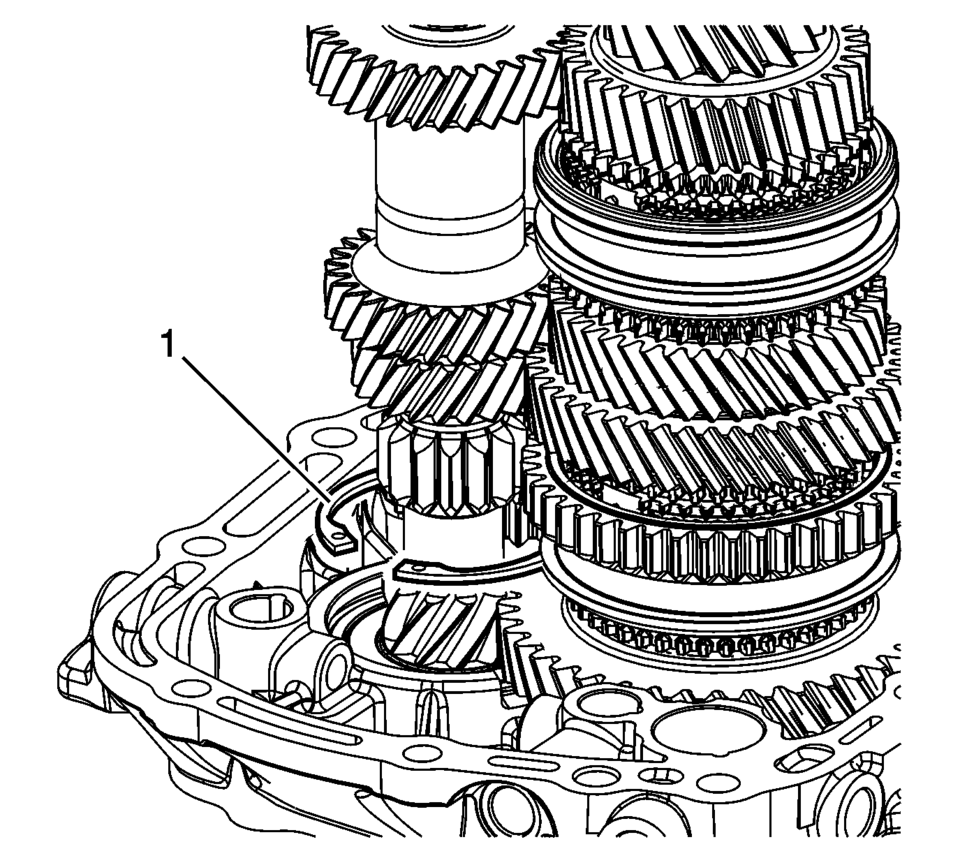
- Install the input shaft bearing retaining ring (1).
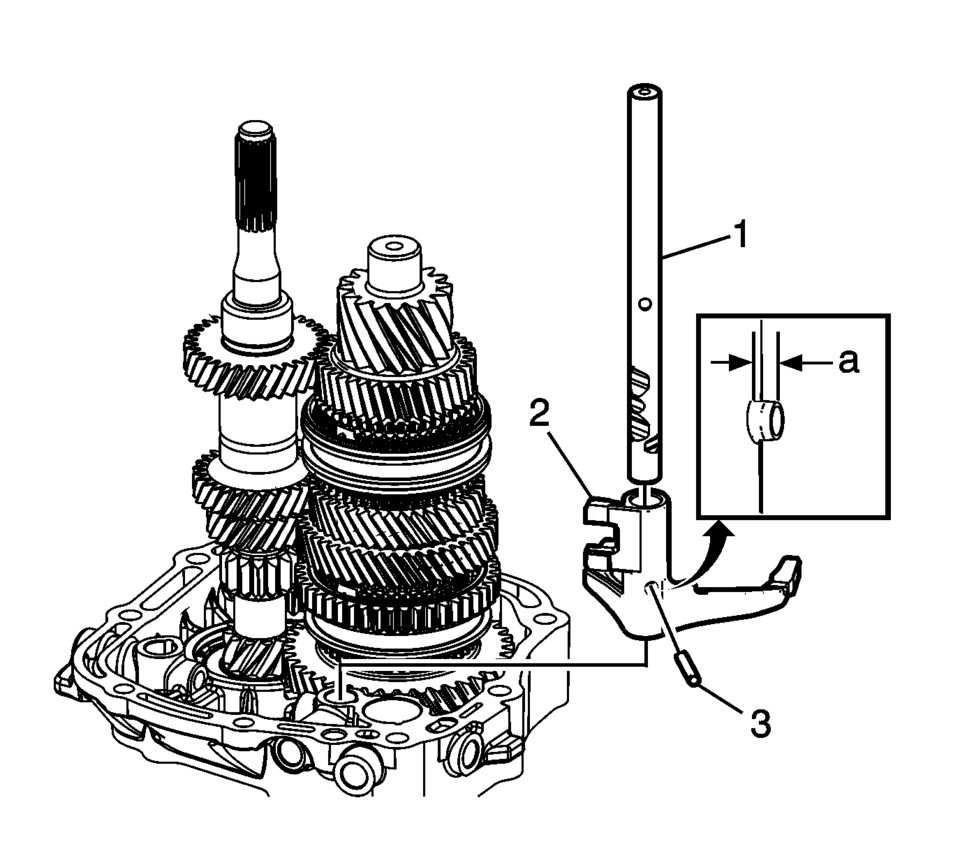
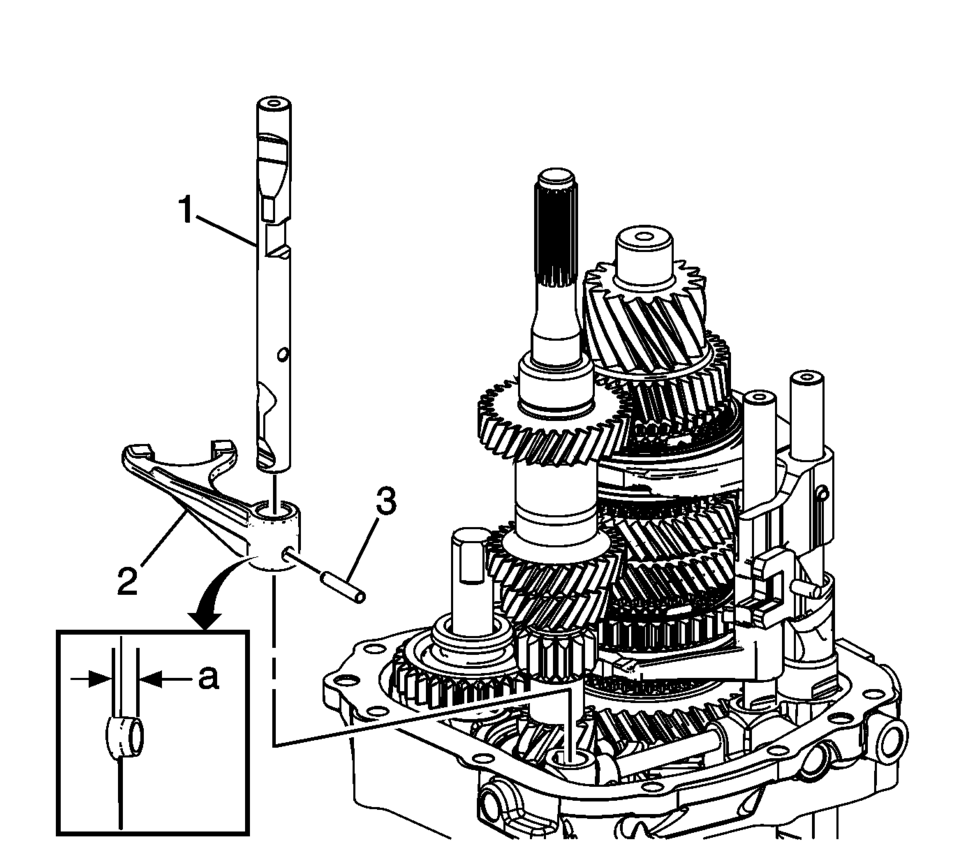
- Install the 1st and 2nd shift fork (2).
- Install the 1st and 2nd shift shaft (1).
- Install the 1st and 2nd shift fork pin (3) to the dimension ??depth of
2 mm (0.80 in)
.
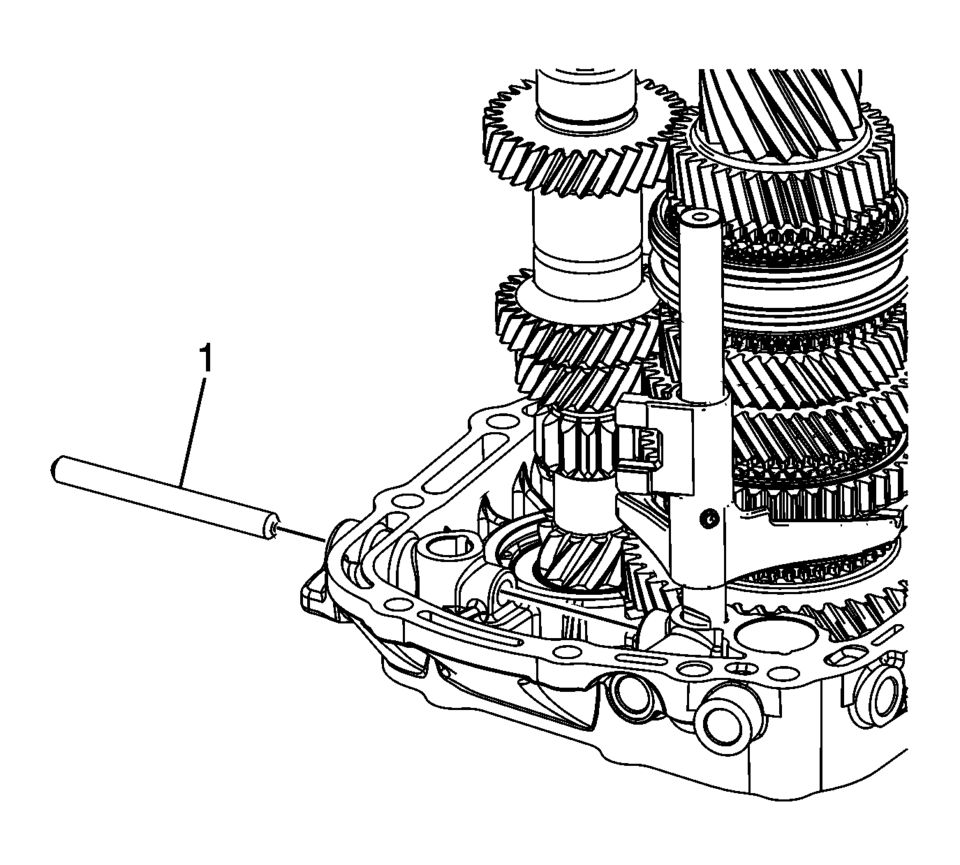
- Install the gearshift rod (1) into the transmission case.
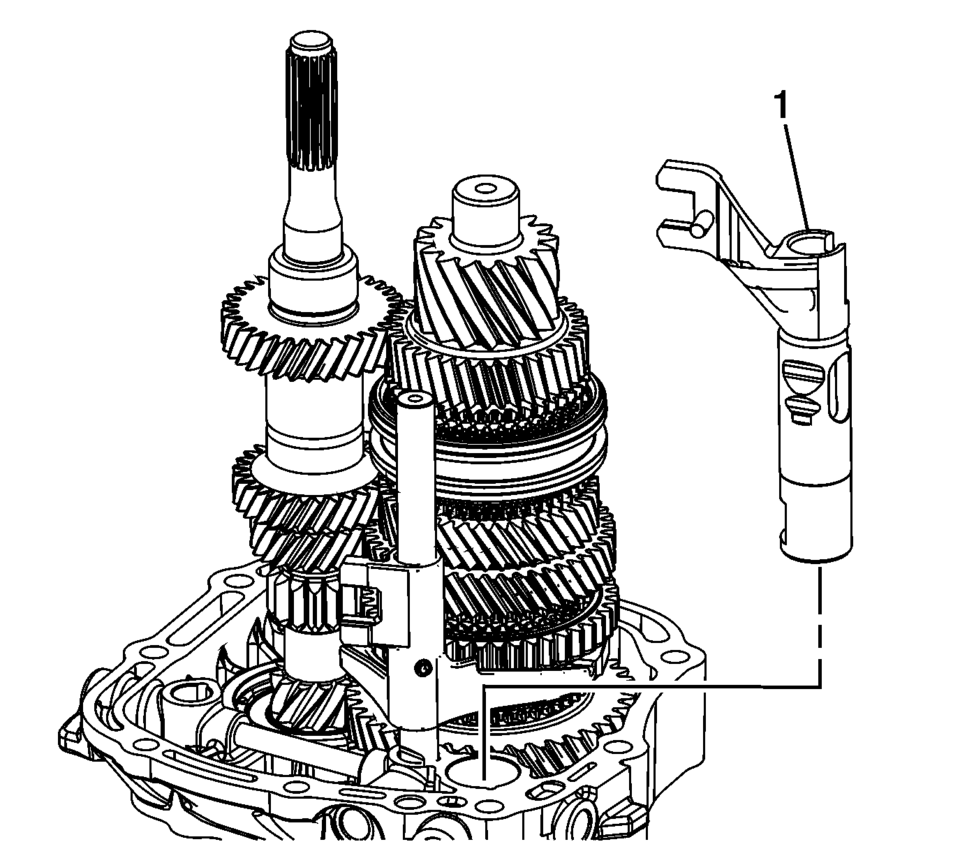
- Install the 5th shift blocking guide (1) into the transmission case.
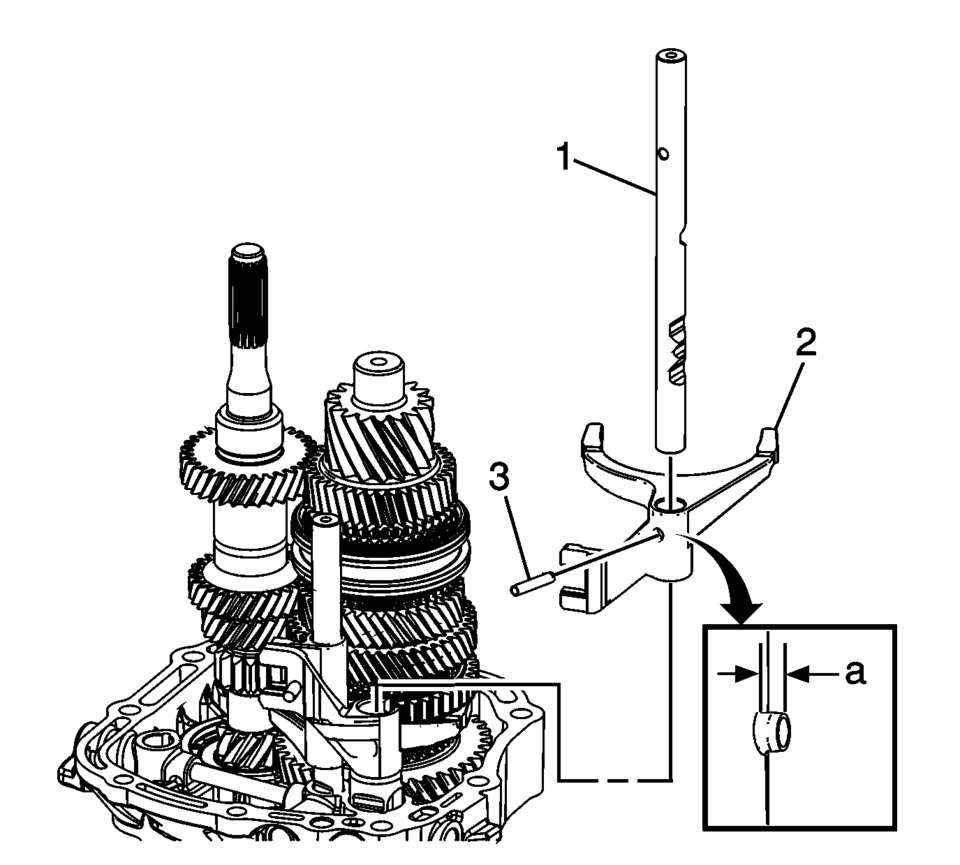
- Install the 3rd and 4th shift fork (2).
- Install the 3rd and 4th shift shaft (1).
- Install the 3rd and 4th shift fork pin (3) to the dimension ??depth of
2 mm (0.80 in)
.
- Install the reverse shift fork (2).
- Install the reverse shift shaft (1).
- Install the reverse shift fork pin (3) to the dimension ??depth of
2 mm (0.80 in)
.
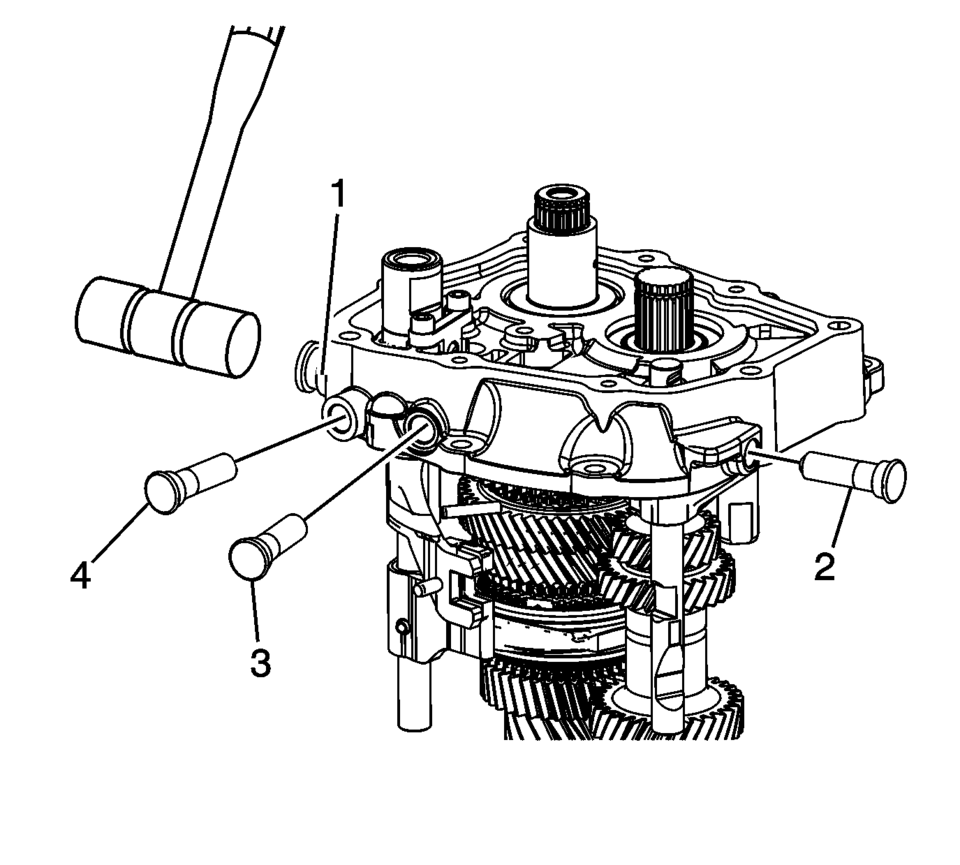
- Using a plastic hammer or equivalent install the 4 shift shaft detent sleeves (1?) into the transmission case until they stop.
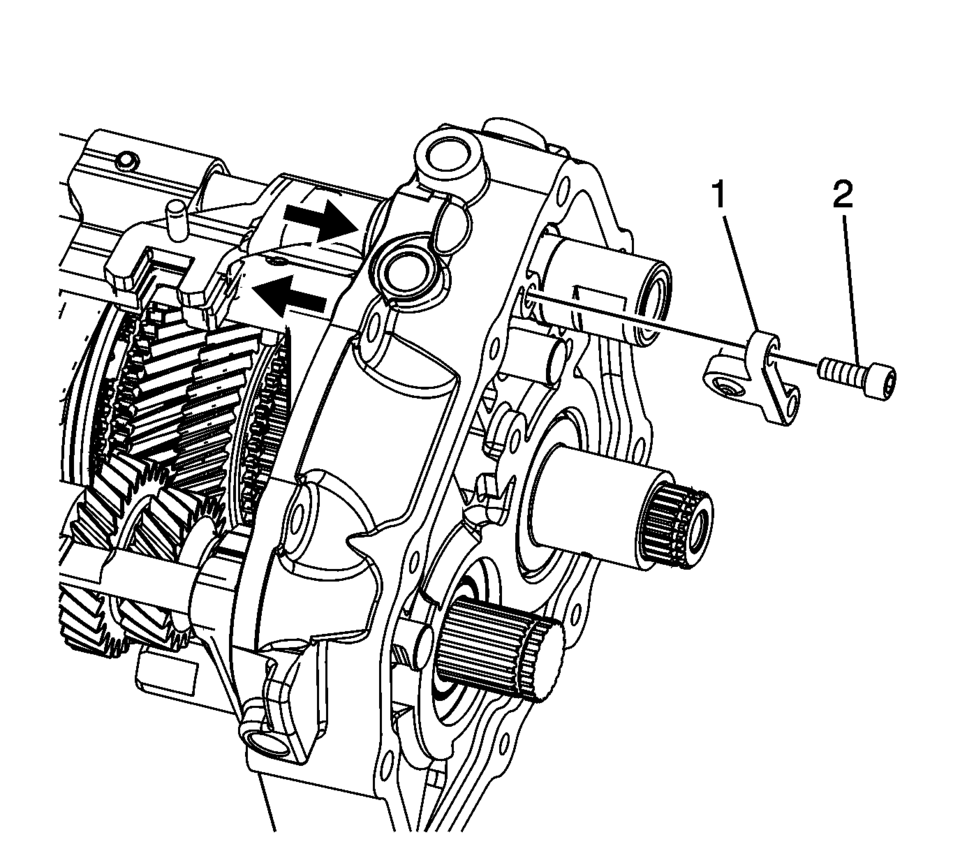
- Install the shift shaft interlock pin connector (1).
- Using thread locking compound install the shift shaft interlock pin connector
bolts (2) and tighten to 7 Y (62 lb in)
.
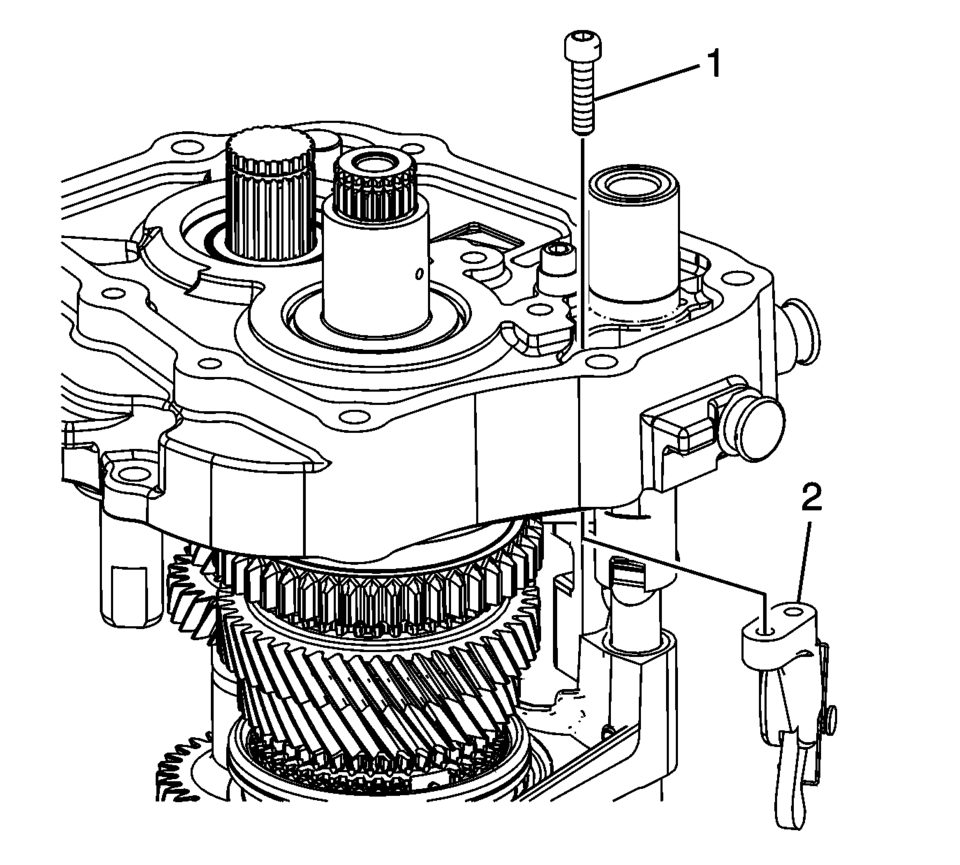
- Install the parking pawl (2).
- Using thread locking compound install the parking pawl retaining bolts (1)
and tighten to 7 Y (62 lb in)
.
- Remove case and shafts assembly from R-0007770 adapter plates and install onto T-0307000 driver fixture .
- Using J-840733 driver , press the 5th gear, driving (1) onto the input shaft.
- Install a NEW 5th gear retaining ring (1).
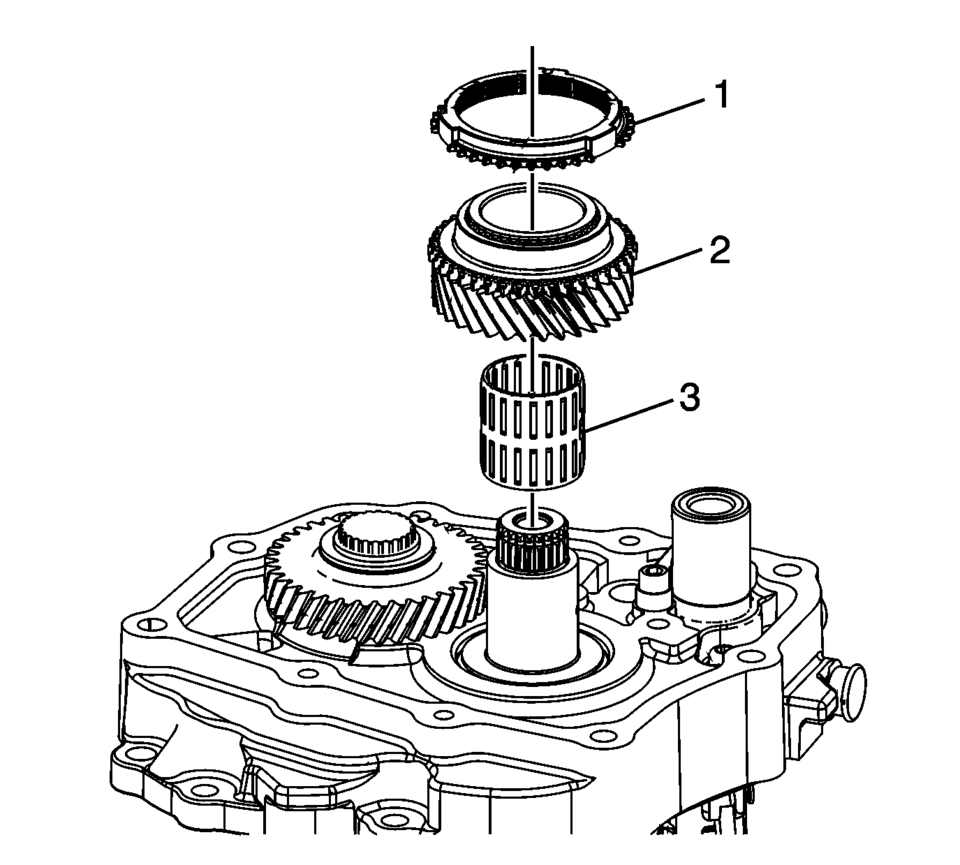
- Install the 5th gear bearing assembly (3).
- Install the 5th gear assembly, driven (2).
- Install the 5th gear blocking ring (1).
- Ensure that the synchronizer assembly (1) is functioning properly, refer to Synchronizers Cleaning and Inspection and Synchronizers Assemble.
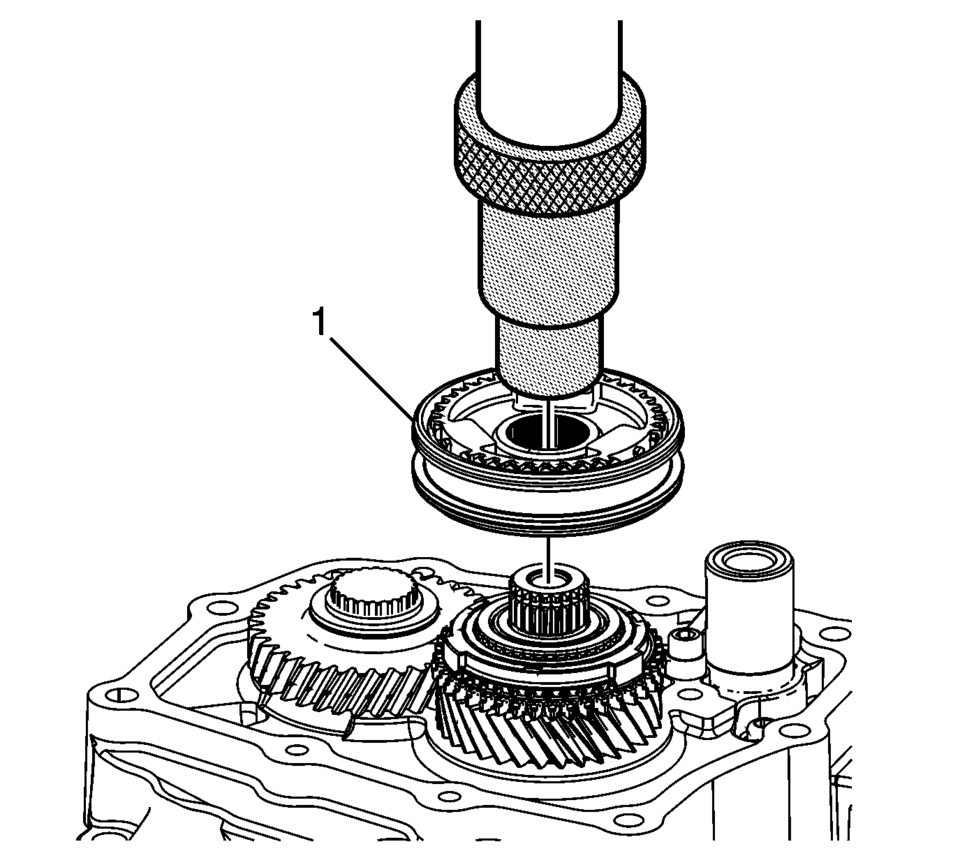
- Using the J-840733 driver and a press, install the 5th gear synchronizer assembly (1).
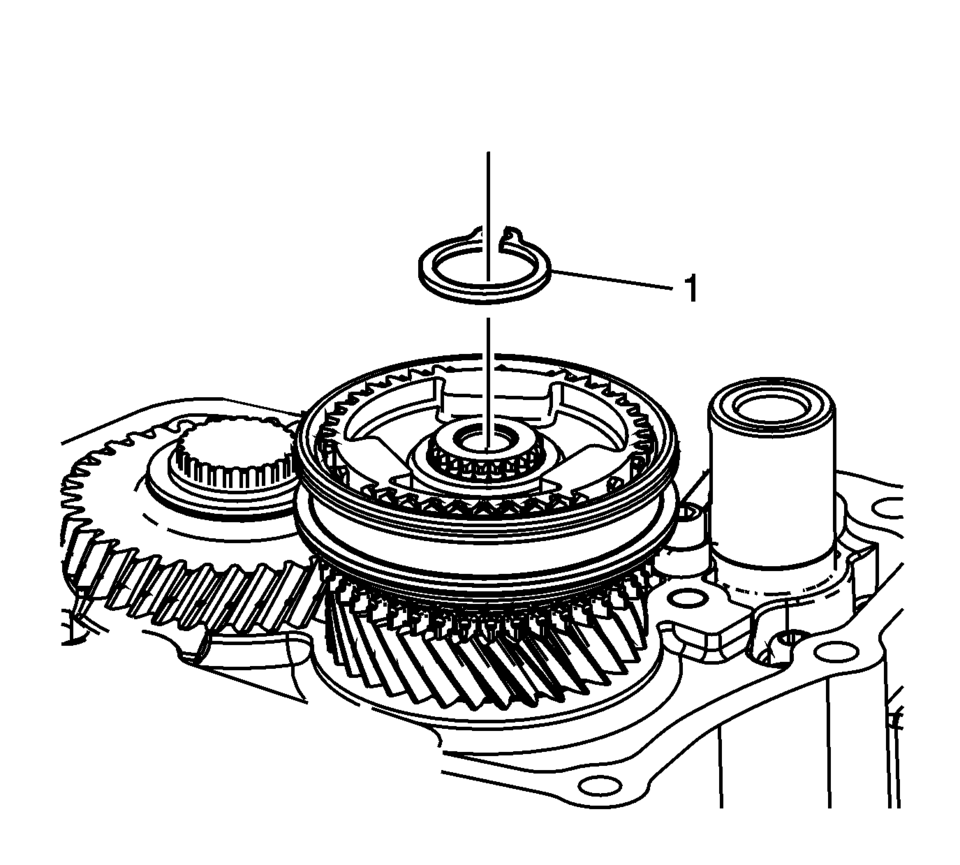
- Install the 5th gear sychronizing hub retaining ring (1).
- Remove the case and shafts assembly from the T-0307000 driver fixture .
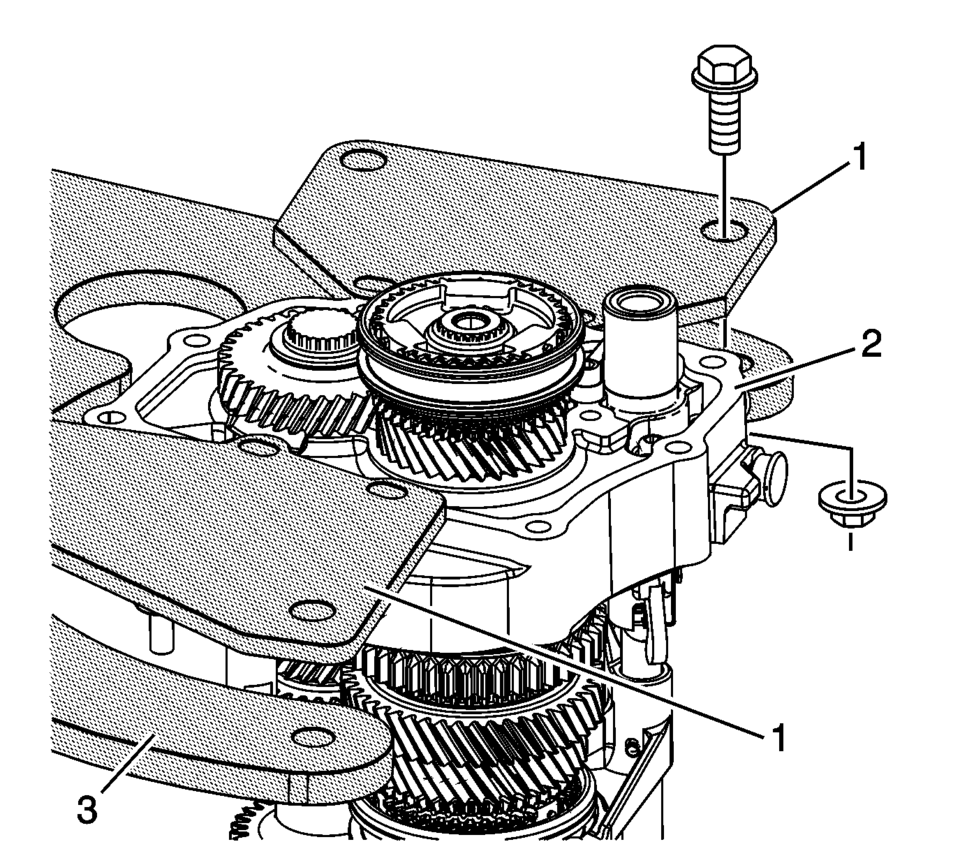
- Install R-0007770 adapter plates (1) onto case (2) and then attach to R-0007758 holding fixture (3).
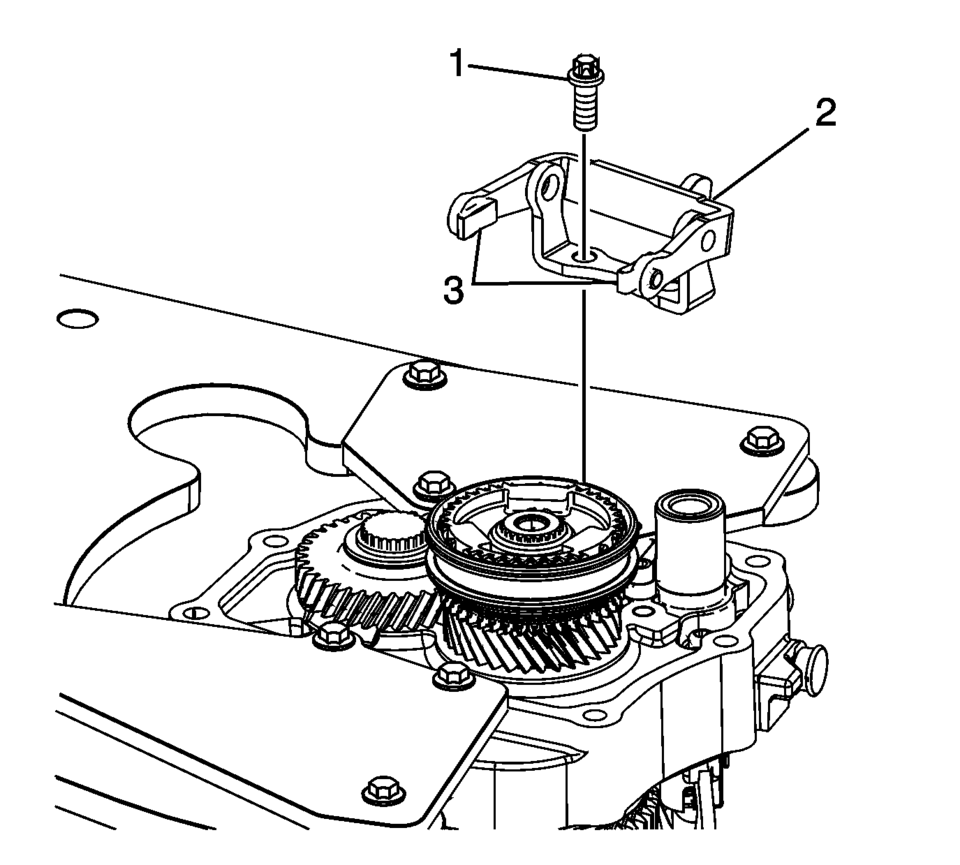
- Install the 5th shift fork shoes (3).
- Install the 5th shift fork bracket assembly (2).
- Using thread locking compound install the 5th shift fork bracket bolts (1)
and tighten to 22 Y (16 lb ft)
.
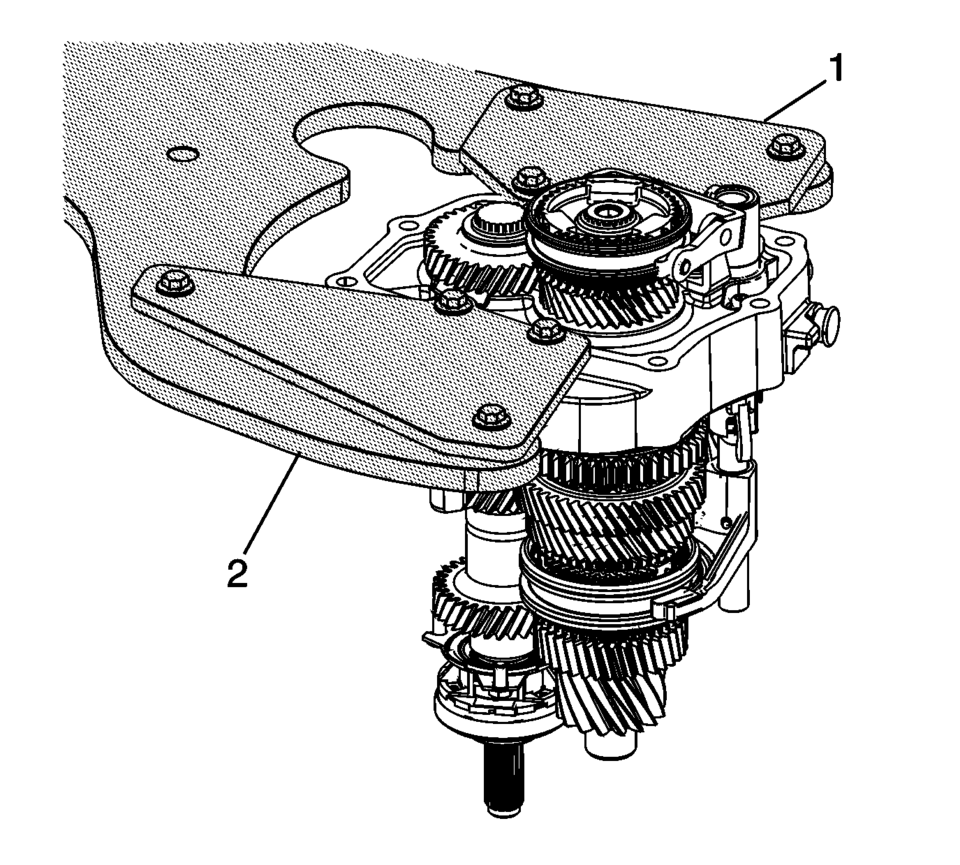
- Remove the transmission case, from the R-0007770 adapter plates (1) the R-0007758 holding fixture and 3-9506289 adapter .
Note:
Engage the shift shafts into 3rd gear and 5th gear as indicated with arrows to install the interlock pin connector.
Note:
Move shift forks into neutral position.
Caution:
Refer to Fastener Caution.
 Transmission Assemble (Gen 2)
Special Tools
3-9506289 Universal Adapter
R-0007758 Holding Fixture
S-9407197 Differential Rotating Tool
S-9407198 Differential Bearing Race Wrench
For equivalent regional tools, refer ...
 Transmission Case Assemble (Gen 2)
Special Tools
3-9506289 Universal Adapter
J-840733 Driver
R-0007758 Holding Fixture
R-0007761 Universal Handle
R-0007770 Holding Fixture Adapter Plates
T-9804669 Seal Installer
T-0 ...
Other materials:
Instrument Panel Center Trim Panel Replacement
Instrument Panel Center Trim Panel Replacement
Callout
Component Name
1
Instrument Panel Center Trim Panel (Qty:?€‰2)
Procedure
Use a flat bladed plastic trim tool in order to disengage the retainers
secur ...
Water Outlet Installation
Clean the sealing surfaces.
Install the water outlet (2) and a NEW water outlet seal ring (1).
Caution: Refer to Fastener Caution.
Install the 3 water outlet bolts (3) and tighten to 8 Y (71 lb in).
...
Intake Manifold Tuning Valve Actuator Replacement
Intake Manifold Tuning Valve Actuator Replacement
Callout
Component Name
Preliminary Procedure
Properly raise and support the vehicle. Refer to Lifting and Jacking
the Vehicle.
1
Intake Manifold ...

0.0088