
Nissan Armada 2025-2026 Owner's Manual: USB (Universal Serial Bus) charging connector
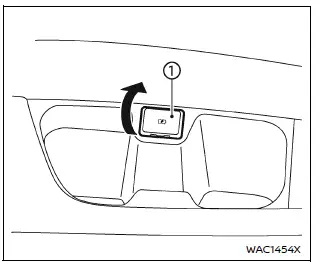
In the Nissan Armada, the Type-C USB charging connector 1 is предназначен exclusively for charging external devices such as smartphones, tablets, and other portable electronics.
To begin charging in the Nissan Armada, simply connect a compatible USB device into the connector. Once connected, charging will start automatically without any additional action required.
The Nissan Armada USB charging system provides continuous power as long as the ignition switch is in the ON position, ensuring reliable charging during your journey.
However, charging performance in the Nissan Armada may vary depending on the specifications and compatibility of the connected device, and some devices may not charge.
CAUTION
- Do not force a USB device into the Nissan Armada connector. Inserting the plug at an angle may damage both the port and the device.
- Always remove the USB cable carefully and avoid pulling on the connector cover, as this may cause damage to the Nissan Armada charging port.
 Basic information
CAUTION
Always use the Nissan Armada power outlets with the engine running to
prevent battery discharge.
Avoid using the power outlets simultaneously with high electrical loads
such as air ...
 Wireless charger
Lid
Charging pad
The Nissan Armada wireless charger is conveniently located beneath a lid in the
center console. Press the lid to open it, then place your smartphone on the charging
pa ...
Other materials:
Storing a Flat or Spare Tire and Tools
Warning
Storing a jack, a tire, or other equipment in the passenger compartment of
the vehicle could cause injury. In a sudden stop or collision, loose equipment could
strike someone. Store all these in the proper place.
Storing the Flat Tire and Tools
1. Return the jack and tools to their or ...
Airbag Side Impact Sensor Replacement (with AYF/AYO)
Airbag Side Impact Sensor Replacement
Callout
Component Name
Warning: Refer to SIR Warning.
Warning: Refer to SIR Inflator Module Handling and Storage
Warning.
Warning: Following the deployment o ...
Positive Crankcase Ventilation Pipe Removal
Open the 2 positive crankcase ventilation pipe retainer clips (2) and (3).
Note: Move retainer clamp (1) in direction of the arrow.
Remove the positive crankcase ventilation pipe from the intake manifold.
Loosen the charger air bypass val ...

0.0047