Chevrolet Sonic Repair Manual: Wheel Stud Replacement
Special Tools
CH 43631 Ball Joint Separator
For equivalent regional tools, refer to Special Tools.
- Removal Procedure
-
- Raise and support the vehicle. Refer to Lifting and Jacking the Vehicle.
- Remove the tire and wheel assembly. Refer to Tire and Wheel Removal and Installation.
- Without disconnecting the hydraulic brake flex hose, remove and support the brake caliper and bracket as an assembly. Refer to Front Brake Rotor Replacement.
- Remove the front wheel hub. Refer to Front Wheel Bearing and Hub Replacement.
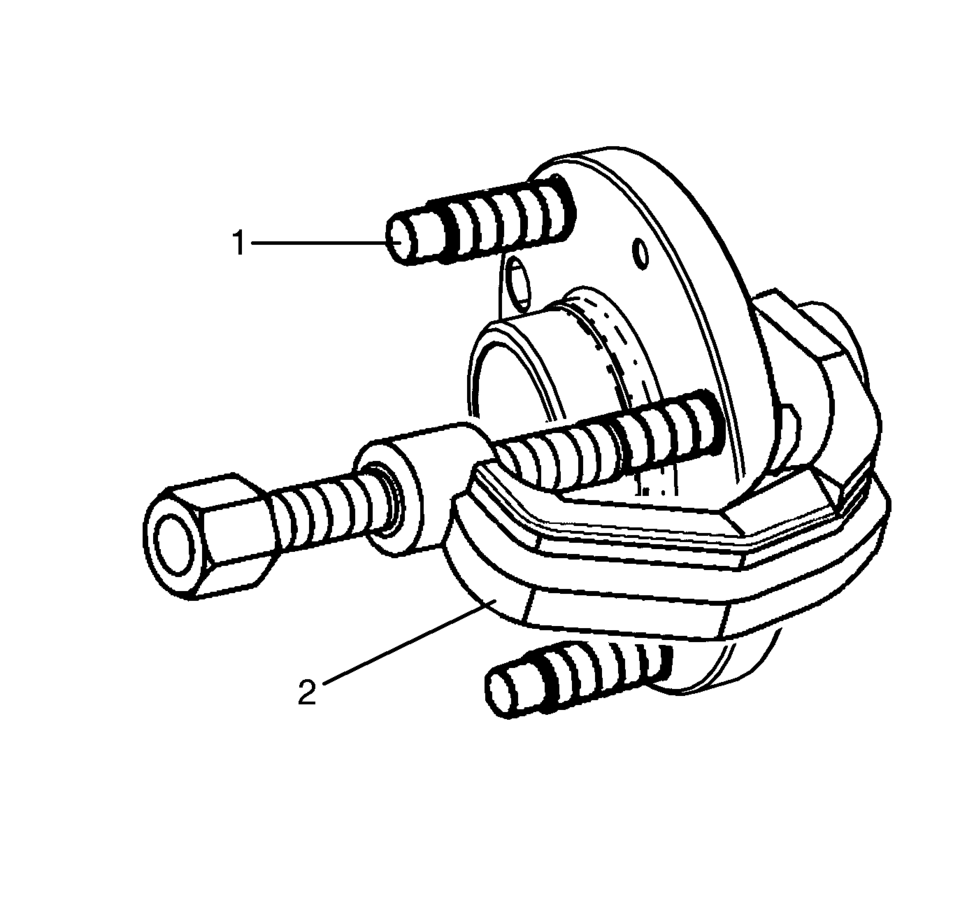
- Using the CH 43631 separator (2), remove the wheel stud (1) from the wheel bearing and hub.
- Installation Procedure
-
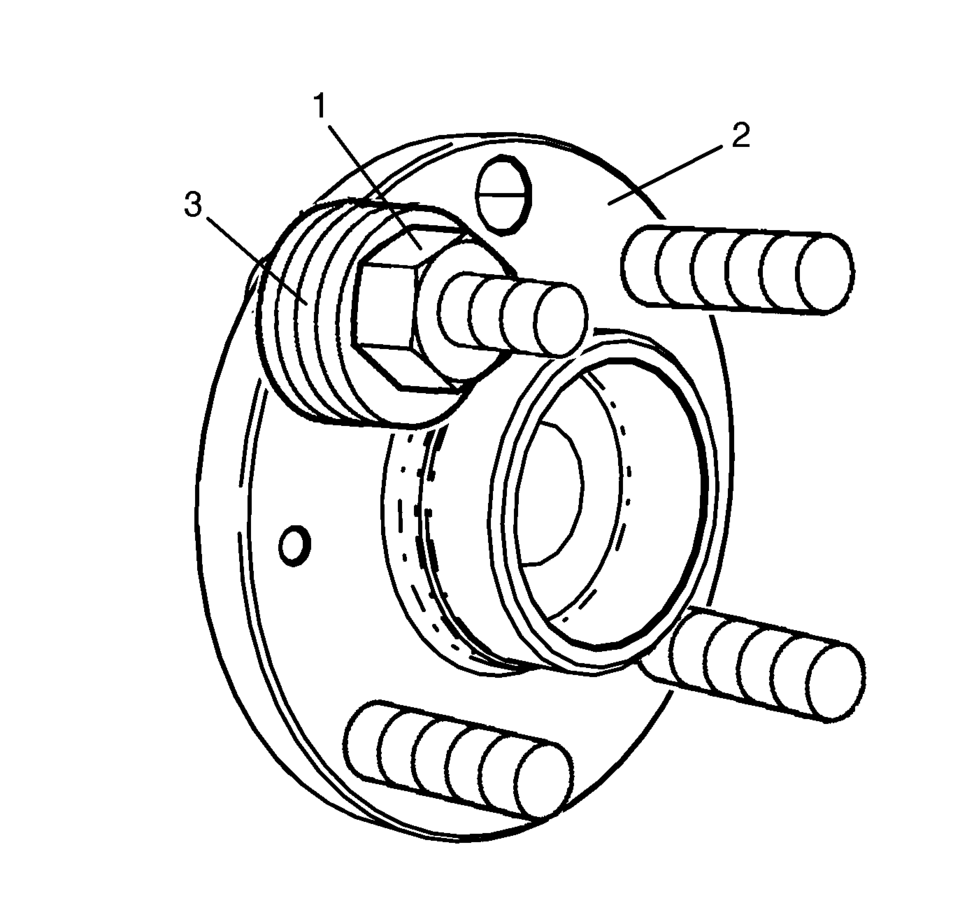
- Install a NEW wheel stud to the wheel hub flange (2).
- Position three washers (3) and an old lug nut (1) on the stud to be replaced.
- Position the pry bar to hold the wheel bearing flange while tightening the wheel lug nut.
- Tighten the old lug nut (1) until the wheel stud is firmly seated in the wheel hub flange.
- Remove the washers (3) and the old lug nut (1) and the pry bar.
- Install the front wheel hub. Refer to Front Wheel Bearing and Hub Replacement.
- Install the front brake rotor. Refer to Front Brake Rotor Replacement.
- Install the tire and wheel assembly. Refer to Tire and Wheel Removal and Installation.
- Lower the vehicle.
 Wheel Replacement
Replace any wheel that is bent, cracked, or badly rusted or corroded. If wheel
nuts keep coming loose, the wheel, wheel bolts, and wheel nuts should be replaced.
If the wheel leaks air, replace it ...
 Electrical
...
Other materials:
Steering Wheel Straight and Column Locked Caution
Caution: With wheels of the vehicle facing straight ahead, secure
the steering wheel utilizing steering column anti-rotation pin, steering column
lock, or a strap to prevent rotation. Locking of the steering column will prevent
damage and a possible malfunction of the SIR system. The ste ...
Rear Brake Hose Replacement (Body to Axle - Disc Brake)
Removal Procedure
Warning: Refer to Brake Dust Warning.
Warning: Refer to Brake Fluid Irritant Warning.
Raise and support the vehicle. Refer to Lifting and Jacking the Vehicle.
Remove the tire and wheel assembly. Refer to Tire and Wheel Removal
and Install ...
Front, front central seat-mounted side-impact supplemental air bag and roof-mounted
curtain side-impact and rollover supplemental air bag systems
*: if so equipped
In the Nissan Armada, the supplemental side-impact and curtain air bag systems
are engineered to provide enhanced protection for occupants during side collisions
and rollover events. These systems work together with seat belts to form a comprehensive
safety network.
The ...

0.0052