Chevrolet Sonic Repair Manual: Manual Transmission Shift Lever Cable Adjustment
Special Tools
DT-527-A Adjuster or 5mm drill bit
For equivalent regional tools, refer to Special Tools.
- Remove the floor console. Refer to Front Floor Console Replacement.
- Lift upward and disengage (do not remove) cable lock adjuster (1) to release the internal cable assembly, one for each cable.
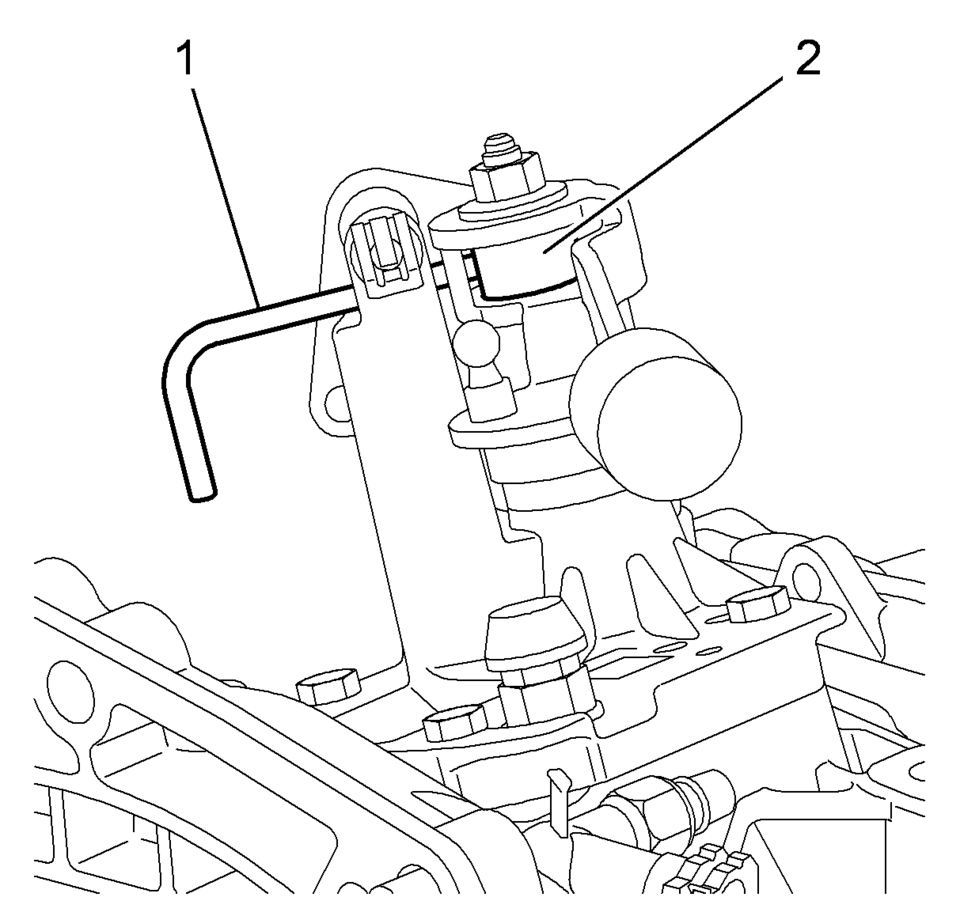
- Lock the transmission gear control with DT-527-A pin (1) or 5mm drill bit.
- Lock the position of the shifter control lever by rotating the reverse lockout device with the following instructions:
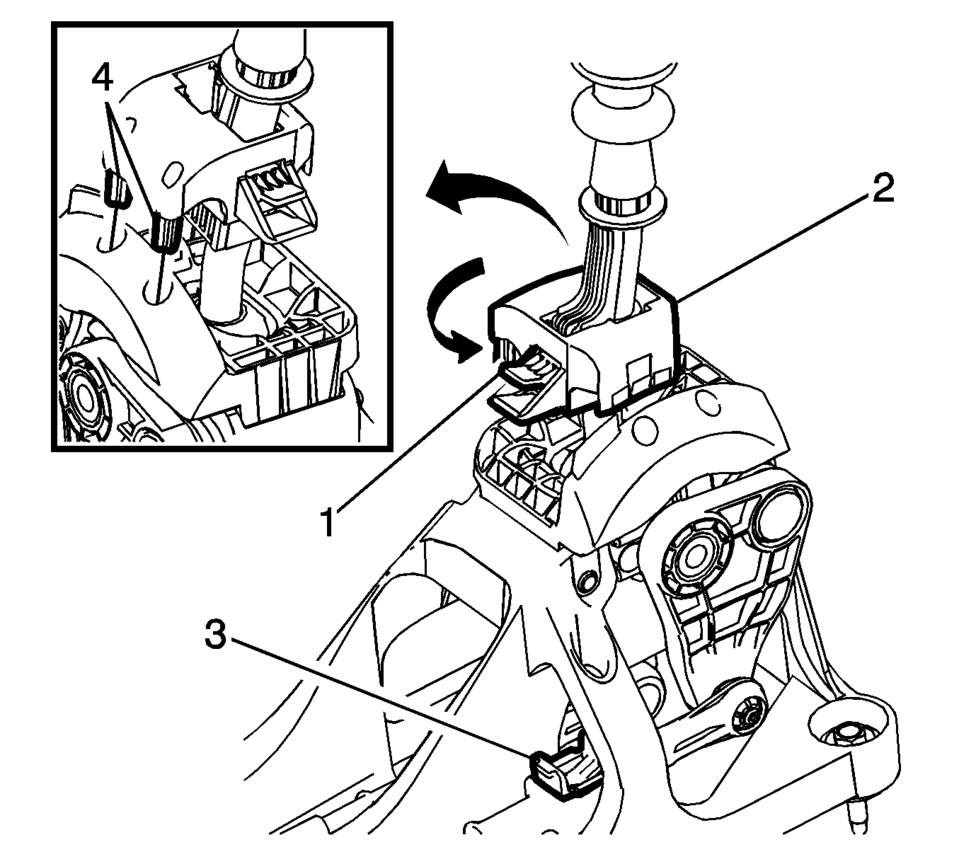
- Push down on tab (1) and pull up on device (2) to release from installed position.
- Rotate device 180 degrees so tab (1) is in the rear of the shift control assembly.
- Secure integral pins in holes located on shifter base by pushing down device (2) until seated.
- Secure adjuster locks (3) by pushing down until locked. One for each cable.
- Reposition the reverse lockout device with the following instructions:
- Push down on tab (1) and pull up on device (2) to release from installed position.
- Rotate device (2) 180 degrees so tab (1) is in the front of the shift control assembly.
- Push downward on the reverse lockout device (2) until tab (1) snaps into detent.
- Remove the DT-527-A lock pin or drill bit from the transmission gear control.
- Install the floor console. Refer to Front Floor Console Replacement.
- Verify correct operation of the transmission control assembly.
Note:
Not using the specified tools may lead to shift system mis-adjustment.

Note:
The hole of the transmission gear control (2) must be aligned to the hole in the base so the pin (1) can pass thru both. The transmission gear control will be locked in the 1? neutral position.

Note:
During this procedure DO NOT touch or preload the fixed shift lever as this may cause mis-adjustment to the shift system.
 Main Shaft Disassemble (Gen 2)
Special Tools
69604356 Gear Pullers
For equivalent regional tools, refer to Special Tools.
Remove the 1st gear thrust washer (1) and the 1st gear (2)
using 69604356 pull ...
 Manual Transmission Shift Lever and Selector Lever Cable Adjustment
Remove the floor console. Refer to
Front Floor Console Replacement.
Lift upward and disengage (do not remove) both cable lock
adjusters (1) to release the internal cable asse ...
Other materials:
Radio with Touchscreen
The infotainment system can play music or movies connected by the auxiliary device.
Play will begin when the system has finished reading the information on the device.
Playing Music
To play the music from the device, if the device is already connected:
1. Press .
2. Press audio.
3. Press Sou ...
Turbocharger Removal
Special Tool
EN-49942 Holding Wrench
For equivalent regional tools, refer to Special Tools.
Install the EN-49942 holding wrench (2) to the turbocharger coolant
feed pipe. Guide a ratchet wrench (1) along with an extension through EN-49942
holding wrench to the turbo ...
Differential lock mode switch
The rear differential lock (DIFF-LOCK) in the Nissan Armada is designed to distribute
engine torque evenly between the left and right rear wheels, ensuring balanced traction
in demanding driving conditions.
When the Nissan Armada becomes stuck in challenging environments such as sand,
sno ...

0.0062