Chevrolet Sonic Repair Manual: Air Conditioning System Seal Replacement
- Removal Procedure
-
- Disassemble the A/C refrigerant components. Refer to the appropriate repair procedure.
- Cap or tape the A/C refrigerant components.
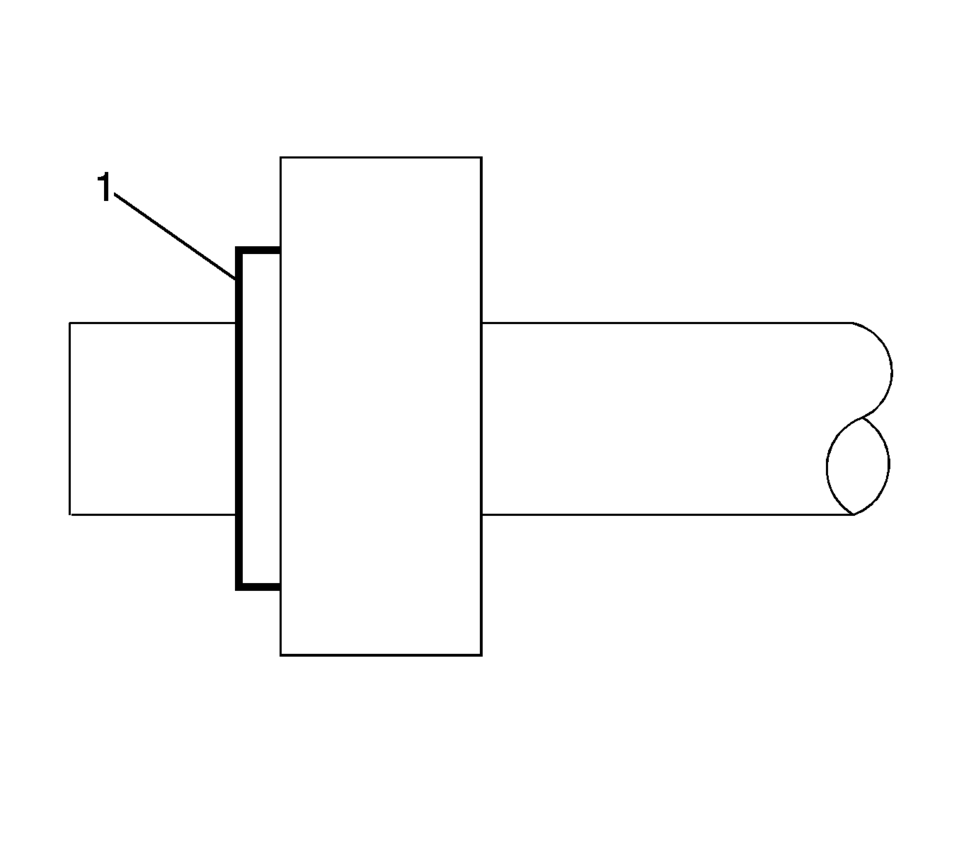
- Remove the sealing washer (1) from the A/C refrigerant component.
- Inspect the seal washer for signs of damage to help determine the root cause of the failure.
- Inspect the A/C refrigerant components for damage or burrs. Repair if necessary.
- DISCARD the sealing washer.
Note:
Cap or tape the open A/C refrigerant components immediately to prevent system contamination.
Note:
DO NOT reuse sealing washer.
- Installation Procedure
-
- Inspect the new sealing washer for any signs of cracks, cuts, or damage.
Do not use a damaged sealing washer.
- Remove the cap or tape from the A/C refrigerant components.
- Using a lint-free clean, dry cloth, clean the sealing surfaces of the A/C refrigerant components.
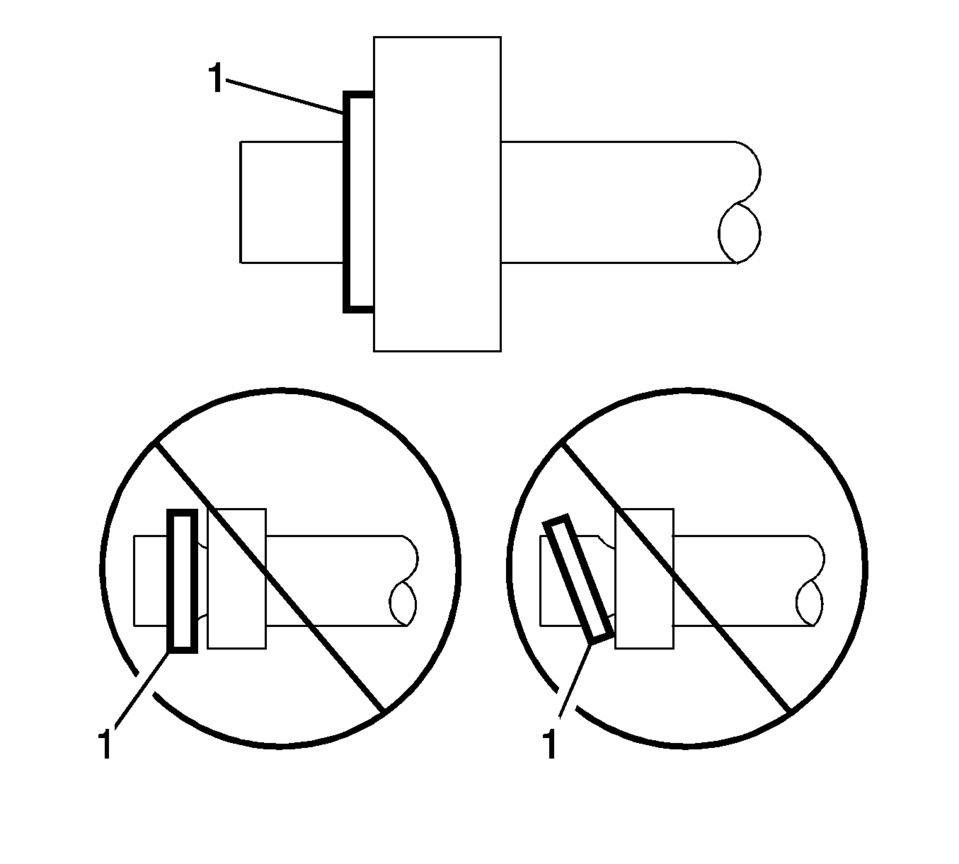
- Carefully install the NEW sealing washer (1) onto the A/C refrigerant
component.
The sealing washer (1) must completely bottom against the surface of the fitting.
- Assemble the remaining A/C refrigerant components. Refer to the appropriate repair procedure.
Note:
Flat washer type seals do not require lubrication.
Note:
After tightening the A/C components, there should be a slight sealing gap of approximately 1.2 mm (3/64 in) between the A/C line and the A/C component.
- Inspect the new sealing washer for any signs of cracks, cuts, or damage.
 Air Conditioning Refrigerant Service Valve Core Replacement
Special Tools
GE-39400-A Halogen Leak Detector
GE-46246 Valve Core Removal Tool
For equivalent regional tools, refer to Special Tools.
Removal Procedure
Recover the refrigerant ...
 Air Inlet Assembly Replacement
Air Inlet Assembly Replacement
Callout
Component Name
Preliminary Procedures
Remove the Heater and Air Conditioning Evaporator and ...
Other materials:
Replacing Airbag System Parts after a Crash
Warning
A crash can damage the airbag systems in the vehicle. A damaged airbag system
may not work properly and may not protect you and your passenger(s) in a crash,
resulting in serious injury or even death. To help make sure the airbag systems
are working properly after a crash, have them i ...
Airbag Instrument Panel Module Replacement
Airbag Instrument Panel Module Replacement
Callout
Component Name
Warning: Refer to SIR Inflator Module Handling and Storage
Warning.
Warning: Refer to SIR Warning.
Preliminary Procedure
Disable t ...
Automatic Transmission (AT)
9 speed automatic transmission
The Nissan Armada is equipped with a sophisticated 9-speed automatic transmission
that is electronically managed by an advanced transmission control module. This
system is engineered to deliver optimal fuel efficiency, smooth gear transitions,
and responsive per ...

0.0058