
Chevrolet Sonic Repair Manual: Engine Oil Cooler Housing Replacement
- Removal Procedure
-
- Drain the engine coolant. Refer to Cooling System Draining and Filling.
- Drain the engine oil. Refer to Engine Oil and Oil Filter Replacement.
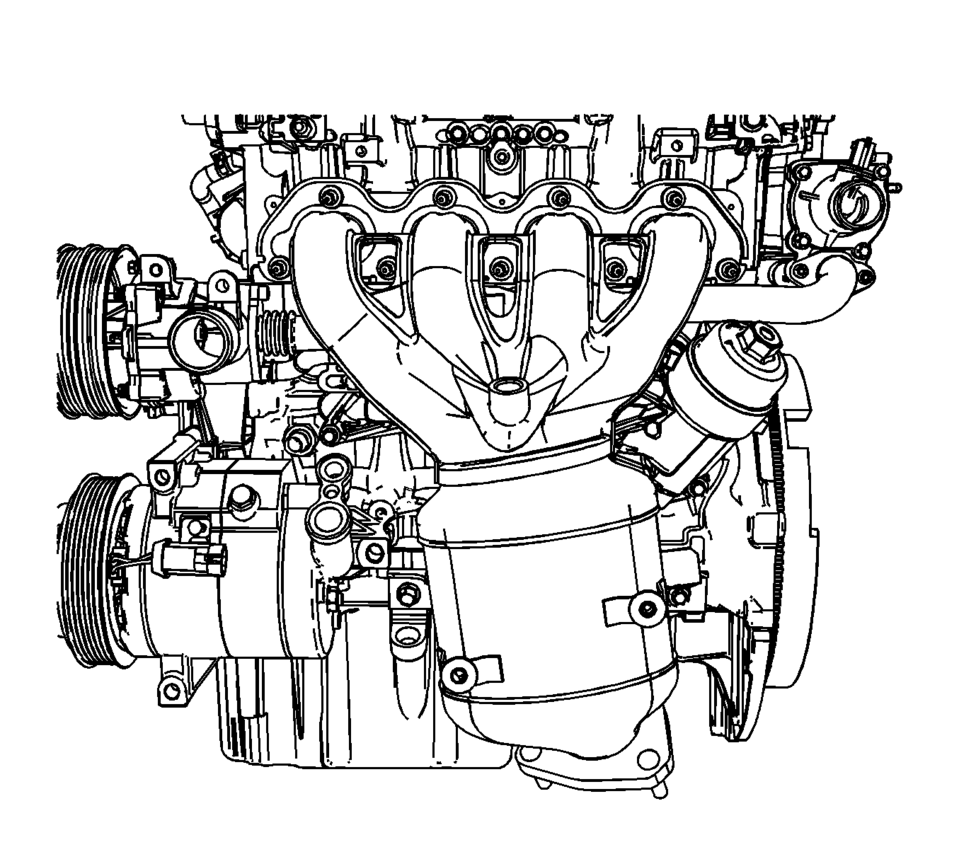
- Remove the exhaust manifold. Refer to Exhaust Manifold with Catalytic Converter Replacement.
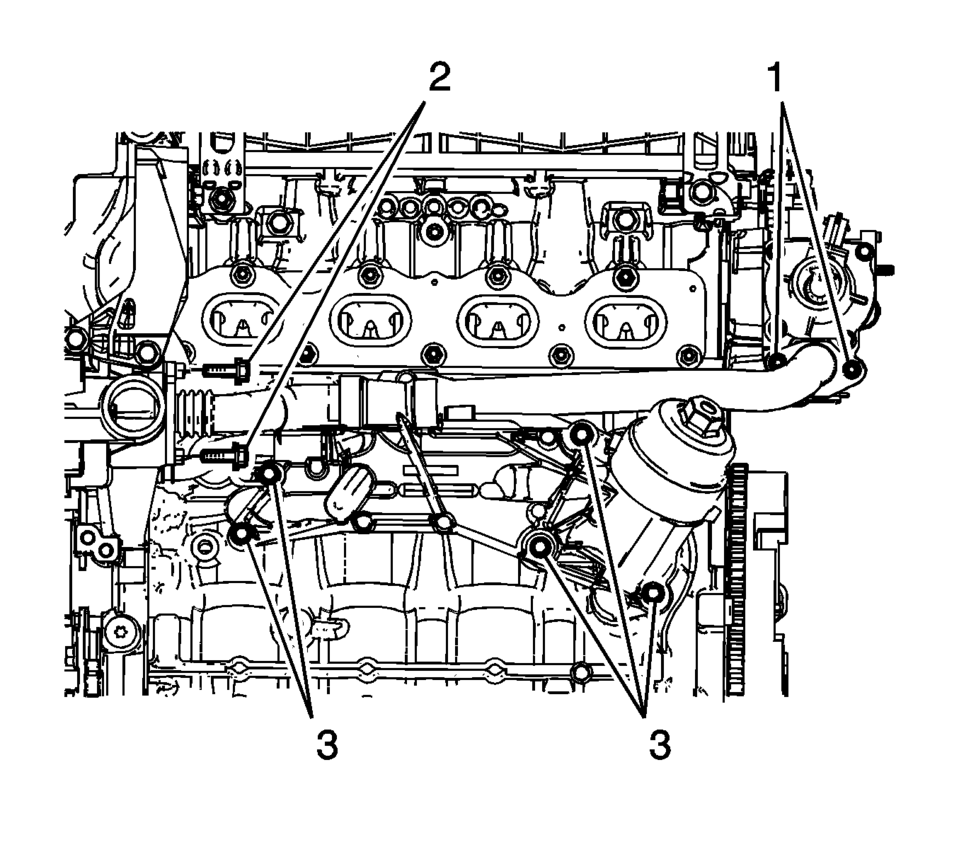
- Remove the coolant pipe bolts (1) from the engine coolant distributor case .
- Remove the coolant pipe bolts (2) from the engine front cover.
- Remove the oil cooler tightening bolts (3).
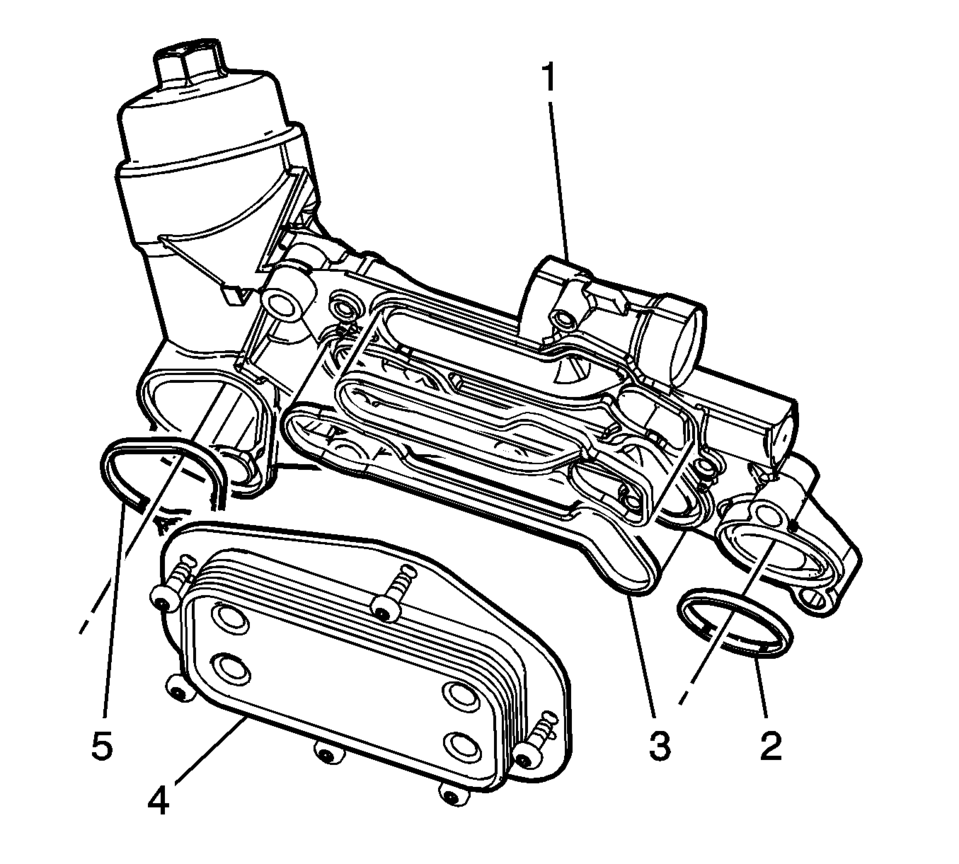
- Remove the heat exchanger (4) with the gasket.
- Installation Procedure
-
- Install the heat exchanger (4) with the gasket to the oil cooler housing.
Tighten
Tighten the heat exchanger bolts to 8 Y (70.8 lb in). - Insert the coolant pipes to the oil cooler housing with the gasket.
- Install the oil cooler tightening bolts (3).
Tighten
Tighten the oil cooler tightening bolts to 25 Y (18 lb ft). - Install the coolant pipe bolts (2) to the engine front cover.
Tighten
Tighten the coolant pipe bolts to 8 Y (71 lb in). - Install the coolant pipe bolts (1) to the engine coolant distributor
case.
Tighten
Tighten the coolant pipe bolts to 8 Y (71 lb in). - Install the exhaust manifold. Refer to Exhaust Manifold with Catalytic Converter Replacement.
- Refill the engine oil. Refer to Engine Oil and Oil Filter Replacement.
- Refill the engine coolant. Refer to Cooling System Draining and Filling.
Caution:
Refer to Fastener Caution.
Note:
Check for damage or leakage on the oil cooler gaskets. If damage or leakage, replace the related gasket with a new one.
- Install the heat exchanger (4) with the gasket to the oil cooler housing.
 Engine Oil Cooler Housing Removal
Remove the 2 engine oil cooler pipe bolts (1).
Remove the oil cooler pipe (2).
h.\.\,.\\..,v:..//
Remove the 5 engine oil cooler housing bolts (2 ...
 Engine Oil Cooler Inlet Pipe Replacement (LUW)
Removal Procedure
Drain the cooling system. Refer to Cooling System Draining and Filling.
Remove the exhaust manifold with catalytic converter. Refer to Exhaust
Manifold with C ...
Other materials:
Radio Front Side Door Speaker Replacement
Radio Front Side Door Speaker Replacement
Callout
Component Name
Preliminary Procedure
Remove the front side door trim. Refer to Front
Side Door Trim Replacement.
1
Radio Front Side Door Speaker ...
Jump Starting
For more information about the vehicle battery, see Battery.
If the battery has run down, try to use another vehicle and some jumper cables
to start your vehicle. Be sure to use the following steps to do it safely.
Warning: Batteries can hurt you. They can be dangerous because:
The ...
Front seats
Front power seat adjustment
The Nissan Armada front seats are equipped with advanced power adjustment features
designed for comfort and ergonomic support during long drives.
Operating tips:
The power seat motor includes an automatic overload protection system. If
adjustment stops unexpect ...

0.0096