
Chevrolet Sonic Repair Manual: Front Wheel Speed Sensor Replacement
- Removal Procedure
-
Warning:
Refer to Brake Dust Warning.
- Raise and support the vehicle. Refer to Lifting and Jacking the Vehicle.
- Remove the tire and wheel assembly. Refer to Tire and Wheel Removal and Installation.
- Clean the wheel speed sensor mounting area on the steering knuckle of any accumulated dirt and debris.
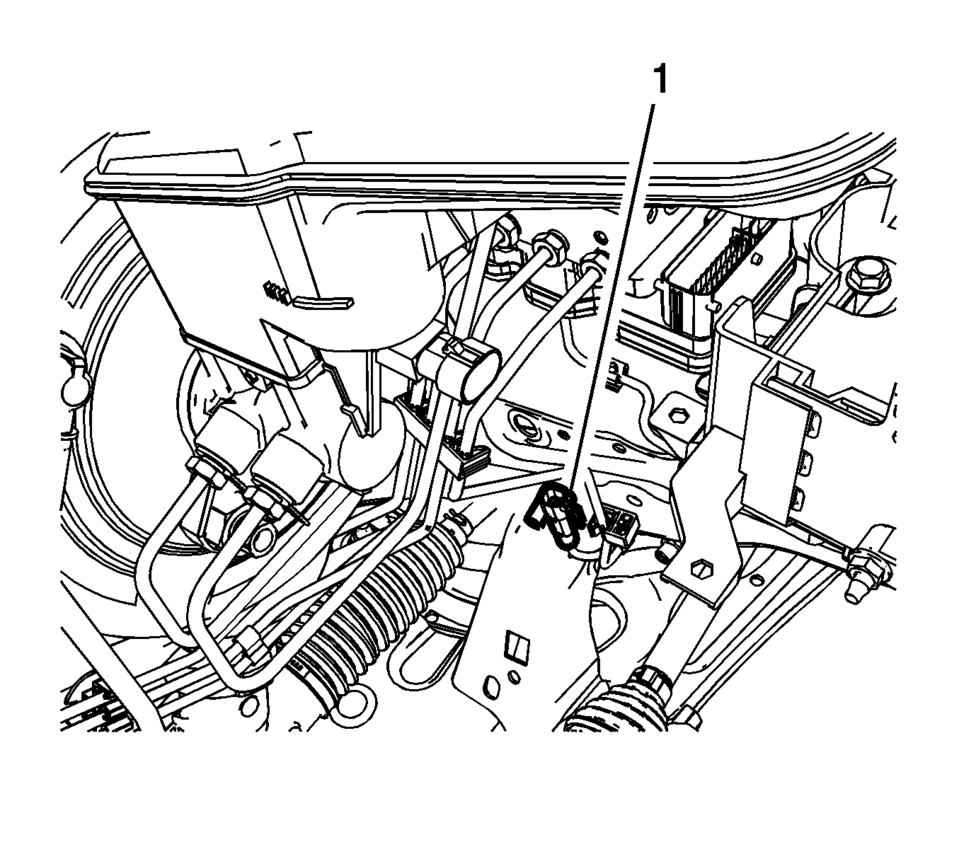
- Disconnect the wheel speed sensor electrical connector (1) and release the connector from the vehicle body.
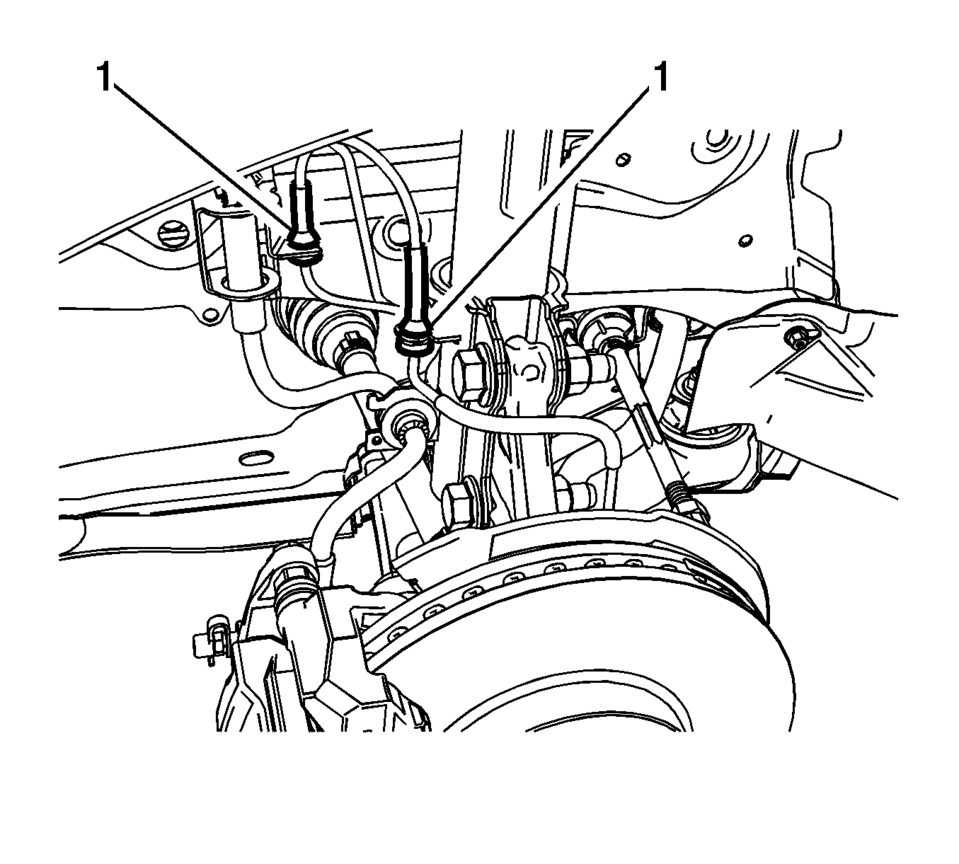
- Release the wheel speed sensor harness grommets (1) from the brake hose brackets.
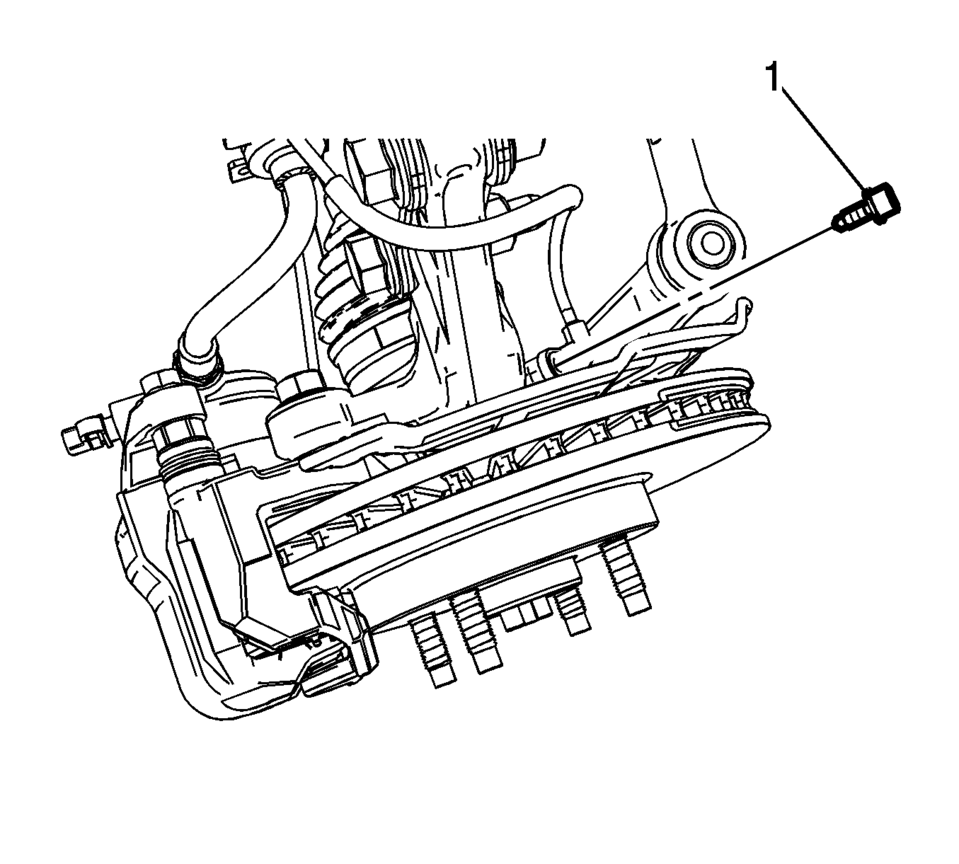
- Remove the wheel speed sensor bolt (1).
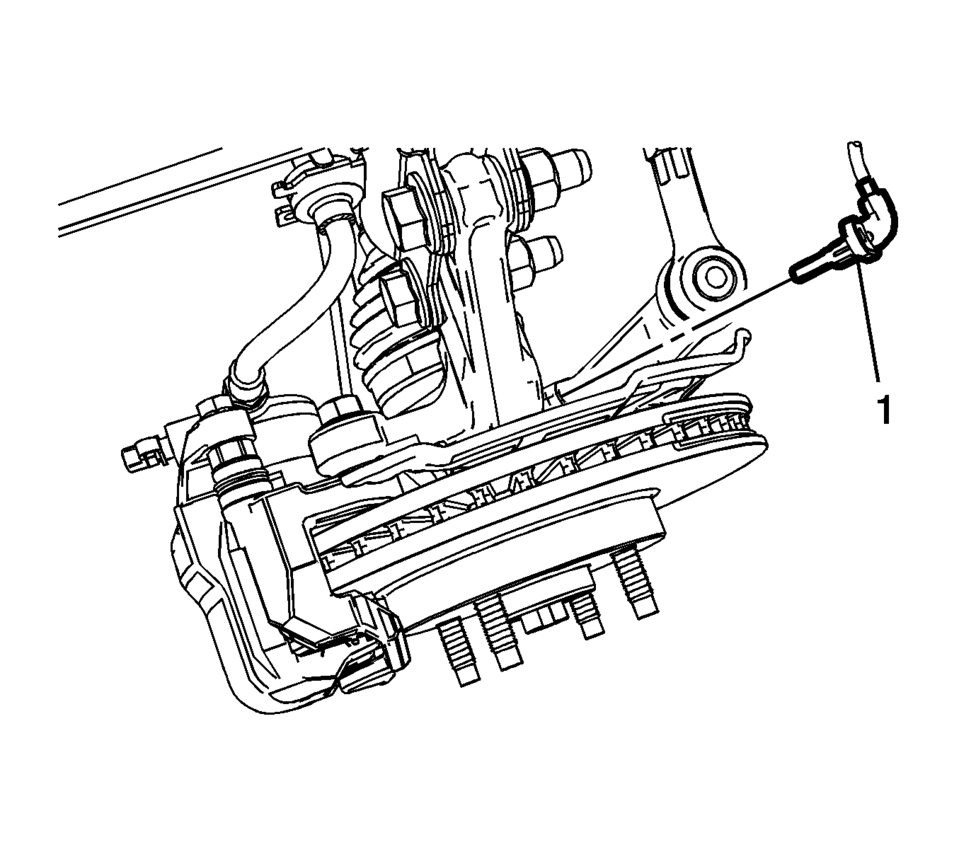
- Carefully remove the wheel speed sensor (1) from the steering knuckle by pulling the sensor straight upward using a slight twisting motion.
- Installation Procedure
-
- Install the wheel speed sensor (1) to the steering knuckle.
- Install the wheel speed sensor bolt (1) and tighten to 8 Y (71 lb in)
.
- Install the wheel speed sensor harness grommets (1) to the brake hose brackets.
- Connect the wheel speed sensor electrical connector (1) and install the connector to the vehicle body.
- Install the tire and wheel assembly. Refer to Tire and Wheel Removal and Installation.
- Perform the Diagnostic System Check - Vehicle.
Caution:
Refer to Fastener Caution.
 Steering Angle Sensor Replacement
Steering Angle Sensor Replacement
Callout
Component Name
Preliminary Procedure
Remove the steering wheel airbag coil. Refer to ...
 Input Speed Sensor Replacement
Removal Procedure
Remove the control solenoid valve and transmission control module assembly.
Refer to Control Solenoid Valve and Transmission Control Module Assembly
Replacement. ...
Other materials:
Fog Lamp Aiming
Preparation Procedure
Note: Horizontal aim is not adjustable on this vehicle. Vertical
aim is done by an adjusting nut located on the rear of the fog lamp. Prior
to aiming the fog lamps, perform the following steps:
Completely assemble all of the components on the vehi ...
Crankshaft Position System Variation Learn
Note: The crankshaft position sensor system variation learn procedure
is required when the following service procedures have been performed, regardless
of whether DTC P0315 is set:
Engine replacement
Engine control module (ECM) replacement
Crankshaft damper replacement
...
Automatic Transmission Fluid (ATF)
For the Nissan Armada, inspection or replacement of automatic transmission fluid
should be performed by qualified technicians. It is recommended to visit a NISSAN
dealer for proper servicing.
CAUTION
Use only Genuine NISSAN Matic P ATF when servicing the Nissan Armada
transmission system ...

0.0057