
Chevrolet Sonic Repair Manual: Rear Spring, Insulator, and Jounce Bumper Replacement
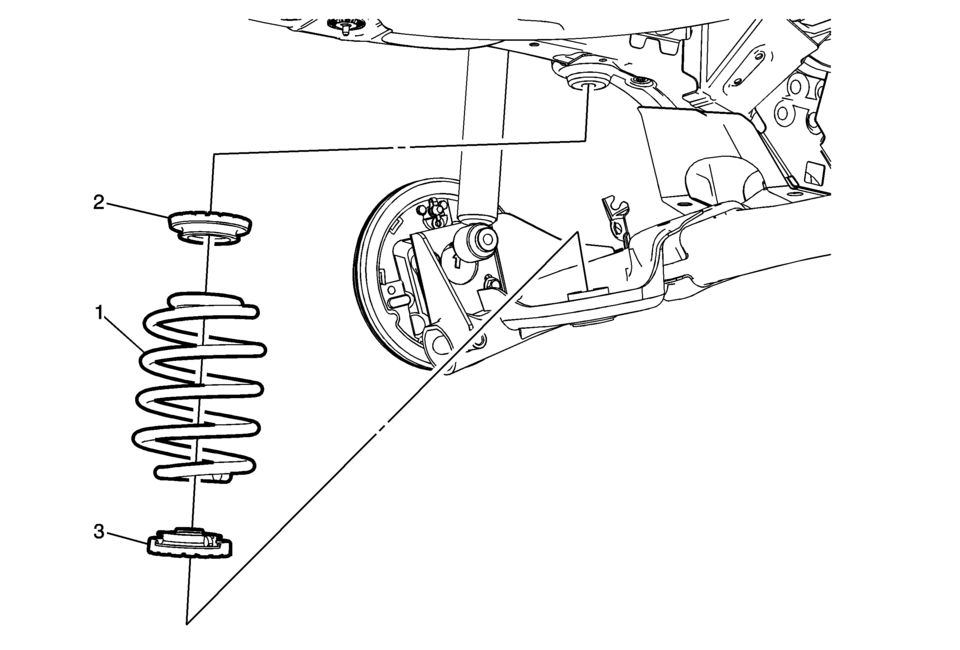
|
Callout |
Component Name |
|---|---|
|
Preliminary Procedure
Raise and support the vehicle. Refer to Lifting and Jacking the Vehicle. |
|
|
1 |
Rear Spring Procedure
|
|
2 |
Upper Rear Spring Insulator Tip: Ensure that the rear spring insulator is properly seated in the rear frame rail. |
|
3 |
Lower Rear Spring Insulator Tip: Ensure that the rear spring insulator is properly seated in the rear axle. |
 Ball Joint Inspection
Caution: Refer to Vehicle Lifting and Jacking Caution.
Raise the front of the vehicle to allow the front suspension to hang free.
Grasp the tire at the top and the bottom.
Move the ...
 Rear Compartment Lid Hinge Torque Rod Replacement
Rear Compartment Lid Hinge Torque Rod Replacement
Callout
Component Name
Warning: Refer to Hood Hold-Open Device Warning.
...
Other materials:
Parking
If the vehicle has a manual transmission, before getting out of the vehicle,
move the shift lever into R (Reverse) if parking on a downhill slope. On a level
surface or an uphill slope, use 1 (First) gear. Firmly apply the parking brake.
Turn the wheels toward the curb for a downhill slope, or ...
Radiator Upper Bracket Replacement
Radiator Upper Bracket Replacement
Callout
Component Name
Preliminary Procedure
Remove the front bumper fascia assembly. Refer to Front Bumper Fascia
Replacement.
1
Radiator Upper Bracket Fasten ...
Intake Air Pressure and Temperature Sensor Replacement
Intake Air Pressure and Temperature Sensor Replacement
Callout
Component Name
Preliminary Procedure
Remove the left front wheelhouse liner. Refer to Front Wheelhouse Liner
Replacement.
1
Intake ...

0.0049