Chevrolet Sonic Repair Manual: Fog Lamp Aiming
- Preparation Procedure
-
Note:
Horizontal aim is not adjustable on this vehicle. Vertical aim is done by an adjusting nut located on the rear of the fog lamp. Prior to aiming the fog lamps, perform the following steps:
- Completely assemble all of the components on the vehicle.
- Place the vehicle on a level surface.
- Stop all unnecessary operations or work that could affect the ride height of the vehicle.
- Close the doors and verify that the luggage compartment is empty.
- Stabilize the suspension by rocking the vehicle sideways.
- Ensure that the fuel level is full.
- Ensure that the tires are inflated to the proper pressure.
- Ensure that the driver or a similar weight , approximately 75?‚ā¨‚Äįkg (165?‚ā¨‚Äįlb), is in the vehicle driver seat.
- Aiming Procedure
-
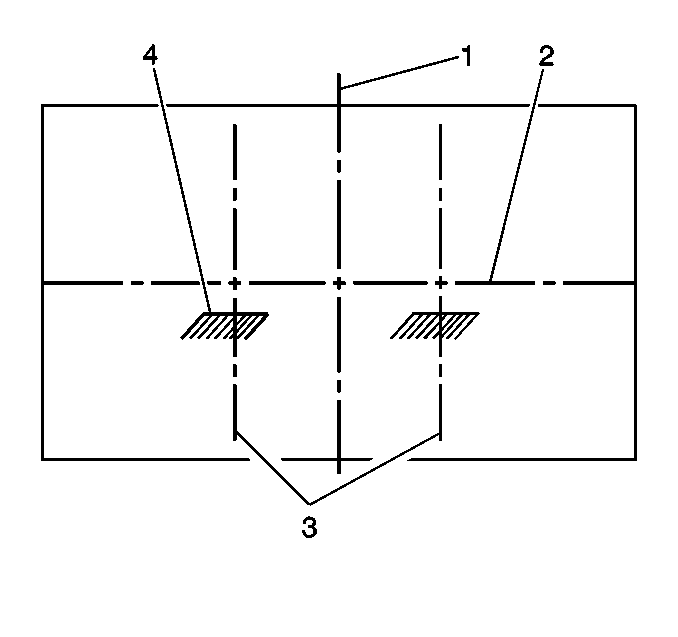
- Park the vehicle 7.6?‚ā¨‚Äįm (25?‚ā¨‚Äįft) away from the target screen.
- Measure from the center of the fog lamp to the ground line. Using this measurement, mark the horizontal centerline?‚ā¨‚Äį(2) of the fog lamp on the target screen directly in front of the vehicle.
- Turn ON the fog lamps. The top of the fog lamp beam image?‚ā¨‚Äį(4) on the target screen should be 102?‚ā¨‚Äįmm (4?‚ā¨‚Äįin) below the center of the fog lamp lens height.
- Adjust the fog lamp as required using the adjusting screw above the projector lens on the outside of the front bumper fascia.
- Turn OFF the fog lamps.
 Backup Lamp Switch Replacement
Removal Procedure
Disconnect the electrical connector from the backup lamp switch?‚ā¨‚Äį(1).
Remove the backup lamp switch?‚ā¨‚Äį(1) from the transmission.
Remove and D ...
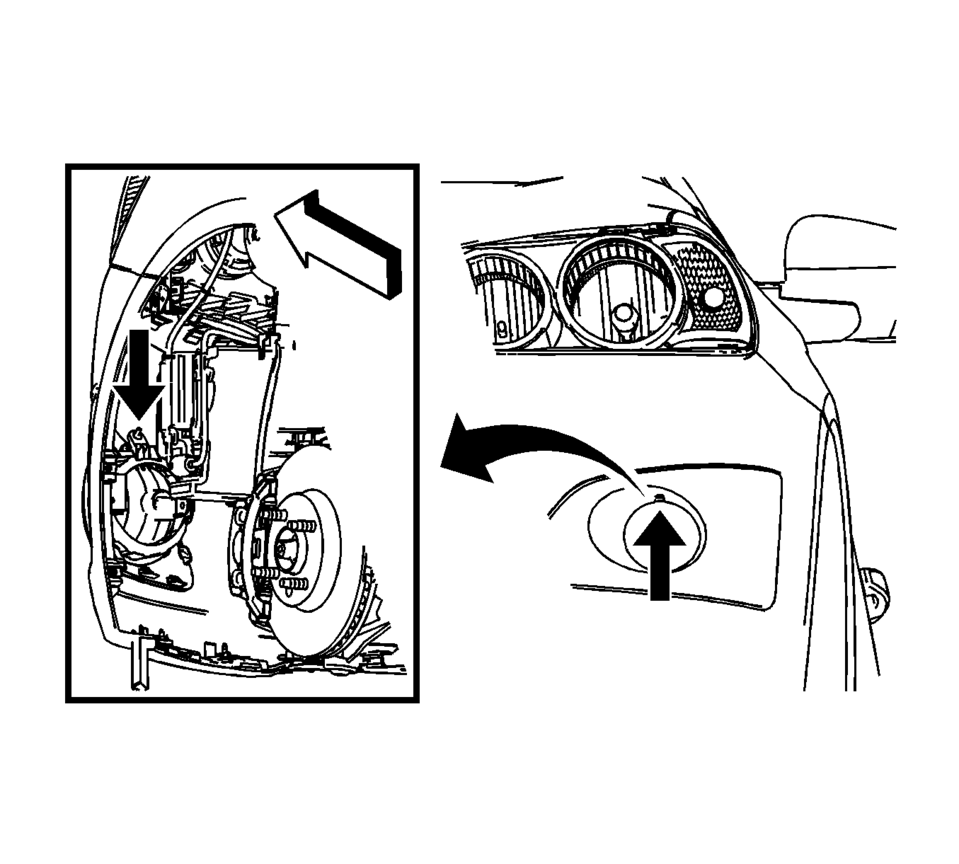
 Front Fog Lamp Bulb Replacement
Front Fog Lamp Bulb Replacement
Callout
Component Name
Preliminary Procedure
Remove either the left front or right front wheelhouse ...
Other materials:
Driver Information Center (DIC)
The DIC display is in the instrument cluster. It shows the status of many vehicle
systems. The controls for the DIC are on the turn signal lever.
1. SET/CLR: Press to set or clear the menu item displayed.
2. : Turn the band to scroll through
the menu items.
3. MENU: Press to display the DI ...
Evaporative Emission Control System Description
Typical Evaporative Emission (EVAP) System Hose Routing Diagram
(1)
Evaporative Emissions (EVAP) Purge Solenoid Valve
(2)
EVAP Canister
(3)
EVAP Vapor Tube
(4)
Vapor Recirculation Tube
(5) ...
Overview
The Nissan Armada ProPILOT Assist system is an advanced driver assistance technology
designed specifically for controlled-access highways. It is not intended for urban
streets or rural roads. This system supports the driver by helping maintain lane
centering and keeping a preset following dist ...

0.0075