Nissan Armada 2025-2026 Owner's Manual: RearView Monitor system operation
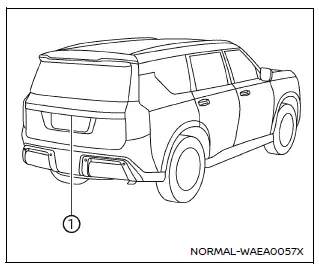
The Nissan Armada RearView Monitor system utilizes a rear-mounted camera 1, positioned just above the license plate, to provide a clear and wide-angle view behind the vehicle.
To activate the Nissan Armada RearView Monitor, turn the ignition switch to the ON position and shift the transmission into R (Reverse). The system will automatically display the rear view on the screen.
This intelligent Nissan Armada feature enhances driver awareness and assists with safer reversing and parking maneuvers.
How to read the displayed lines
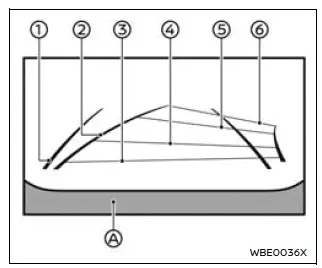
The Nissan Armada RearView Monitor displays guiding lines that help estimate vehicle width and distance relative to the rear bumper line A.
Vehicle width guide lines 1:
These lines represent the approximate width of the Nissan Armada and assist in aligning the vehicle when reversing.
Predictive course lines 2:
The Nissan Armada predictive course lines dynamically adjust based on steering wheel movement, showing the projected path of the vehicle while backing up.
These lines appear automatically when the transmission is in R (Reverse) and provide valuable visual guidance during parking.
Note: The Nissan Armada predictive lines and width indicators may appear wider than the actual vehicle dimensions.
Distance guide lines:
The Nissan Armada monitor includes color-coded lines indicating approximate distances from the rear of the vehicle:
- Red line: approximately 1.5 ft (0.5 m)
- Blue line: approximately 3 ft (1 m)
- Blue line: approximately 7 ft (2 m)
- Blue line: approximately 10 ft (3 m)
 Basic information
Touch screen display
WARNING
Failure to follow proper Nissan Armada RearView Monitor usage instructions
may result in serious injury or fatal accidents.
The Nissan Armada RearView M ...
 Difference between predictive and actual distances
Basic information
The Nissan Armada RearView Monitor provides reference guidelines only. The actual
distance to objects may differ depending on terrain and object positioning.
On uneven surfaces s ...
Other materials:
Front Side Door Lock Cylinder Replacement
Front Side Door Lock Cylinder Replacement
Callout
Component Name
1
Front Side Door Lock Cylinder Screw Access Plug
Tip: Use the appropriate tool, remove the plug.
2
Front Side Doo ...
Mode Control Cable Replacement (LHD)
Mode Control Cable Replacement
Callout
Component Name
Preliminary Procedures
Remove the heater and air conditioning control.Refer to Heater and
Air Conditioning Control Replacement
Remove the instrument panel lower trim p ...
Clutch Master Cylinder Replacement
Removal Procedure
Remove the battery tray. Refer to
Battery Tray Replacement.
Remove as much brake fluid out of brake fluid reservoir
as possible.
Remove the clutch master cylinder reservoir hose (1)
from the clutch master cylinder.
Unclip th ...

0.0051