Chevrolet Sonic Repair Manual: Strut, Strut Component, or Spring Replacement
- Disassembly Procedure
-
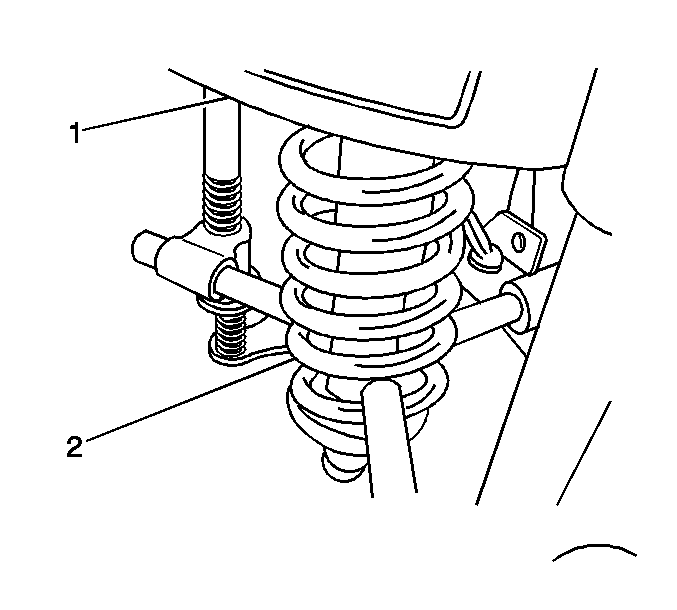
- Remove the strut assembly from the vehicle. Refer to Strut Assembly Removal and Installation.
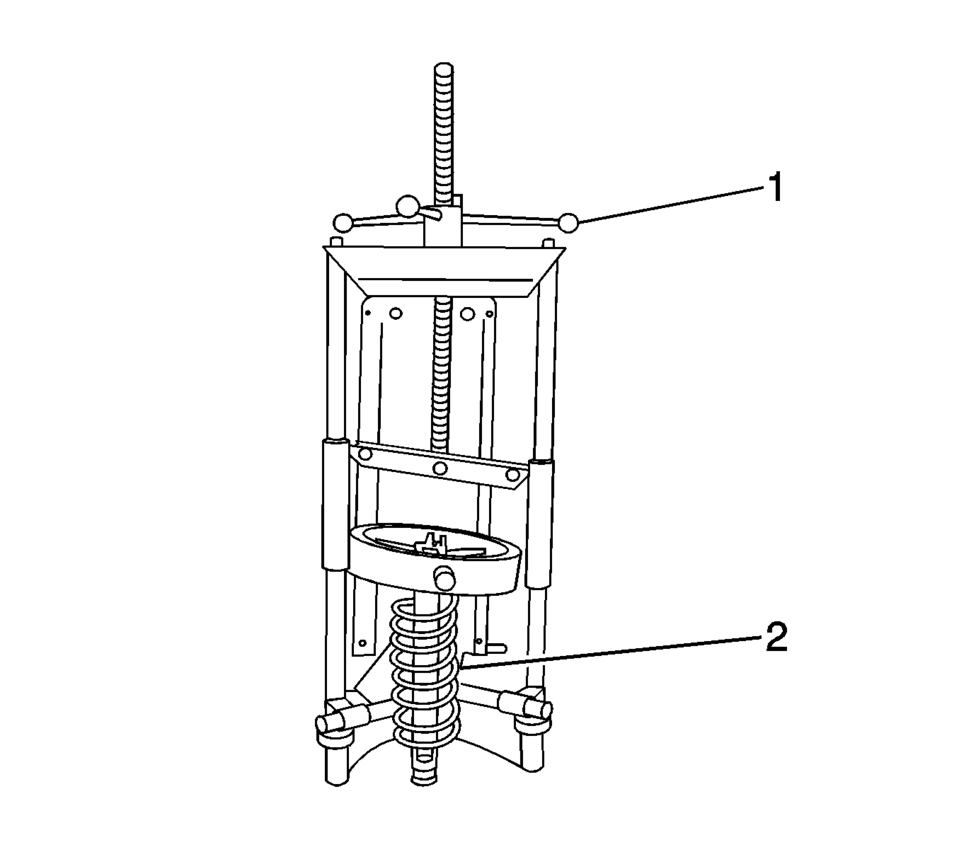
- Install the strut assembly (2) in a suitable spring compressor (1) and compress the front spring.
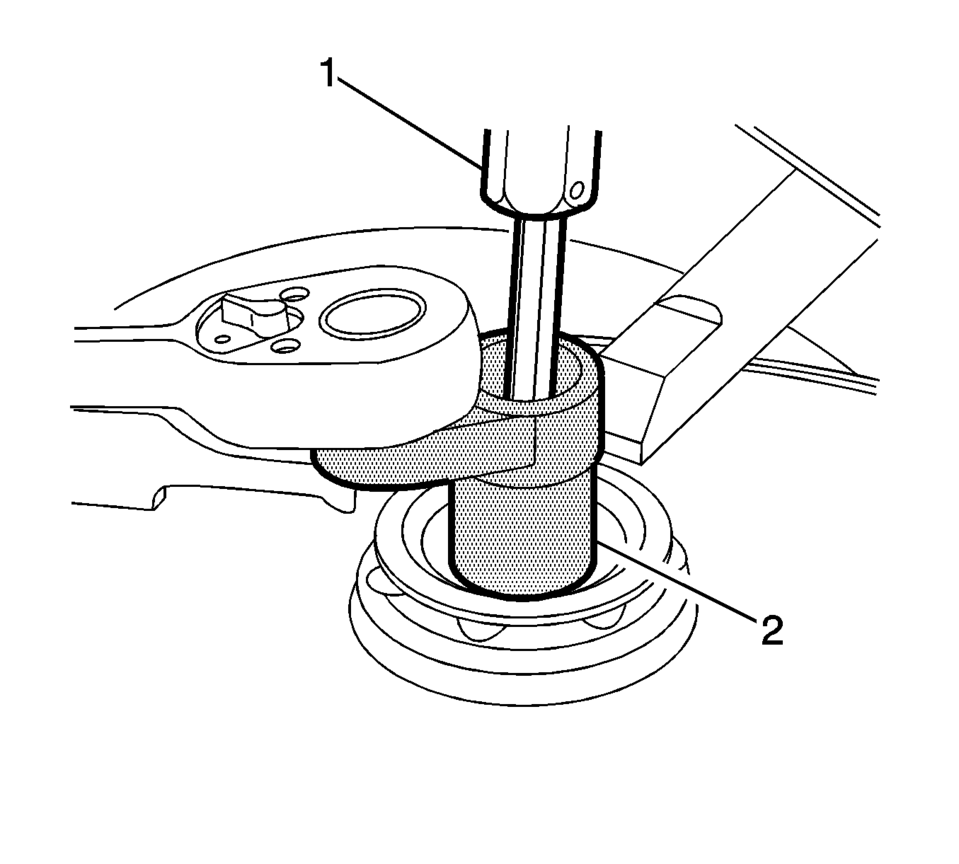
- Use a suitable bit (1) and socket (2) to loosen the front suspension strut mount nut.
- Slowly loosen the spring compressor (2) to remove the front suspension strut components to be serviced.
- Remove the front suspension strut mount assembly (1), front spring insulator (2), front spring (3), front suspension strut bumper (4) and the front strut (5) from the spring compressor.
Note:
The spring is compressed when the strut moves freely.
(((((((l(((((((((((i

- Assembly Procedure
-
- Install the front suspension strut (5), front suspension strut bumper (4), front spring (3), front spring insulator (2) and the front suspension strut mount assembly (1) in the spring compressor.
- Use the spring compressor (1) to compress the front spring (2).
- Install the front suspension strut mount nut and tighten as much as possible by hand.
- Use a suitable bit (1) and socket (2) to tighten the front suspension
strut mount nut to 65 Y (48 lb ft)
.
- Remove the strut assembly from the spring compressor.
- Install the strut assembly. Refer to Strut Assembly Removal and Installation.
(((((((l(((((((((((i
Caution:
Refer to Fastener Caution.
 Strut Assembly Removal and Installation
Special Tools
CH 49375 Strut Rod Nut Socket
For equivalent regional tools, refer to Special Tools
Removal Procedure
Remove the air inlet grille panel. Refer to Air Inlet Grill ...
 Shock Absorber Disposal
Warning: Use the proper eye protection when drilling to prevent metal
chips from causing physical injury.
Clamp the strut in a vise horizontally with the rod (1) completely ex ...
Other materials:
Engine Compartment Overview
1.4L L4 Engine
1. Engine Air Cleaner/Filter.
2. Engine Oil Dipstick. See Engine Oil.
3. Engine Cooling Fan (Out of View). See Cooling System.
4. Engine Oil Fill Cap. See Engine Oil.
5. Engine Coolant Surge Tank and Pressure Cap. See Cooling System.
6. Brake/Clutch Fluid Reservoir. See Brakes ...
Automatic Transmission Fluid
How to Check Automatic Transmission Fluid
It is not necessary to check the transmission fluid level. A transmission fluid
leak is the only reason for fluid loss. If a leak occurs, take the vehicle to your
dealer and have it repaired as soon as possible.
There is a special procedure for checkin ...
Brake Caliper Inspection
Warning: Refer to Brake Dust Warning.
Inspect the brake caliper housing (1) for cracks, excess wear, and/or damage.
If any of these conditions are present, the brake caliper requires replacement.
Inspect the caliper piston dust boot seal (2) for cracks, tears, ...

0.0048