
Chevrolet Sonic Repair Manual: Front Wheel Drive Shaft Inner Joint and Boot Replacement
Special Tools
DT-35910 Drive Axle Boot Clamp Pliers
For equivalent regional tools, refer to Special Tools.
- Disassemble Procedure
-
Note:
There are types of inner joints available. If the inner joint is connected with the CV style joint, the inner joint is not serviced separately. The inner joint is serviced with the wheel drive shaft as an assembly. If the inner is a tripot type joint follow the procedure below.
- Remove the wheel drive shaft from the vehicle. Refer to Front Wheel Drive Shaft Replacement.
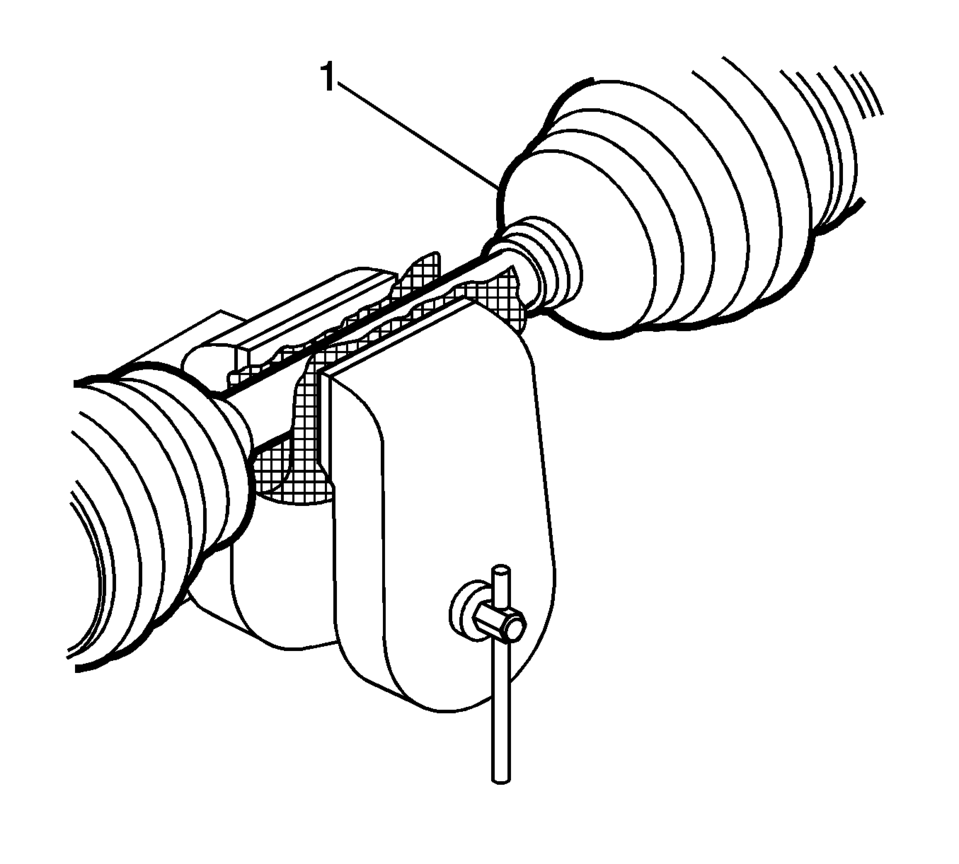
- Install the wheel drive shaft in a soft jawed vise.
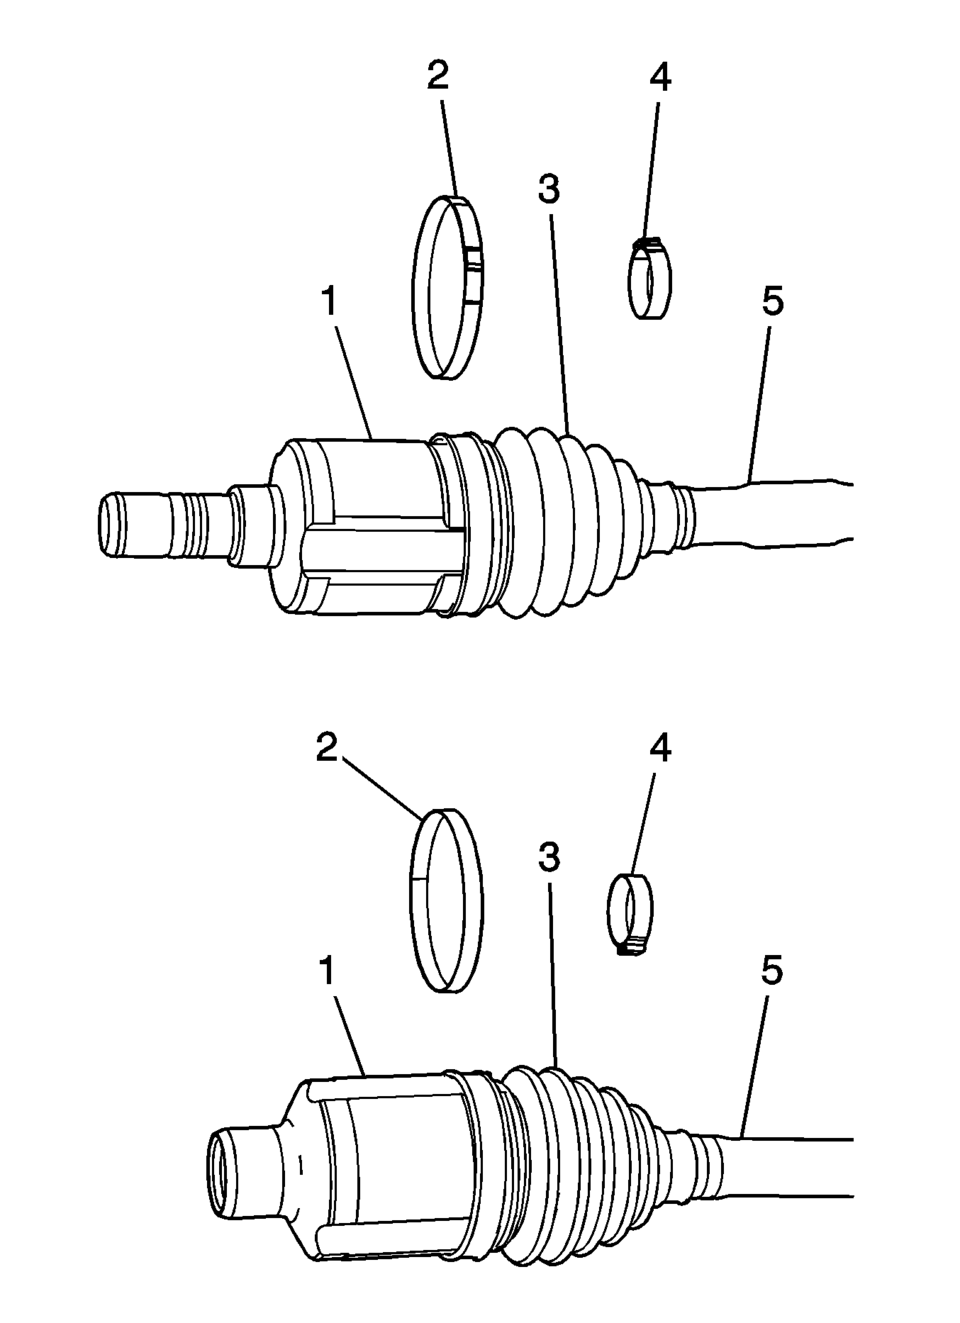
- Using a pair of side cutters, remove and discard the small boot clamp (4) from the boot (3).
- Using the appropriate tool, remove and discard the large boot clamp (2) from the boot (3).
- Remove the boot (3) from the from the tripot housing (1).
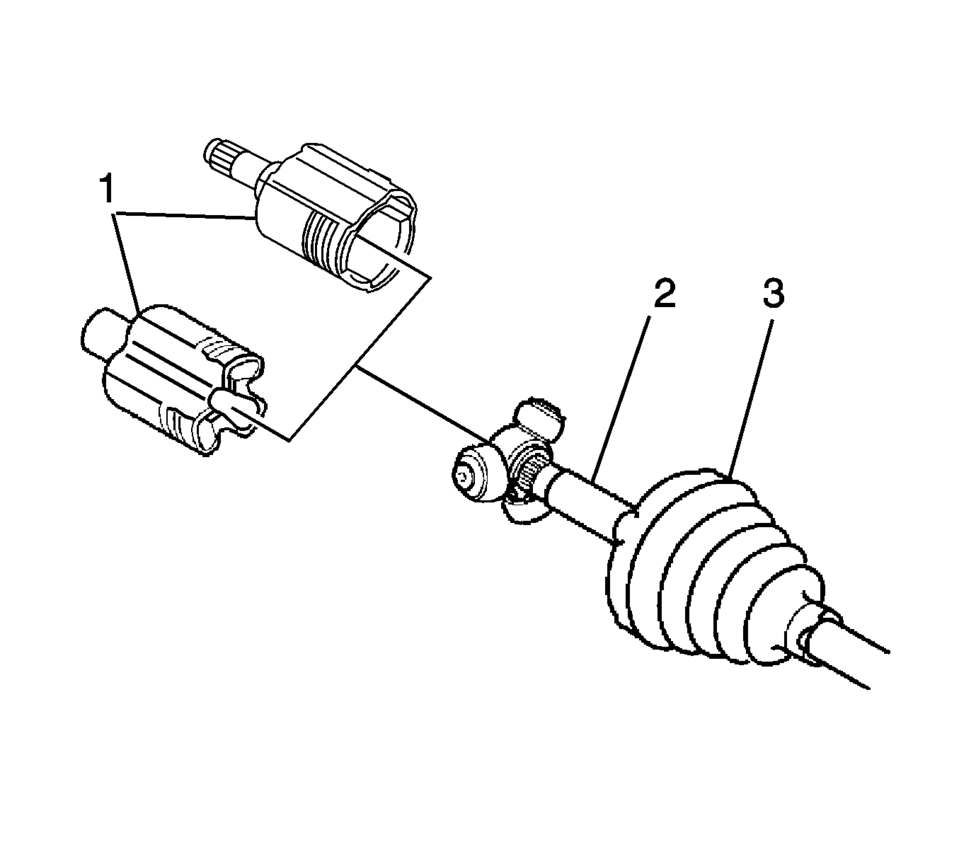
- Remove the inner tripot housing (1) from the wheel drive shaft (3).
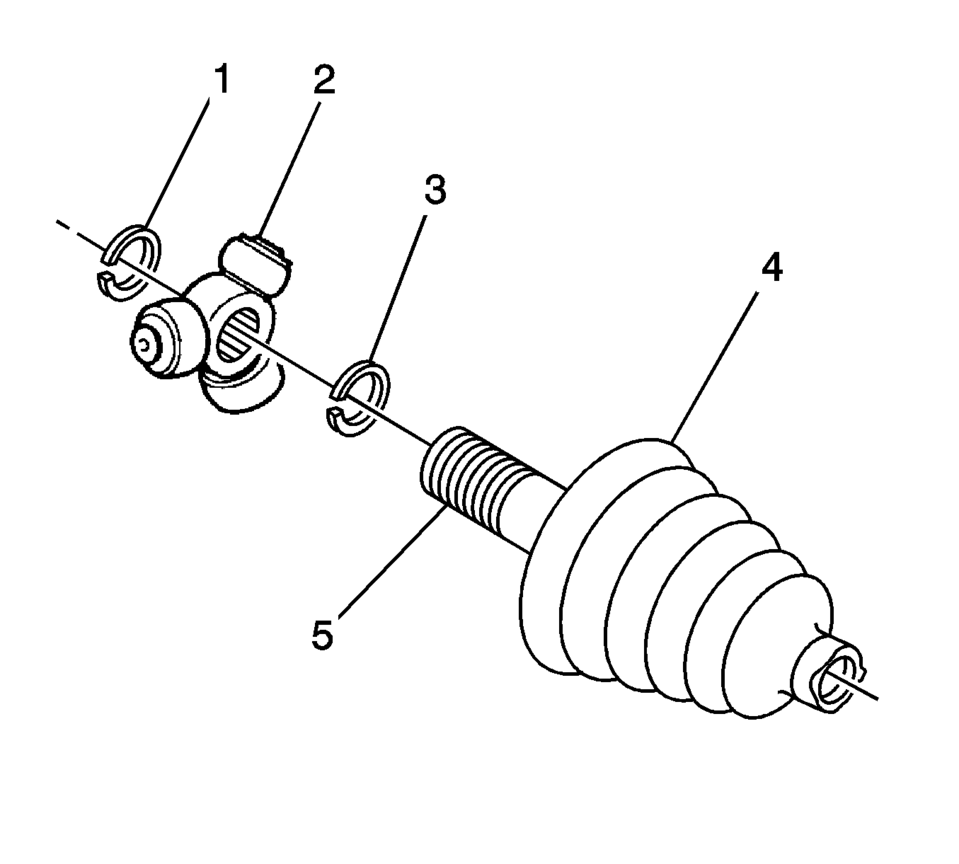
- Using the appropriate tool, remove the outer tripot spider retaining ring (1) from the wheel drive shaft (5).
- Remove the tripot spider (2) from the wheel drive shaft (5).
- Using the appropriate tool, remove the inner tripot retaining ring (3), if equipped, from the wheel drive shaft (5).
- Remove the wheel drive shaft boot (4) from the wheel drive shaft (5).
- Inspect the wheel drive shaft inner joint. Refer to Wheel Drive Shaft Inner Joint Inspection.
- Assemble Procedure
-
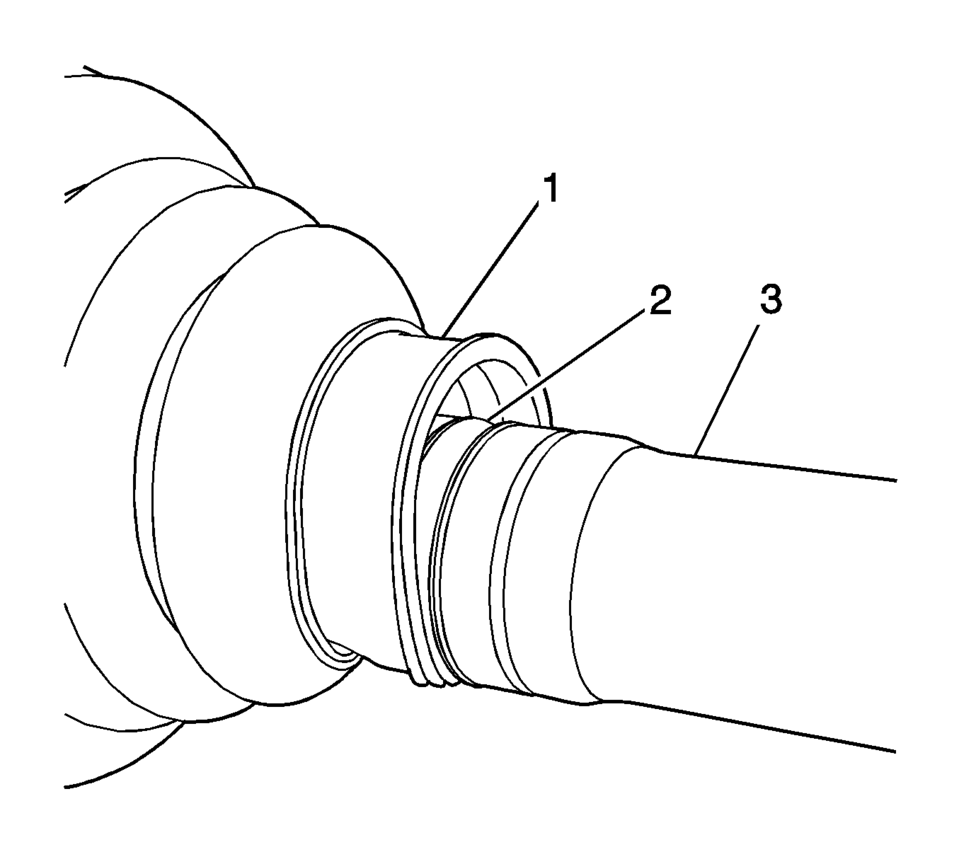
- Install the boot (1) on the wheel drive shaft (3).
- Ensure that the boot (1) is properly seated in the groove (2) in the wheel drive shaft.
- Using the appropriate tool, install the inner tripot retaining ring (3), if equipped.
- Install the tripot spider (2) until just touches the shoulder on the wheel drive shaft (5).
- Using the appropriate tool, install the outer tripot spider retaining ring (1).
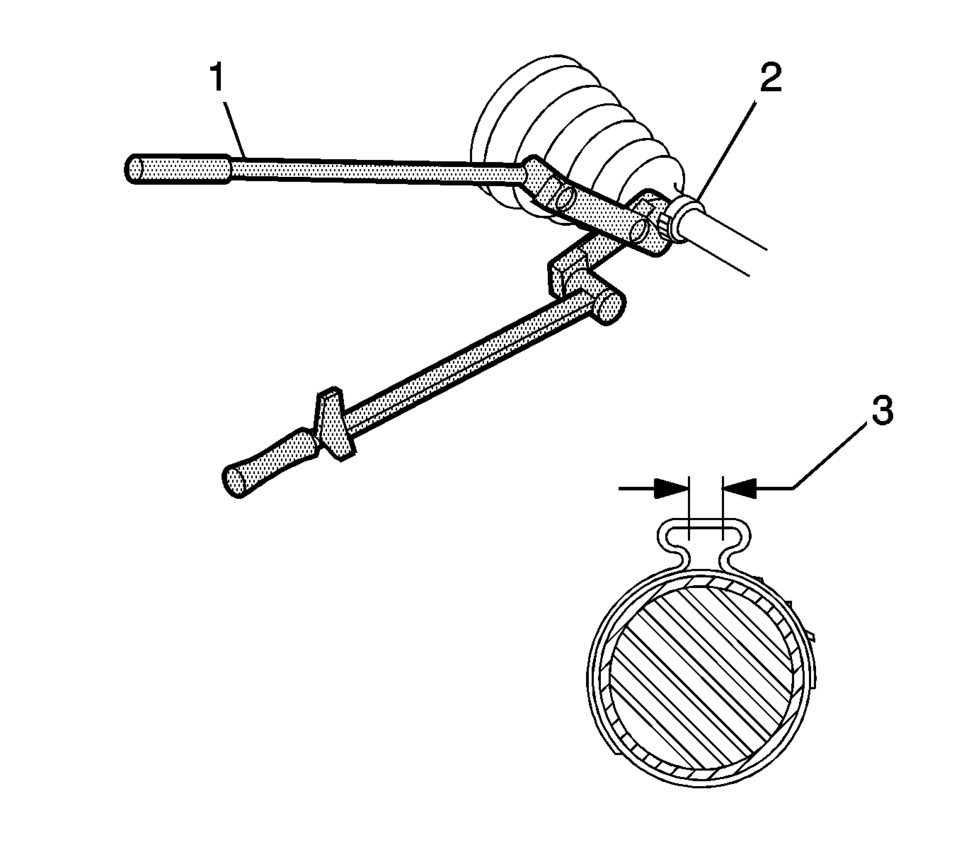
- Using the DT-35910 drive axle boot clamp pliers with a ratchet
wrench and a breaker bar (1), close the boot clamp (2) until the gap (3) measures
1.8 mm (0.07 in)
.
- Install the tripot housing (1) on the wheel drive shaft (3).
- Install the wheel drive shaft boot (3) on the tripot housing (1).
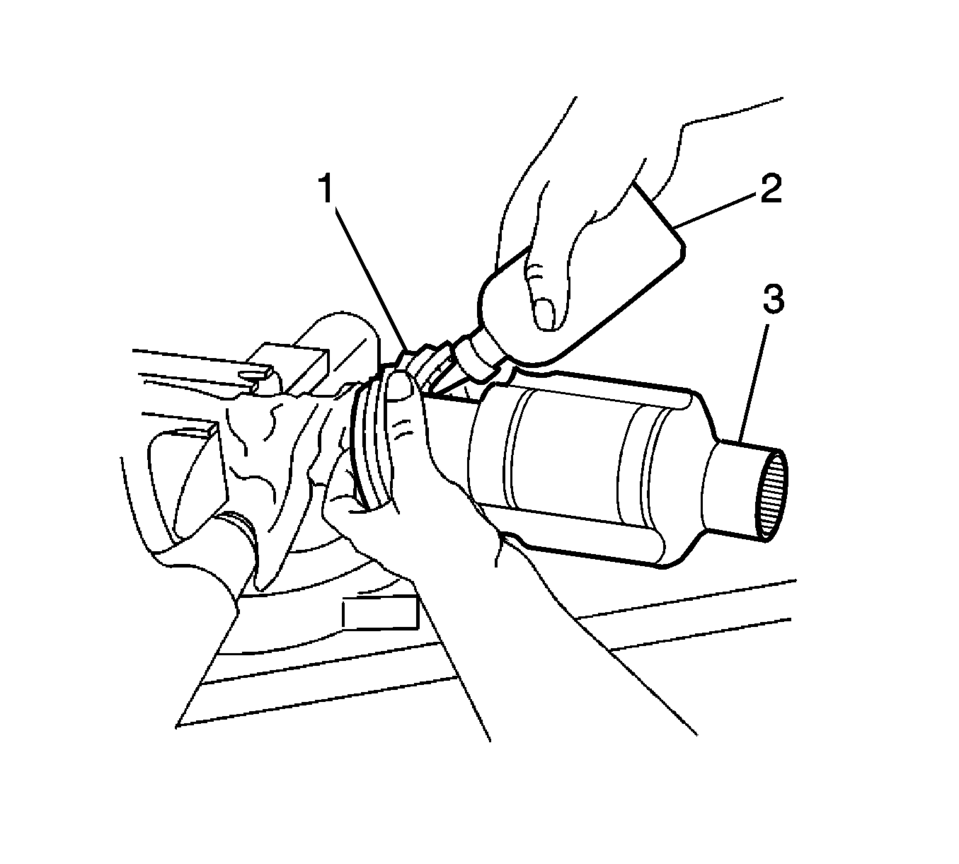
- Place approximately half of the lubricant (2) in the boot (1) and the remaining half in the tripot housing (3).
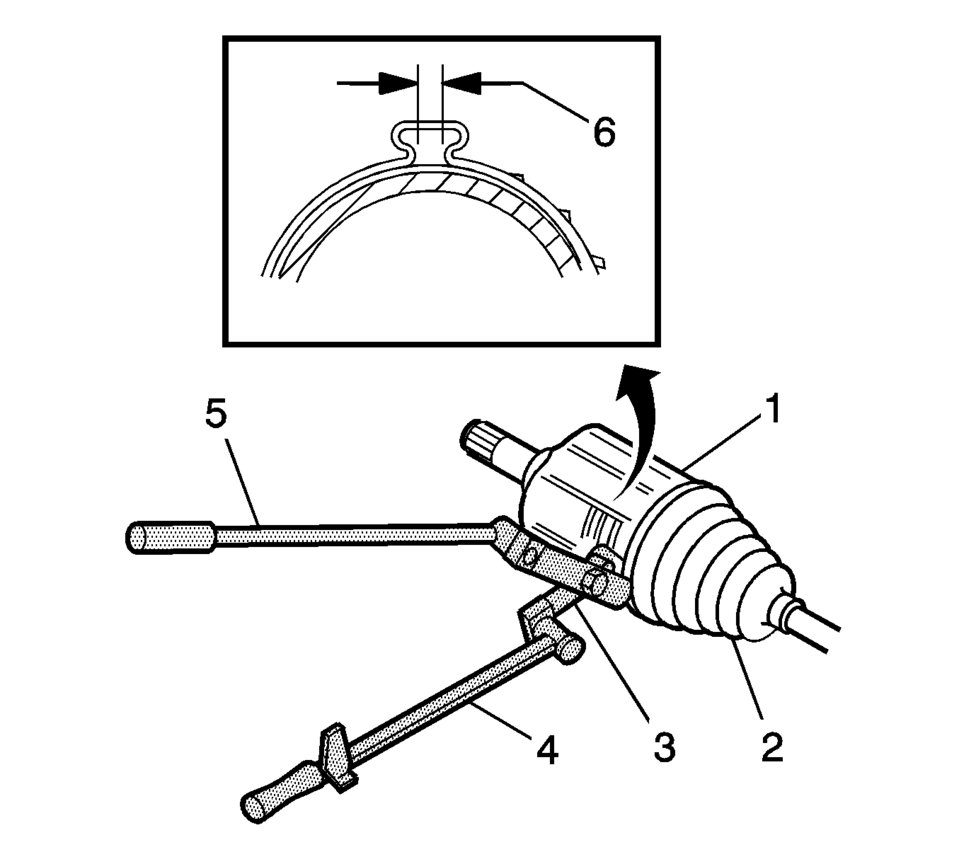
- Using the DT-35910 drive axle boot clamp pliers (3), a ratchet
wrench (4) and a breaker bar (5), close the boot clamp (1) until the gap (6) measures
1.9 mm (0.07 in)
.
- Remove any of the excess lubricant from the tripot housing and wheel drive shaft.
- Move the tripot joint housing in a circular motion to distribute the lubricant in the tripot housing.
- Remove the wheel drive shaft from the vise.
- Install the wheel drive shaft in the vehicle. Refer to Front Wheel Drive Shaft Replacement.
Note:
Ensure that the boot clamp is properly positioned around the entire circumference of the boot.
 Front Wheel Drive Intermediate Shaft Replacement
Front Wheel Drive Intermediate Shaft Replacement
Callout
Component Name
Preliminary Procedure
Raise and support the vehicle. Refer ...
 Front Wheel Drive Shaft Outer Joint and Boot Replacement
Special Tools
DT-35910 Drive Axle Boot Clamp Pliers
For equivalent regional tools, refer to Special Tools
Disassemble Procedure
Remove the wheel drive shaft from the vehicle. Refer ...
Other materials:
Immobilizer System Component Programming
This procedure will learn the immobilizer function. If the battery voltage is
low, charge the battery before proceeding with the learn. If the body control module
(BCM) or engine control module (ECM) have been replaced, they must be programmed
before performing this learn procedure.
Dependin ...
Fuel Tank Fuel Pump Module Replacement
Special Tools
EN-48279 Fuel Sender Lock Ring Tool
For equivalent regional tools, refer Special Tools.
Removal Procedure
Relieve the fuel system pressure. Refer to Fuel Pressure Relief
Remove the fuel tank. Refer to Fuel Tank Replacement.
Disconnect the electrical c ...
Transmission Case Assemble (Gen 1)
Special Tools
3-9506289 Universal Adapter
J-840733 Driver
R-0007758 Holding Fixture
R-0007761 Universal Handle
R-0007770 Holding Fixture Adapter Plates
T-9804669 Seal Installer
T-0307000 Extractor and Driver Fixture
For equivalent regional tools, refer to Special Tools.
...

0.0095